GNU Health/Printable version
| This is the print version of GNU Health You won't see this message or any elements not part of the book's content when you print or preview this page. |
The current, editable version of this book is available in Wikibooks, the open-content textbooks collection, at
https://en.wikibooks.org/wiki/GNU_Health
Preface
The corresponding official chapter: //docs.gnuhealth.org/his/preface.html |
Preface
[edit | edit source]Regardless of the remarkable achievements in technology, thousands of children will die today from preventable diseases. Infectious diseases such as malaria, chagas, AIDS, tuberculosis or infectious diarrhea destroy millions of families in developing countries. Noncommunicable diseases including obesity, diabetes, heart disease, cancer or major depressive syndrome hit both the North and the South Hemispheres, although with much higher prevalence and incidence among the underprivileged sectors. Equally important are the alarming levels of child labor, human trafficking and sex slavery, family violence, child abuse or drug addiction. Complex, multi-etiological and anthropological issues also exist that desperately need to be addressed.
We need a change of paradigm: We need to move away from the reactive Model of Disease, to the proactive Model of Health. Many countries lack good public health, sometimes because they put the focus on the private sector; sometimes because they give too much emphasis to technology. The most sophisticated technology will never beat good Primary Health Care policies. Education, good nutrition, family affection, physical exercise, and sanitary housing conditions are the best and most sustainable public policies one can make. The concept of Integrative Medicine is always present in GNU Health.

I started the GNU Health project in 2008 to improve Primary Health Care (PHC) in rural communities. Today GNU Health has grown to a full Health and Hospital Information System, but the spirit remains the same. GNU Health complements PHC, but never will replace the work of the mother, teacher, nurse, doctor or social worker. What GNU Health does well is handling and processing large amounts of data. GNU Health manages demographics; patient evaluations, hospitalizations, clinical history; genetic and hereditary risks; epidemiology and health center resources (stock, finances, human resources, pharmacies, laboratory .. ), to name a few resources. Computing power and data processing improve team work and optimize health promotion and disease prevention campaigns. For example, GNU Health allows quick identification of new TBC or Dengue outbreaks by showing the index cases in a map, in real-time. It can show the trends in infestation level of vectors that transmit Chagas disease in Domiciliary Units; It can cross indicators in different communities, and relate Social determinants of Health in many conditions (family violence, teenage pregnancy, child mortality, ... ).
In 2018 we have made 10 years since our initial release. We are now a mature ecosystem, with a mature community. GNU Health now incorporates state-of-the-art technology in bioinformatics, genetics and proteomics. GNU Health brings Precision Medicine, always in the context of the person and patient, providing a holistic picture of the person that we have in front, from the biological and molecular basis of health and disease, to the socioeconomic determinants of health. The GNU Health Federation introduced in 3.4 series allows to build nationwide federated networks with thousands of heterogeneous nodes. The GNU Health federation is revolutionary, and will allow the community, the health practitioners, the research institutions and the ministries of health to have much better perspective and precise information on the individuals and their context.
The GNU Health Book of Life, and the pages of life introduce a new, trans-disciplinary way of doing medicine. Our health is much more than just cold medical records. Most of the time, our health is the result of many events related to the environment, decisions we make, and interactions with many actors, that shape our life as individuals. The GNU Health pages of life put the person on the driver seat, making them an active actor of the system of health. It also provides the health professional a great way to enter and study the health determinant factors, especially in the context of the GNU Health Federation.
GNU Health is a philosophy. It's putting Free Software as a public good, and as an integral part of Public Health. It's about equity, community work and solidarity. It's about empowering the health professionals, their health centers and their communities. It's about putting in action many aspects from the Alma-Ata Declaration.
GNU Health is about embracing System of Health paradigm, instead of the conventional system of disease that many countries are immersed today.
I hope you enjoy this book, and I count on you to join our growing community of academic institutions, NGOs, public hospitals, private companies and Multilateral organizations. Free Software in Health Care is here to stay.
eHealth for all !
Luis Falcón, MD
GNU Solidario
Las Palmas de Gran Canaria, Spain
Introduction
About this Book
[edit | edit source]This book provides an introduction to GNU Health, The Free Health and Hospital Information System. Unlike traditional books, this Wikibook will be updated with the latest stable GNU Health version. Health is dynamic by nature, so is GNU Health.
Versioning: The book will include functionality from the upcoming version, several weeks before the stable release. This means that some texts and pictures in the book belong to the new version.
The book is organized in the following sections:
- Introduction to GNU Health
- Functional guide: Philosophy behind the project and the core functionality. Provides the information on how to approach a GNU Health implementation.
- Modules in Detail: Information and instructions for specific modules. Each modules encompasses functionality for a speciality (pediatrics, surgery, gynecology, socioeconomics ... )
- Technical: Installation manual, administrator's guide
If you are starting with GNU Health, you should read the book in a linear, sequential fashion. It's the best way to understand the software, the project and how to implement it.
GNU Health Functionality
[edit | edit source]The main areas of GNU Health are:
- Individual and community management: demographics, domiciliary units, families, operational areas and sectors, ...
- Patient management: Socioeconomics, lifestyle, encounters / evaluations, hospitalizations, lab reports, clinical history, ...
- Health center management: Finances, stock, pharmacy , laboratory, beds, operating rooms, appointments, supply chain management, human resources, ...
- Information management: Reporting, Demographics and Epidemiology
These areas involve multi-disciplinary teams, with different responsibilities. For example, the individual demographics and status of the domiciliary units (DU) can be collected by social workers, the patient management by health professionals, the health center management by administrative personnel and accountants, and the Information produced by the health center can be processed and managed by the Ministry of Health authorities.
This is just an example to show the importance of team work in GNU Health to get the best results in your community.
Deploying GNU Health: Centralized vs Distributed Installations
[edit | edit source]GNU Health is scalable in functionality, database size, and transactional volume. For instance, you can install GNU Health in a single doctor office, or in country public hospitals network. Depending on the type of deployment, you will think about a centralized (single instance) vs a distributed installation.
- Single GNU Health Instance: All the information resides in a single database, and it will be accessed via network from different workstations from the same health center (local area network) or from different health centers.
- Distributed GNU Health instances: Under this scenario, each health center has its own database instance, and information can be synchronized among health centers. This would be the case when you want to deploy GNU Health in a network of hospitals, where the communication infrastructure is suboptimal.
Needless to say, choosing the deployment method requires careful study of resources (hardware, network, human resources, security and access control, backup and disaster recovery policies, ... ) that goes beyond the scope of this book. The two types of installations have pros and cons.

Unique Patient ID: In hand-written histories and in some electronic medical records, it is not uncommon to find duplicate patients or duplicate medical records. This scenario is not only costly, but it may represent a risk to the patient.
The other problem people face in many countries is data isolation. That is, health centers don't communicate with each other, resulting in a different medical history on each center. In other words, in many health care systems today, you are a different person and patient at each health center you visit.
GNU Health uses a unique person and patient identifier, that does not allow the duplication of either individuals or patient medical history at the health center. It allows exporting the information to the patient card, and it provides the framework to synchronize data between health centers. For quick patient identification in different health care networks, the patient ID can be read, for example, with a QR reader, speeding up the registration process and avoiding common human errors.
If you plan to use a distributed environment in your health network, you can find more information about it in the GNU Health Synchronization Guide.
Resources
The corresponding official chapter: docs.gnuhealth.org/his/support.html |
More GNU Health Resources
[edit | edit source]Besides the GNU Health documentation on Wikibooks (which you are reading right now), there are several other resources for the GNU Health community.
Website
[edit | edit source]The official GNU Health Website can be found at https://www.gnuhealth.org
Mastodon
[edit | edit source]For regular news updates we suggest that you follow GNU Health on Mastodon at : https://mastodon.social/@gnuhealth
Matrix
[edit | edit source]GNU Health now has it own space at Matrix. The #gnuhealth-space contains the rooms from the GNU Health ecosystem. Is the easiest way to access.
#gnuhealth-space:matrix.org: GNU Health space at Matrix.
The following GNU Health rooms are part of the gnuhealth-space.
#gnuhealth-his:matrix.org: GNU Health general discussion room
#mygnuhealth:matrix.org: Discussion room for MyGNUHealth Personal Health Record
#thalamus:matrix.org: Discussion room for Thalamus, the GH Federation message and authentication server
The link to the GNU Health space is : https://matrix.to/#/#gnuhealth-space:matrix.org
Mailing Lists
[edit | edit source]There are several mailing lists for information exchange via email:
- health: General questions and discussions about GNU Health
- health-announce: GNU Health releases and events (read-only list)
- health-dev: Development, requests and bugs
- health-security: Security advisories around GNU Health and its components (read-only list)
- health-i18n: GNU Health localization and translation
- health-es: General questions and discussions about GNU Health in Spanish
- health-fr: General questions and discussions about GNU Health in French
- health-pt: General questions and discussions about GNU Health in Portuguese
To subscribe to these mailing lists, please visit https://savannah.gnu.org/mail/?group=health
Telegram
[edit | edit source]The official GNU Health channel in Telegram is https://t.me/gnuhealth
(Now replaced by Mastodon: https://mastodon.social/@gnuhealth) Historical: https://twitter.com/gnuhealth
IRC Channels
[edit | edit source]You can find live help at IRC in the following channels:
- #gnu-health: English
The official IRC GNU Health channels are now at Libera
For more information, please check https://libera.chat/
Development Environment
[edit | edit source]On August 26th, 2011, the Free Software Foundation adopted GNU Health as an official GNU project. Since then, the development environment is hosted at GNU Savannah. Besides the mailing lists, here you can post bugs, tasks and check out the latest development version.
http://savannah.gnu.org/projects/health
Community Demo Server
[edit | edit source]This server is in Europe and serves as a demo server to practice and see a running system. You can find more information in the Online Demo Database section of this book.
First Steps
The corresponding official chapter: docs.gnuhealth.org/his/userguide/basics/firststeps.html |
Introduction
[edit | edit source]Before we start the implementation process, it is important to get familiar with the terminology commonly used in the rest of this book. At the beginning some words might be a bit puzzling, but with a bit of practice, you will find this terminology quite logical.
Even if you are not a technical person, it might be helpful to understand that GNU Health is an ecosystem of heterogeneous platforms. Since release 3.4, GNU Health has the following main components and nodes:
- Hospital Management Information System (HMIS) node
- Laboratory Information System (LIMS) node
- Person Master Index
- Message server (Thalamus)
- Health Information System
With the introduction of the GNU Health Federation, different platforms can be integrated in real-time to the network of nodes, being able to share data.
HMIS and LIMS nodes
[edit | edit source]The following concepts are essential to understand how GNU Health HMIS and LIMS nodes work.

- Party: In GNU Health, a party is an entity. An abstract concept to define someone or something that has legal status. It's the unit of the relationship in Tryton. Some examples of Parties are:
- Patients
- Companies
- Health professionals
- Health centers
- Model: The model defines each object in GNU Health. Models define the database objects (tables). gnuhealth.patient is a model example.
- Field: The building blocks of the model. For example: age and sex are gnuhealth.patient fields.
- View: Views are the representation of the model on the screen. Most models will have an individual form to accept data into the model and display data out from the model.
- Tree: The list format of the model. The tree view allow us to search select multiple records.

Example of a Tree list - Form: The representation of the model on the screen that allows you to input data.
Form view of the same record
- Tree: The list format of the model. The tree view allow us to search select multiple records.


- Table: The model representation at the database server. The model gnuhealth.patient is mapped in the table gnuhealth_patient in postgreSQL.
- Record: Each unique entry in a particular database table. For example Ana Betz is a record on the gnuhealth_patient table in PostgreSQL.

- Module: Modules are programs that provide specific functionality. GNU Health provides different modules to meet your health center needs. Example of modules are Socioeconomics, Genetics and Surgery. You should only install the modules that are actually needed for your center.
- Report: Reports allows you to dynamically print documents in Open Document / LibreOffice format (ODF), Portable Document Format (PDF) or even directly to the printer.

- Action: Actions are processes excecuted upon one or more selected records.
- Notebook: A tabbed group of forms designed to make navigation easier.
Navigation Area
[edit | edit source]Now is time to identify the components of the GNU Health Screen. In the following screenshot we have marked the main sections :

- Main Menu : We can navigate among the different functionalities. Configuration, Patients, Financial, ... You can deactivate the main menu (useful in low resolution devices) by pressing Ctrl+T
- Tabs : Tryton allows you to have multiple records open at the same time. The section "Tabs" of the screenshot shows the current form.
- Actions : Under the Tabs section you will find different icons that act upon the current record. You can, for instance, create a new record, generate a report, change the view, select related records associated to this patient (appointments, lab tests... ).
- Record form : This is where you see and input the information. Notice that you can have tabbed forms (notebooks) in the lower half of the form, which allows quick and easy navigation. In this example some of the tabs within the records are main, medication, diseases, surgeries, socioeconomics and gynecological information. The upper side of this form is static, so the health professional has the most relevant information about the patient always visible.
- Status bar : The lower side of the screen shows the status bar. From left to right, these are fields :
- User name : In this case we logged in as Administrator
- Organization Name : GNU Solidario Hospital
- Requests : Tryton has an internal messaging system. You will get notifications in realtime.
- Server Information : The lower right section gives you login and server information. In this example, it shows "admin@localhost:8000/demo". admin is the login name, localhost the name of the GNU Health server, 8000 is the port where connects and demo is the database name.
Form fields and field types
[edit | edit source]Let's now go through the most relevant field types and how to properly use them. We will use the previous screenshot of the patient as the example.
- Text fields : These type of fields allow us to enter a lot of information. You will see them normally like large boxes. In our example, the field under "Patient Allergies and Critical Information" is a text field.
- Character fields : These type of fields are similar to the Text fields, but with a limited size. There are few character fields and none in this example. The diet type in the lifestyle section or the Gene ID on genetics are example for character fields.
- Date Fields : These fields will open a calendar when clicked, so you can choose the date. Alternatively, you can enter the date manually. The date of birth is a Date field.
- DateTime Fields : Similar to the date fields, but with the addition of time. An example of this field is the Date/time of birth of the newborn, in the neonatology module.
- Integer fields : These fields allow only integer numbers. They show a "0" by default. An example is Minutes of physical exercise per day
- Float fields : You can enter decimal numbers. The body temperature is one example of a float field.
- Function fields : These are special fields, in the sense that they are calculated in real time, depending, most of the time, on the values of other fields. For example, the Patient Age is a function field. Notice that the field has a grey background, meaning that is read-only. It will calculate the current patient age in years/months/days depending on the patient date of birth. Another example of function field is the Hospitalization Status of the patient.
- Selection fields : These fields will let you choose from a list of options. For example, the patient Sex or the blood type are selection fields. This type of field minimizes typing error.
- Relational fields : These fields retrieve information from a related model. They are of the form One2Many or Many2One. Relational fields are important to keep the uniqueness of data. By using this type of fields, you link the ID of an existing record, without duplicating information, to another record. The patient is a relational (One2Many) field. It relates to the party model, from where it gets all the administrative data (Social security number, address, etc... ).
- Shortcuts : [F2] will open the related record and [F3] will create a new record
- Required fields : These fields are mandatory. You must enter information or else the record won't be saved. You can quickly identify the required fields because they have a blue background. The Patient field is a required field.
Time to Practice
[edit | edit source]Important : Make sure you are in your demo database. This demo database that you created has no important information. You can put anything you want. You can even delete it and recreate it. Just make sure you don't use a production database for your tests. One way to prevent accidentally entering the production database is to have a different password for your demo database, this way if you select the wrong database, you won't be able to login.
If you do not have a demo database yet, please refer to the chapter Different ways to test GNU Health to learn how to create your own testing environment.
It's been a lot of information! Now is time to play around with all this information.
With the information try the following :
- Navigate in the Main menu
- Open the Configuration Submenu
- Create a Physician with the Family Medicine Specialty.
The core module
The corresponding official chapter: //docs.gnuhealth.org/his/userguide/basics/coremodule/ |
The Core Module
[edit | edit source]As we have mentioned already in previous sections of the book, GNU Health is composed of different modules which will provide specific functionality to your health center.
The module health is at the center of GNU Health. This module contains the core models and classes, so the rest of the modules will just inherit them. This gives modularity and scalability, without leaving behind the most important building blocks in public health. Some of the models found in the core module are:
- Individuals
- Families
- Domiciliary Units
- Operational Sectors
- Health Centers
- Diseases
- Patient
- Patient Evaluation / Encounters
- Medicaments
- Treatments
There are many others models in the core module, but this subset will give you an idea of the concept. If you are not a programmer, you don't really have to worry much about how GNU Health deals internally with dependencies and inter-module communication. For example, if you want to install the pediatrics module health_pediatrics, it will automatically mark the core module health for installation, as a dependency.
To learn more about GNU Health modules, please refer to the Modules chapter.
In this documentation, we will cover the functionality of the core module first before exploring the possibilities of the other modules.
People before Patients
[edit | edit source]If we want to be good in a Public Health system, the first thing we need to do is knowing our population. As I say, we need to deal with people before patients . Whenever possible, the health center should have a census, and the list of domiciliary units (DU) and their conditions, at least of those habitants that are part of the operational sector covered by the health center.
From a functional and implementation point of view, we should see the GNU Health core module objects as the first ones to be assessed. The process of collecting this information will get our health center involved with the community. In the next chapters we will be covering how to setup a Domiciliary Unit (DU); an Individual; the habitants of a DU; Families ; Operational Areas and Operational Sectors.
Once you have that information in place, you will be able to give a new attribute to the individual when she or he first come to your office, the patient attribute. As you can see, there are precious information and actions that can be done in Public Health before dealing with a single patient.
Health Institutions
The corresponding official chapter: https://docs.gnuhealth.org/his/userguide/basics/coremodule/healthinstitutions.html |
Introduction to Health Institutions
[edit | edit source]The Health Institution plays a central role in GNU Health. As a matter of fact, is the first thing you will have to create in the installation.
The health institution is a model. It is linked to the party model, but it has many other attributes.
Creating and Updating Health Institutions
[edit | edit source]
The very first health institution that you create is special because it is also your company. Please refer to the "Create a Company" section in the "Installation" chapter for more details.
Health institutions can be accessed in the Health → Institutions section.
Health Institution Facilities
[edit | edit source]
A health institution can have multiple facilities and resources, such as buildings, wards, operating rooms, beds or units.
The best way to access the health institution facilities is by clicking on the Relate button in the Institutions form as shown in the screenshot. One of the benefits of using related records from the institution form is that the related facility will contain the parent center, optimizing data entry and minimizing human error.
Beds
[edit | edit source]Beds are the most basic facilities in a health institution. Creating a bed record for each physical bed available is important for capacity planning and for finding a patient. Each bed belongs to a ward.
Configuring Beds
[edit | edit source]Bed records in GNU Health can be managed in the Health → Configuration → Institutions → Beds section. For each Bed record you need a corresponding Product Variant record (which stands for the individual bed) plus a Product record (which stands for the bed category and defines its price).
Note: If you are not familiar with products in Tryton, there is more information about this concept in the chapter "Products and Services Management". But if you just want to configure some beds at this moment and don't care about the details, then simply read on.
Configuring beds in GNU Health is a three step process:
1. For every category of beds, create a product record and enter the price the patient will be charged. Example:
| Standard Bed | Luxury Bed | ICU Bed | |
|---|---|---|---|
| Price per day | USD 150 | USD 250 | USD 500 |
2. For every bed available in your health institution, create a product variant record and check the Bed checkbox. Every variant will need a code as an identifier, but you are free to use any combination of characters and numbers to match the numbering scheme in your institution. Example:
| Standard Bed | Luxury Bed | ICU Bed | |
|---|---|---|---|
| Variants |
|
|
|
3. For every bed available in your health institution, create a bed record and assign it to the corresponding product variant record. A bed record stores additional information about a bed like its status (free, reserved, occupied, ...) or the ward it belongs to. If you skip this step you will not be able to assign a patient to a bed in the hospitalization process!
Buildings
[edit | edit source]Buildings simply have a name and a code. At the moment you can not enter more information.
Configuring Buildings
[edit | edit source]Creating and editing buildings is straight forward. The only thing to keep in mind is that both the name and the code of a building need to be unique within a given health institution.
Wards
[edit | edit source]Each ward belongs to one building (the physical location) and one unit (the organisational entity).
Configuring Wards
[edit | edit source]Configuring wards is straight forward. However, the Wards form allows you to enter a lot of details about a ward:
- Name: The ward name is mandatory and must be unique within a health institution.
- Building: Link to an existing building or create a new one.
- Floor Number: Indicate the floor within a building.
- Unit: Link to an existing unit or create a new one.
- Number of beds: This field is for information only. It does not reflect the number of beds you have configured for your health institution.
- Gender: Indicate if a ward is gender specific. (If not, set it to "Unisex" which is the default value.)
- Status: Indicate if a ward has capacity for more patients. (Choose between "Beds available", "Full", or "Not available".)
The wards form allows you to indicate some special features as well:
- Telephone access
- Air conditioning
- Private bathroom
- Guest sofa-bed
- Television
- Internet access
- Refrigerator
- Microwave
Operating Rooms
[edit | edit source]Each operating room belongs to one building (the physical location) and one unit (the organizational entity).
Configuring Operating Rooms
[edit | edit source]The configuration of operating rooms is straight forward. A name is mandatory and must be unique within a given health institution. Assigning an operation room to a building and/or a unit is optional. Further information about the operation room can be stored in the Extra Info field.
Units
[edit | edit source]Units simply have a name and a code. At the moment you can not enter more information.
Configuring Units
[edit | edit source]Creating and editing units is straight forward. The only thing to keep in mind is that both the name and the code of a unit need to be unique within a given health institution.
Domiciliary Units
The corresponding official chapter: https://docs.gnuhealth.org/his/userguide/basics/coremodule/domiciliaryunits.html |
Introduction to Domiciliary Units
[edit | edit source]
A Domiciliary Unit (DU) represents a human dwelling. It is composed of intra (domiciliary) and extra (peridomiciliary) spaces. The DU is a physical entity that denotes the place where one or more people live regularly.
Since it is a physical location, it can always be geo-referenced by latitude and longitude, and many times it will have an associated address (street, ZIP code, city). This DU information should always be provided, since it is key determinant of health. Diseases like dengue fever and Chagas disease are intimately related to the DU condition (see Neglected Tropical Diseases for details).
The Domiciliary Units Form
[edit | edit source]The Domiciliary Units form can be found at Health → Demographics → Domiciliary Units in the main navigation of GNU Health.
A domiciliary unit can be described by the following information:
- Code: A unique identifier of the dwelling. This field is required.
- Description: Short description of the DU.
- Address: Street, number, and other subdivisions (province, city, municipality, district, ... )
- Latitude and Longitude

- OSM Map URL: The OpenStreetMap URL is created automatically from the coordinates or the DU address. (If latitude and longitude are not provided, then the OSM Map URL will be generated based on the address components. However, latitude and longitude will usually give you a more accurate reference.)
- General Conditions: A summary of the living conditions. This field should be filled in all the times, since it's one of the most descriptive about the DU.
- Type of Dwelling: Single house, apartment, townhouse, ...
- Infrastructure: Electricity, gas, potable water, sewers, ...
- Operational Sector: The area that this DU belongs. Very important to know which operational area is responsible to take different health care actions (health promotion, healthcare area, ambulace action region, ...)
- Members: In this section a list with all inhabitants of a DU is shown. They may be or may not be family members. Each person should be associated to a DU.
Individuals
The Individual
[edit | edit source]It's time to enter the essential unit of GNU Health, the person. We take the person as a unique individual, yet, somebody that is part of a family, interacts with the community and makes up our society. This entity is so important that it's impossible to achieve good public health programs without information about the individuals. This concept that might seem trivial, is very often overlooked.
Review of concepts
[edit | edit source]
We mentioned in the First Steps the concept of Party. A party is an abstract entity, which attributes will differentiate a health center from a person, or a person that is a doctor, a patient or both. The concept of party is extremely simple, yet very powerful and versatile.
At this point is important to go back and refresh the Terminology used in GNU Health.
Your first Individual in GNU Health
[edit | edit source]Follow the menu : Party -> Parties
You will be presented with a Tree view (listing) of the parties in the system. Take a look at the screen shown in this section. I have selected / Highlighted three parties. "Ana Betz", "Cameron Cordara" and "GNU Solidario Hospital". They are all parties (entities), but their attributes make Ana a patient, Cameron a doctor and GNU Solidario Hospital a Health Institution.
Of course, under this model, you can have, for instance, a health professional that is also a patients. Don't forget that doctors are people :-)
To create a new record, click on the new record icon, or type Ctrl+N. You will be presented with the new party form view.
In a multidisciplinary team, the following information is usually done by the administration office, the front desk or sometimes by the social workers.
In this example, we will focus on Ana Betz. Let's go over the main fields:
- Name: This is a required field, denoted by the blue background. Required fields must be entered otherwise you won't be able to save the record.
- Lastname: Enter the lastname as appears in the ID card. Some countries use only the father's name, other use a combination of the father and the mother.
- Alias: Nickname (if any) of the person. Surprisingly enough, in many places around the world, people use nicknames to refer a particular person, and sometimes they don't know the real name. If that person has an alias / nickname, you should enter it on the system. It might be key to know about a missing person.
- Party Attributes: At this point, set the Person checkbox. Just check this one. Don't enable any other at this point.
Before going into the patient demographics. save your work. As a general rule, is important so save your work while working on records, to avoid losing your unsaved data, specially in long records. To save the person, click on the save this record icon or type Ctrl+S.
Demographics
[edit | edit source]
The information entered in this section is very important at both individual and population level. The health professionals and authorities will have precious information for them to make good health programs and to assess the social determinants of health.
Here you enter the person's date of birth, Social Security Number, citizenship, sex, profession, the Domiciliary Unit, education level and marital status, among others. Other models (eg, patient) modules (eg, socioeconomics) will make extensive use of these field. Most of the fields are self-explanatory and don't need to get into details. We'll just make some tips about some of them.
- PUID : This is the Person Unique Identifier Number or equivalent issue by a specific country of region. It can be empty, but once is entered, is unique to the person. The PUID is a key identifier of the individual. If there is a person that does not have a local PUID, set the Alternative ID checkbox and enter the information there.
- Alternative IDs : When you enable this checkbox, you will be able to enter new IDs, such as Passports, other countries SSNs, etc... The person can have multiple IDs, and they should be registered whenever possible. For example, it will facilitate contacting this person if she or he is from another country.For clarity sake, the alternative IDs section is not shown unless the checkbox is set.
- Unidentified : Check this box if the person has no ID at the moment of registration. This can be the case of people that is brought to the health center in an accident settings. Once we gather the information at a later time, we unset the checkbox and enter the ID.
- Domiciliary Unit : This is a relational field that points to the place where the person lives. This is the main person address and should not be confused with the addresses of their relatives acquaintances that we will describe next.
Contact Information
[edit | edit source]
Click on the next tab ("General") to enter the information this person contact information. The address can be associated to a person or an institution. For example, we are showing the address of "Caro Forte", she is Ana Betz Kenpo Karate teacher, with the address of the Kenpo Karate school. Since the contact is associated to a physical person (relational field), you could easily get her teacher information opening the resource. This section also contains the contact mechanisms of the person, such as email or phone number.
Book of Life
|
|
This section applies to version 3.4 of GNU Health. |
Book of life
[edit | edit source]Our health is much more than just cold medical records. Most of the time, our health is the result of many events related to the environment, decisions we make, and interactions with many actors, that shape our life as individuals.

Pages of Life
[edit | edit source]GNU Health command : POL
GNU Health has developed a way to record the relevant events on a person life. These events are not just medical, but also demographical, biographical and social. Each of those relevant events make a Page of Life of the individual.
Integration with GNU Health HMIS node: From the Hospital Management System Node (HMIS) of GNU Health, processes such as encounters, prescriptions, lab and diagnostic imaging are mapped to the book of life of the person.
In addition, the page of life allows the person to be in charge of their health information. The person will be able to read and post relevant information to be part of their Book of Life.
Components of the page of life: Currently the main page types are
- Demographical
- Biographical
- Medical
- Social
In addition, the medical and social categories have their context, to know:
Medical page contexts: Health condition, encounter, procedure, immunization, prescription, surgery, hospitalization, lab, Dx Imaging, genetics, family history, birth and death, among others.
Genetics: If the medical context is genetics, three additional fields will be shown: Gene, Natural variant, Phenotype
Social page contexts: Equity / Social gradient, stress, social exclusion, working conditions, education, physical environment, unemployment, social support, food, addiction, transport, health services, family functionality, family violence, bullying, war.
Page of Life link in the GNU Health Federation
[edit | edit source]Each page of life is unique. The GNU Health federation package includes the Page of Life model in the Federation. Any newly created page of life, and their modifications, can be then be shared across the federation Health Information System.
More information about the GNU Health Federation
Families
The Family Concept in GNU Health
[edit | edit source]Since GNU Health 2.0, the family object is a model that holds all the individuals that compose a family, from the legal and/or genetic point of view. The family members don't necessarily share the same Domiciliary Unit.
A person can be part of several families at the same time. Consider the following situation:
- Peter Stone is the son of Mattew Stone and Rosanna Pellegrino.
- Peter marries Sandra Miller and has two children with her.
- After being divorced, Peter marries Lucia Martinez, and they have another child.
So Peter Stone would be:
- a son in the Stone-Pellegrino family
- the husband in the Stone-Miller familiy
- the husband in the Stone-Martinez familiy
The family model should only be used for one couple and their children, since things can become confusing otherwise. However, the system does not prevent you from entering families with more than two generations.
Managing Families
[edit | edit source]
Families are managed in the GNU Health → Demographics → Families section.
If you are creating a family, the first thing to do is to assign it a unique family name. In our demo database we use a combination of the two lastnames of husband and wife (e.g. "Zenon-Betz" for the familiy of John Zenon and Ana Betz). While this should work fine most of the time, you will run into problems when you have several families with the same combinations of lastnames. In this situation, adding the firstnames could help to make the familiy name unique (e.g. "Zenon-Betz, John & Ana").
Below the family name you will find a list of the family members, each consisting of the following fields:
- Party: Link to a person (or a Party record whith the Person flag set, to be technically correct).
- Role: The role of this person within the familiy (e.g. "Mother", "Son"). Please note that this is a simple text field where you can enter whatever you like. There are no predefined roles, and there is no validation (like a to make sure that a mother is female or that a son is younger than its father).
Searching Family Members
[edit | edit source]In the GNU Health → Demographics → Family Members section you can find a list of all family members. This list is read-only, but you can use it to search family members by family name, party (person) or role.
Health Professionals
The Health Professional Concept
[edit | edit source]The health professional is one of GNU Health's key components: It's used in appointments, patient evaluation, surgeries, lab tests, etc. This is why it is important to have them defined in your system before hand.
The health professional is a general concept: It covers physicians, nurses, biochemists, psychologists, and any other occupation related to health sciences.
Creating and Editing Health Professionals
[edit | edit source]
To define or edit a new Health Professional, follow this path: Health → Health Professionals
The Main steps involved in defining a Health Professional are:
- Select (or create) the related party
- Associate an internal user (login user) to the party
- Define the health professional list of specialties
- Set the default or main specialty
Party associated to a Health Professional
[edit | edit source]The health professional is a party with specific attributes, but is always a party. This abstract concept of party allow us to be different entities at the same time. For example, a health professional can also be a patient; both entities sharing the property of being a person. The party concept provides versatility and simplicity to GNU Health.

When you create the associated party from the Health Professional form, the Person and Health professional attributes will be automatically set. At this point, you need to enter the Health Professional demographics, in the same way as you have done when creating an individual. You might want to refresh the idea by glancing over the Individuals section.

The Internal User field
[edit | edit source]The Individual, when assigned the property of being a Health Professional, it has an extra - and required - field. The "Internal User" field. This internal user is the user that the individual types in then logging into GNU Health. That user allows to digitally sign documents, and to audit their actions.
Once you are done with the party, save the party record ( Ctrl + S ).

Health Professional specific fields
[edit | edit source]A health professional might have more than one specialty. In the Health Professional view, you can add all the specialties related to this particular professional. Once you are done, save the record ( Ctrl + S ). This is important so the system links the party with the health professional record.
Finally, add the information related to the professional:
- Institution
- Practitioner ID
- Main Specialty
- Extra information
Although these fields are not formally required, they are very important and should be entered in the system. Each health professional must have these fields filled in whenever possible. For instance, the Main Specialty field will be used as a default value whenever the doctor is assigned an appointment, or when creating a new evaluation.
Medicaments
| This page or section is an undeveloped draft or outline. You can help to develop the work, or you can ask for assistance in the project room. |
See: Health Centre Management/Products and Services Management section
Prescriptions
About Prescriptions
[edit | edit source]Prescriptons can be found in the Health → Prescriptions section of GNU Health. However, since in most cases you only need to see the prescriptions of a specific patient, the recommended way is to open a Patient record and to switch to Prescriptions using the Relate button.
Information Stored in Prescriptions
[edit | edit source]Each Prescriptions record stores some general information:
- Patient: Link to a patient (mandatory)
- Prescription ID
- Prescription Date
- Prescribed by: Link to a health professional
- Pharmacy: Link to a pharmacy (i.e. a Party record with the Pharmacy flag set)
- Pregnancy Warning
- Prescription Verified
The information about the medicaments can be found in the Presciption Lines section. Each Prescription Line consists of the following fields:
- Medicament: Link to a medicament
- Indication: Link to a Pathology Info record
- Allow Substitution
- Form: Link to a Drug Form record
- Administration Route: Link to another Drug Form record
- Start: Date and time
- End: Date and time
- Dose
- Dose Unit: Select an existing dose unit or create a new one
- Times
- Frequency
- Admin Hours
- Frequency
- Unit: Choose from "Seconds", "Minutes", "Hours", "Days", "Weeks", or "When required"
- PRN: Short for pro re nata (= use it as needed)
- Treatment Duration
- Treatment Period: Choose from "Minutes", "Hours", "Days", "Weeks", "Months", "Years", or "Indefinite"
- Review: Date and time
- Units
- Refills #
- Comment
Note: Only a fraction of these fields are visible in the list view, so make sure to open a Prescription Line in the form you to have access to all fields.
Prescription stock
[edit | edit source]Prescriptions can be tracked and inventoried by means of stock management.
To quickly create a new stock move, right-click the prescription > Actions > Create Prescription Stock Move. To view previous stock moves, right click the prescription > Relate > Stock Moves [readonly].
Note: Do not create new Stock Moves from the Relate view.
Vital Records
About Vital Records
[edit | edit source]Since version 2.8, GNU Health also serves as a Vital Record System, allowing to create and sign birth and death certificates.
Birth Certificates
[edit | edit source]The person birth certificate is part of the GNU Health Vital Record System. It links the person to an official document with the information used in most countries. The information about the date of birth is taken from the person. In addition, if your institution has the GNU Health pediatrics module installed, the date of birth is automatically taken from the neonatology department.
_model.png)


The best way to access and enter the birth certificate is the relate action from the people (party) model. This will fill automatically fields such as the person and birth date |
Alternatively, birth certificates can be managed via Health → Demographics → Birth certificates section.
A birth certificate stores the following information:
- Person: The name of the newborn (link to a person record)
- Date of Birth : By default, taken from the person (party) model.
- Mother and Father (links to person records)
- Institution: The health institution where the birth took place (or the health institution that certifies a delivery at home)
- Code
- Country and Subdivision: These fields will be automatically filled as default values, with the country and subdivision (such as province) of the institution.
- Observations
If you create a birth certificate record it will have the Draft state by default. You can switch to the Signed state by clicking the Sign button. You will be prompted to confirm that you want to sign the birth certificate; please note that signing a birth certificate can not be undone. Signing a birth certificate will add the name of the certifier (the health professional) plus date and time of the signing process.
Death Certificates
[edit | edit source]The death certificate is a key document, since it has legal, administrative, demographic and epidemiological significance.
Death certificates work very much the same way like birth certificates, but they store more information about causes and circumstances of death. The best way to access a person death certificate is by using the related action from the Party model (refer to the birth certificate section). Alternatively, the can be accessed via Health → Demographics → Birth certificates section.
A death certificate stores the following information:
Main section:
- Person: The name of the dead person (link to a person record)
- Date: Date of Death, including hour and minute.
Place section:
- Place: Details about where the person died (at home, at work, in a public place, in a health institution)
- Details about the place
- DU: The exact building/address (link to a domiciliary unit record)
- Institution: The health institution where the person died (or the health institution that certifies a death which occurred at home, at work, or in a public place)
- Op. Sector: Operational Sector where the death occurred.
- Country and Subdivision, such as province. These two fields are automatically filled with the address information from the health institution.
Cause section:
- Cause: The immediate cause of death (link to a Disease record)
- Underlying conditions: Medical conditions that lead to death, in chronological order.
Other section:
- Type of death: Choose between "Natural", "Suicide", "Homicide", "Undetermined", or "Pending Investigation"
- Autopsy: Check if an autopsy has been performed
- Code: Unique identifier to the certificate. The format / nomenclature is country-dependent.
- Observations
If you create a death certificate record it will have the Draft state by default. You can switch to the Signed state by clicking the Sign button. You will be prompted to confirm that you want to sign the death certificate; please note that signing a death certificate can not be undone. Signing a death certificate will add the name of the certifier (the health professional) plus date and time of the signing process.
Digital Signatures
[edit | edit source]It is highly recommended that you use digital signatures to sign the death certificate. The GNU Health Cryptography module health_crypto has the functionality to verify any change to the document. It also allows you to use your private key to sign the document, giving it legal value in many countries. Once signed, the document can be verify against the person who ultimately signed the certificate.
Immunizations
GNU Health includes immunization functionality in the core module. This includes immunization schedules per country and year, the vaccination process, and the person immunization history and status report, to name the main aspects.
The Vaccine
[edit | edit source]
In GNU Health, vaccines are part of the medicament model, those that have set the vaccine attribute. GNU Health includes as default the vaccines that are part of the WHO essential list of medicines module, but you can set up your own set.
The Immunization Schedule
[edit | edit source]Health → Configuration → Immunization Schedule

After you have the list of vaccines, you can create different immunization schedules. Each immunization schedule has the following fields:
- Code: Unique identifier for the schedule
- Country: The name of the country for this schedule
- Year: The year of this immunization schedule
- Active: This field indicates whether this particular schedule is on use. Among other things, it's taken into account when checking the immunization status of the person.
- Description: Short description of the schedule
- Vaccines: This widget lists all the vaccines on the schedule, and the main attributes. The details for this model will be explained in the next section.
Immunization Schedule Line
[edit | edit source]
As described above, each immunization schedule is composed of vaccines, which their own peculiarities. For each vaccine, the following attributes apply:
- Vaccine: The name of the vaccine
- Scope: Recommendation status level . It can be systematic, recommended or limited to risk groups
- Remarks: Additional information and for this vaccine
- Dose: Dose or booster number
- Age: Age of the person when should be applied
- Time unit: Days, weeks, months or years
The Vaccination Process
[edit | edit source]
The following patient shortcut will take you both to the vaccination history and to the vaccination process itself.
Health → Patient → (relate action) Vaccinations
The vaccination form to register the information associated to the immunization itself. The main sections are:
- Header: It contains the patient name and the vaccine to administer
- Administration section: The amount of vaccine and the administration site
- Stock information: The stock and lot associated to the vaccine. GNU Health also allows to enter the picture of the vaccine label. This is quite important, since it contains quite a bit of information that can be useful in the future. Please include it whenever is possible.
- Notes: Extra information associated to the immunization process itself. There is also a wizard that allows to create the stock move of the product related to the vaccine, once this has been used / discarded.
- Administrative Information: Information related to the date, institution and to the health professional who applied the vaccine. The Vaccination process has two states. Those are In Progress and Signed. Once the immunization process has been signed by the health professional, the record becomes read-only.
Immunization Status Report
[edit | edit source]
We can check the Patient immunization status by executing the following report:
Health → Patient → (report) Immunization Status Report
The report will ask you for the specific schedule, and the result will show the person immunization status for that specific schedule. Along with the patient information and the print date, the immunization report will show each vaccine for the chosen schedule, its doses, age when they should be applied and the current status. Always verify and double check the person immunization status against any other historical records the person may have.
Vaccine stock
[edit | edit source]Vaccines can be tracked and inventoried by means of stock management.
To quickly create a new stock move, right-click the vaccine > Actions > Create Vaccine Stock Move. To view previous stock moves, right click the vaccine > Relate > Stock Moves [readonly].
Note: Do not create new Stock Moves from the Relate view.
Configuration
| This page or section is an undeveloped draft or outline. You can help to develop the work, or you can ask for assistance in the project room. |
The Configuration Section in GNU Health
[edit | edit source]In most databases – and GNU Health is no different here – there are two categories of data: Some data is created and updated permanently, while other data, once entered into the system, remains quite static. For example, during a working day in a hospital many new patients, evaluations, prescriptions and hospitalizations are stored in GNU Health. On the other hand, the staff of health professionals, the medicaments available in the pharmacy, the medical procedures provided or the hospital infrastructure (buildings, beds, operating rooms) will not change very much during a day, a week or even a month.
The second type of data is grouped in the Health → Configuration section, and this chapter provides an overview for this section. Since most configuration options are easier to understand in their context, you won't find too many details here but links to other chapters of this book where data from the Configuration section will be used.
Notes:
- The subsections available under the Health → Configuration section will vary depending on the modules installed in your system. This chapter describes the configuration options whith all GNU Health modules installed.
- There are configuration options on a more technical level too, relevant only to system administrators. These are not covered in this chapters since they are not part of the Health → Configuration section.
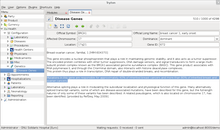
Diseases
[edit | edit source]Genetics
[edit | edit source]Imaging
[edit | edit source]Procedures
[edit | edit source]Laboratory
[edit | edit source]In the Laboratory subsection you define the Lab Test Types, i.e. all tests a laboratory can provide, including all parameters to be analyzed during that test. You can also configure the Lab Test Units used in the laboratory.
For more details, please refer to the Laboratory Management chapter. |
Institutions
[edit | edit source]In the Institutions subsection you define the organisational structure and physical assets of your health institution. This includes the following data:
- Buildings
- Units
- Wards
- Beds
- Operation Rooms
For more details, please refer to the Health Institutions chapter. |
Health Professionals
[edit | edit source]In the Health Professionals subsection you manage the staff of a health institution. A Health Professionals record contains mainly the professional qualifications, while the personal information (like name, date of birth, home address and so on) is stored in the associated Party record. The following fields are available in a Health Professionals record:
- Health Professional: Link to a Party record. You can either select an existing record or create a new one. (Please note that only party records with the Health Professional flag can be found when searching. So if you can't find a party that exists already in your system, please check this flag before unintentionally creating a duplicate record.)
- Licence ID
- Specialities: One or more Health Professional Specialites that health professional has experience in. You can select from the list of existing specialities (which will be the standard procedure) or create a new one if necessary.
- Extra Info
- Institution: Link to a Health Institution record.
- Main Specialty: Link to one of the entries in the Specialties list of this health professional (see above). Please note that you must save the Health Professionals record first for being able to edit this field.
- PUID: Identifier from the Party record. Filled in automatically.
Note: In GNU Health, one health professional can only work for one health institution at a time. If you try to create a second Health Professionals record linking to the same Party record, you will get an error message.
For more details, please refer to the Health Professionals chapter. |
Medicaments
[edit | edit source]Immunization Schedule
[edit | edit source]Misc
[edit | edit source]Occupations
[edit | edit source]Ethnicities
[edit | edit source]Medical Specialities
[edit | edit source]Recreational Drugs
[edit | edit source]Pediatrics Growth Charts WHO
[edit | edit source]Insurances
[edit | edit source]
Command Line
|
|
This section applies to version 3.4 of GNU Health. |
Description
[edit | edit source]
Since GNU Health 3.4, the HMIS client allows to use most of the functionality from the command line, without the need of the menu. It's much faster and direct than the previous menu-based client. Of course, the menu is still available.
Most commands accept arguments, so the user can go directly to one specific instance of the resource. For example
PAT : list all the people registered on the system
PAT ESPGNU777ORG : takes directly to the patient with federation account "ESPGNU777ORG"
Accessing the command line
[edit | edit source]The command line can be accessed by clicking on the Command Line box (either at the top or bottom left of the client).
Clicking SHIFT + Z will put the focus on the Command Line Interface section.
| Command | Description |
| CMD | GNU Health Commands |
| PPL | Demographics |
| PAT | Patients |
| SYSINFO | Technical information for client and server |
| LAB | Lab Test Results |
| FEDQ | Federation objects queue |
| MED | Patient Medicaments |
| APP | Appointments |
| SES | Socioeconomics and Family Functionality Assessment |
| DU | Domiciliary Units |
| HP | Health Professionals |
| RX | Prescription Orders |
| EVL | Patient Evaluations |
| ECG | Electrocardiograms |
| RCRI | Revised Cardiac Risk Index |
| DX | Health Conditions |
| POL | Pages of Life |
| GEN | Personal Genetic Info |
| NEO | Newborn / Neonatal Information |
| OBS | Obstetric histories |
| SRV | Patient Health Services |
| SUR | Surgeries |
| MI | Medical Imaging Results |
| INV | Invoices |
| PRD | Products |
| CMD | GNU Health Commands |
| GDIS | Disease Genes |
| VAR | Natural variant phenotypes |
| VARP | Natural variant phenotypes |
| PDIS | Protein related diseases |
Patient Management
Introduction to Patient Management
[edit | edit source]Patients are parties with specific properties. These party properties differentiate them from the other parties. A patient is a party that has the following properties:
- Person
- Patient
In GNU Health, a person can be both a health professional and a patient at the same time. Makes sense, doesn't it ?
Creating a party with the patient property
[edit | edit source]Depending on the size of your health center, patient creation can be done by different teams. Let's go through the different stages of a party, and who could be in charge. We use the example of "Ana Betz" to go through a typical scenario that takes you from defining the party to create the associated patient.

Step 1: Party definition and demographics
[edit | edit source]This information creates the individual person. At this point, Ana is just an individual (a physical person). The social worker can enter all the demographics about her (family, Domiciliary Unit, contacts.. ).
Note: The person that has been defined in GNU Health can be a patient at a later point. In some cases, this person will never be a patient from our health center, as it can be the case for family members that live in other countries.

Step 2: Enabling the patient attribute in the party
[edit | edit source]Now let's suppose that Ana - that was created on the system a while ago - shows up to the primary care center for a health checkup. She will give the Social Security Number or other type of unique identifier to the officer at the frontdesk, and at this moment, Ana will become a patient in the Health System of her region or country.
Note: The SSN field (translated to other names depending on the country) is the unique value that identifies each person. Please check the section Individuals for more information.
Listing the current patients
[edit | edit source]You can access the patient main menu from Health → Patients → Patients. This menu action will show all the patients. That is, parties that have the patient attribute and that have associated a patient record to it. You can search patients from any of the fields on the tree view. You can enter any of the records by double clicking the patient record from the list. That action will take you to the form view. It you have permissions, then you will be able to edit it.
Creating a patient record
[edit | edit source]You can create the patient from clicking on the new record icon or typing Ctrl + N. This will take you to the main patient form.
The first - and required - field is the link to the party that has been created earlier in the process. The search is limited to parties with the patient attribute.
Printing a patient ID card
[edit | edit source]
An ID card lets you quickly identify a patient by his PUID or by a machine readable QR code. Working with ID cards is faster and creates less errors than simply asking patients for their names and birth dates. It even works if a patient is not able to speak (spleeping, sedated, unconcious, or simply a newborn) or does not know how to spell his name exactly (not uncommon in countries with higher illiteracy rates).
To print an ID card, open the patient record, click the Report button in the toolbar and choose ID Cards or ID Cards - QR (depending on your needs). This will generate a file in the ODT format that can be opened and printed in your word processing application (e.g. LibreOffice Write or Microsoft Word).
Patient Evaluations
Introduction to Evaluations
[edit | edit source]
By using GNU Health, the physicians have the possibility to open and make an Evaluation from the Patient window. This evaluation can be linked to an existing Appointment or just creating a new one.
Evaluations History
[edit | edit source]
From the Patients form you can switch to the Evaluations history of a given patient by clicking on the Relate button in the toolbar. The system allows to print the report with all the patient information, which is very important when a doctor needs to see the overall situation of the patient.
Evaluations Form
[edit | edit source]
The doctor has different tabs that will help him collect information during the evaluation process. The idea is to gather as much information as possible, this will allow the physician to have a better idea about the patient and to give a presumptive diagnosis in order to get to a final one and start the right treatment.
Main Info Tab
[edit | edit source]In this section we can link the evaluation to an existing previous appointment or just start a new one. The doctor can input the patient complaints and/or present/existing symptoms or illness.
Clinical Tab
[edit | edit source]The doctor will gather all the vital signs (temperature, blood pressure …), anthropometry info and signs and symptoms encountered during the evaluation.
Mental Status Tab
[edit | edit source]The physician can make a quick Glasgow Coma Scale when it's necessary.
Diagnosis Tab
[edit | edit source]Finally the physician can make a presumptive diagnosis and input more info about it as well as treatment plan.
Patient Appointment and Admission Management
Appointments
[edit | edit source]Information stored per appointment
[edit | edit source]
Each appointment can store the following information:
- Appointment ID
- Patient
- Type of Appointment
- Level of Emergency
- Date
- Specialty
- Health Professional
- Health Center
List of all appointments
[edit | edit source]
From the main menu of Health you have the possibility to get into the Appointments section. Here you see the list of all the appointments stored in the system.
- Free tab: This list reflects all available timeslots where you can create a new appointment.
- Confirmed tab: This list reflects all existing appointments.
Appointments Calendar
[edit | edit source]The subsection Appointments Calendar allows you to display all appointments stored in the system in a calendar view.
Appointments Report
[edit | edit source]The subsection Appointments Report allows you to display all appointments of a certain health professional in a certain time period.
List of appointments for a specific patient
[edit | edit source]

To access the list of all appointments for a specific patient only you typically start from the patients record. Simply click the Relate button and choose Appointments.
Hospitalizations
[edit | edit source]

From the main menu you will have access to the Hospitalizations area. From here you will manage any kind of action related to the patient’s admission to or discharge from the hospital.
When you create a new Hospitalization record there are different tabs that will help you gather more information:
- Administrative Data: In this section you can enter all the administrative information related to the patient admission.
- Nutrition: The information in this section helps the hospital center to know more about the patient’s diet, belief etc.
- Medication: All the information entered here is related to medication during the admission (indication, treatment period, dosage etc.).
- Care Plan: Here you will input all the data about nursing plan and discharge plan.
For more information about hospitalizations please refer to the Inpatient Management chapter.
Financial Accounting
| This page or section is an undeveloped draft or outline. You can help to develop the work, or you can ask for assistance in the project room. |
Chart of accounts
Configuring Accounts
Account Types
Configuring Journals
Organization structure
Asset management
Cost allocation among cost centers, cost allocation from cost centers
Multi-dimensional CO-PA reports
FI monthly closing (deprecation , FI related reports)
CO monthly closing (activity planning, maintain SKF, COPA report)
Analytic Accounting
| This page or section is an undeveloped draft or outline. You can help to develop the work, or you can ask for assistance in the project room. |
Products and Services Management
Products
[edit | edit source]Products basics
[edit | edit source]Similar to a party, a product is a basic data concept in Tryton. Whenever you need a certain product in GNU Health, this product needs to be created and configured in the Product module.
There are three different types of products:
- Assets
- Goods
- Services
The type will determine the tabs and fields available in the Products form.
Each product can be assigned to one category and can have one or more variants.
Products are the basic entity for creating invoices. Therefore every product needs a list price, a cost price and a unit of measure (UOM) for calculating costs.
Variants basics
[edit | edit source]In the lower half of the Products form there are checkboxes to specify the product type in the context of the Health section:
- Medicament
- Medical Supply
- Vaccine
- Bed
- Insurance Plan
Creating new medication products
[edit | edit source]IMPORTANT: GNU Health medicament products must always be created in the main “Tryton” product section before they can be imported into the GNU Health medicaments.
- Each product can be added individually or a range of products can be loaded via a CSV file.
- The product must be described and costed as individual dose units that are dispensed / administered to patients in the following format DRUG | STRENGTH | FORM e.g. Amoxicillin 500mg capsules (UOM = capsule), Amoxicillin 125mg/5mL oral liquid (UOM = mL), Benzylpenicillin 600mg vials (UOM = vial)
- A range of new “Default UOM” values will need to be created for medication dose units – tablet, capsule, mL, vial etc
- Always tick the “Consumable”, “Medicament” and the "Purchasable" boxes.
- When the "Purchasable" box is ticked a new tab will open allowing the setting up of "Suppliers" for a particular product. Set up any number of suppliers to attach to the product.
- Add a “Category” as “Medicaments” or “Medicaments / WHO essential medicines”.
After this initial set up it is now possible to create/import the medicament product into the configuration section of the GNU Health module - Health/Configuration/Medicaments
Type in a few letters of the product to be imported from the main “Tryton” product section.
For liquid medicines (or solid medicines) there is now an option to enter the STRENGTH of the product e.g. 125 mg in 5 mL, 500 mg in 1 capsule etc. This functionality is designed for future use of more complex prescribing scenarios.
Add the pharmacological category – in this case “Antibacterials”.
And set the Pregnancy Warning setting for that particular medication. This setting will trigger a message when prescribing for female patients between the age of xx years and yy years.
Add the “Active component” of the medication. This should be entered by referring to the WHO essential medicines list.
Categories
[edit | edit source]Categories are used to group similar products. You can create, edit, or delete categories in the Product → Categories section.
Typical categories in GNU Health could be:
- Imaging Services
- Insurances
- Lab Services
- Medicaments
To see all products of a certain category, open the Categories list view, then double click the category you are interested in.
Invoicing Patients
[edit | edit source]Step 1: Listing Health Services to be Invoiced
[edit | edit source]
To invoice a patient for hospitalizations, examinations, treatments, medicaments, expendable items etc. you need to create a new record in the Health → Health Services → Health Services section. THIS MUST BE DONE BEFORE ANY SERVICES ARE CHARGED TO THE PATIENT'S ACCOUNT.
A Health Services record consists of the following data:
- Patient
- Date
- ID (set automatically)
- Description (e.g. "Medical evaluation and prescription")
- Invoice to: The recipient of the invoice (which is not necessarily identical with the patient). Since this is a link to a Party record you can not only bill patients or persons but institutions as well.
In the Service Line section you add the products and services to be charged. Each service line consist of the following fields:
- Invoice
- Product
- Description
- Qty: The quantity.
- From
- To
Step 2: Creating the Invoice
[edit | edit source]
When the Health Services record is complete, click on the Action button in the toolbar and choose the Create Health Service Invoice command. A dialog box will appear asking you whether you want to create an Invoice based on the information you have entered in the Health Services record. Click the Create Invoice button.
Things that may go wrong at this point:
- If you get the error message "No Payment Term associated to the Patient": Go to Party → Parties → People, open the record of the patient you are about to bill, switch to the Accounting tab and fill in the Customer Payment Term field. Make sure to save the record before going back to Health → Health Services → Health Services and trying to create the invoice again.
- If you get an error message similar to "There is no account expense/revenue defined on the product paracetamol (30)": Go to Product → Products, open the record of the product mentioned in the error message, switch to the Accounting tab and fill in both the Account Revenue and the Account Expense field. Make sure to save the record before going back to Health → Health Services → Health Services and trying to create the invoice again.
After you have successfully created the invoice, the Health Services record changes its state from Draft to Invoiced. However, the process is not complete at this point (and you could still revert the Health Services record to its Draft state by clicking the Set to Draft button if necessary).

For the final steps you must switch to the Financial → Invoices → Invoices section. There you will find your new invoice, still in Draft state. Open the invoice, complete it as necessary, then validate it.
An invoice can have one of the following states:
- Draft: The initial state.
- Validated: An invoice that has been validated can not be edited anymore. However, you could change the state of the invoice to Draft or Cancelled by clicking the appropriate buttons.
- Cancelled: An invoice that has been cancelled can not be edited either. However, you could change the state of the invoice to Draft again which will allow editing.
- Paid: Clicking the Post button will bring an invoice to the Paid stage. The invoice can not be edited anymore, and you can't change its state neither.
Invoice payment
[edit | edit source]At the moment the invoice is posted, a new invoice ID is created, and it can be paid at that moment.
Payment Method: You need to specify a payment method. The payment method is created in

Financial -> Configuration -> Journals -> Invoice Payment methods.
Make sure you use the right debit and credit accounts when creating the Invoice payment method Journal, otherwise you will not see the payment method in the selection |
Purchase Administration
| This page or section is an undeveloped draft or outline. You can help to develop the work, or you can ask for assistance in the project room. |
Stock Management
Basics of Stock Management
[edit | edit source]Stock management contains all processes to track physical products within a company. This allows a company to tell which products in which quantities are on stock and in which location they can be found. The Inventory & Stock module of GNU Health allows to document any change in stock, be it a shipment from a supplier, a shipment to a customer, or simply a move from one location to another.
In the context of a health instution, stock management is especially useful for keeping track of medicaments available in the pharmacy.
Stock Locations
[edit | edit source]Stock locations can be defined, edited, and deleted in the Inventory & Stock → Locations section. You can have as many locations as you need, and you can create hierarchical structures by assigning a parent location to a location.
There are six types of locations:
- Storage: Storage locations represent real places where products are stored.
- Warehouse: Warehouses are used to group several storage locations.
- Customer: Customer locations are virtual locations for products that have been sent to customers.
- Supplier: Supplier locations are virtual locations for products that have been received from suppliers.
- Lost And Found: Lost And Found locations are used for inventory gaps.
Stock Movements
[edit | edit source]Whenever goods are transported from one location to another you create a move record in the Inventory & Stock → Moves section. There you basically indicate what amount of a certain product has been moved from one location to another, and at which date. By doing so you tell GNU Health to adapt the inventory of the two locations affected.
A move has one of the following states:
- Draft: A move that is planned for the future but still subject to modifications. Default state for new move records.
- Assigned: A move that will not be modified anymore. The products affected by the move will be reserved.
- Done: A move that has been performed in the real world.
- Cancel: A move that has been cancelled in Draft or Assigned state and therefore has never taken place in the real world.
Shipments
[edit | edit source]A shipment is simply a group of several moves happening at the same date and around the same location.
Supplier Shipments
[edit | edit source]A supplier shipment record is created when products are received from a supplier. It contains information about the Supplier, the Warehouse in which the products are coming, the Planned Date and the Effective Date of the shipment. In addition, a supplier shipments contains Incoming Moves (moves between the supplier location and the input location of the warehouse) and Inventory Moves (moves between the input location and the storage location of the warehouse).
A supplier shipment has one of the following states:
- Draft: Incoming moves and inventory moves are in Draft state.
- Received: Incoming move are set in state Done, inventory moves are created if necessary.
- Done: Inventory moves and incoming moves are in Done state.
- Cancel: All containing moves are cancelled.
Supplier Return Shipments
[edit | edit source]((to be added))
Customer Shipments
[edit | edit source]A customer shipment record is created when products are sent to a customer. It contains information about the Customer, the Warehouse in which the products are going, the Planned Date and the Effective Date of the shipment. In addition, a customer shipment contains Inventory moves (moves between the storage location and the output location of the warehouse) and Outgoing Moves (moves between the output location of the warehouse and the customer location).
A customer shipment has one of the following states:
- Draft: Outgoing moves and inventory moves are in Draft state.
- Waiting: Inventory moves are created (or completed) to balance the outgoing moves. This shipment should be processed.
- Assigned: Products have been assigned (or reserved) from the storage locations.
- Packed: Inventory moves have been made, i.e the products have been physically moved to the outgoing locations.
- Done: Outgoing moves have been made, e.g. the truck has left the warehouse.
- Cancel: Shipment was cancelled before reaching the Done state. All containing moves are cancelled.
Customer Return Shipments
[edit | edit source]((to be added))
Internal Shipments
[edit | edit source]An internal shipment record is created when products are sent across locations inside the company. It contains information about the From Location, the To Location, the Planned Date and the Effective Date of the shipment. In addition, an internal shipment contains a list of Moves.
An internal shipment has one of the following states:
- Draft: The containing moves are in draft.
- Waiting: The shipment is waiting for been processed.
- Assigned: The products have been assigned.
- Done: The moves have been made.
- Cancel: Shipment was cancelled befor reaching the Done state. All containing moves are cancelled.
Inventories
[edit | edit source]An inventory is basically a list of all items in a certain stock location at a given time. It allows to control and update the quantities of the products in stock.
To create an inventory you enter a Storage Location, a Lost and Found Location and a Date. By clicking the Complete Inventory button a list with the expected quantities for each product in the location is created. If there is a difference between the expected quantities and the quantities in the real world (i.e. the number of products in the shelves), the real quantities can be entered. By clicking the Confirm button, move records are created to balance expected quantities and real ones.
Access Management
Access Management Overview
[edit | edit source]Like in many other IT systems, access to data and functions in GNU Health is controlled through groups (also known as roles). A group is a set of access rights. By assigning a user (also known as account or login) to a group, this user gains all rights of this group.
Groups
[edit | edit source]
To create, edit, or delete groups, please go to the Administration → Users → Groups section. Create a new group or double click an existing group to open the Groups form. All data in this form is divided into two tabs:
Members Tab
[edit | edit source]
The Members tab lists all users that have been assigned to this group. You can add users to the group here, or you can double click on a user to see this users details.
It is a safe practice to define all access rights of a group first and add users to the group later.
Access Permissions Tab
[edit | edit source]
The Access Permissions tab defines the access rights of a group. There are four types of rights that can be granted to a group:
- Access to a certain model: This allows to grant the right to read, write, create and/or delete records of a certain record type (or model as it is called in GNU Health).
- Access to a certain field: This allows to grant the right to read, write, create and/or delete data in certain field. While field access is not as commonly used as model access, this option allows you to fine tune your access permission and to protect sensitive data.
- Access to a certain menu item: This allows to show or hide sections in the main navigation. It is a good practice to hide sections where a group should not or cannot edit data to simplify the user interface.
- Access to a certain rule
Users
[edit | edit source]To create, edit, or delete users, please go to the Administration → Users → Users section. Create a new user or double click an existing user to open the Users form.
Every user needs a Name (which is a descriptive name, not the user name for logging into the system) and a Status (which is active or not active and defines if a user can log into the system at all).
All other data in this form is divided into four tabs:
User Tab
[edit | edit source]
The User tab contains the very basic information about a user:
- Login: This is the user name for logging into the system and cannot be empty. It must be unique, that is to say that you can not have to users with identical logins.
- Password: This is the password for logging into the system. When entering a password you can check the checkbox on the right hand side of the Password field to see what you are entering.
- Email: If you enter a user's email address here, clicking on the globe icon on the right hand side of the Email field opens a new mail in your email client.
Actions Tab
[edit | edit source]Access Permissions Tab
[edit | edit source]In the Access Permissions tab a user can be assigned to one or more groups. Please be aware that not assigning groups here will lead to users who can log into the system but not do anything within the system.
Preferences Tab
[edit | edit source]In the Preferences tab you can set the preferred language of a user.
GNU Health Federation
|
|
This section applies to version 3.4 of GNU Health. |
One World, One Health: Welcome to the GNU Health Federation !
[edit | edit source]Introduction
[edit | edit source]Genetic disorders, cancer, neurodegenerative conditions and autoimmune diseases are some formidable and elusive challenges that the world faces today. In the areas of genomics and precision medicine, many natural variants are of unknown clinical significance, that is, we still don't know how pathogenic they are or the role they will play on our health. Moreover, and most importantly, socioeconomic determinants are still behind of 50% of maladies.
It's important to conceive health as the result of the interaction from multiple factors and actors. The GNU Health federation puts together and contextualize the information on a person biology, family history, lifestyle and environmental / socioeconomic status. We can no longer only focus on the molecular basis of health and disease, disregarding the environment, social condition and lifestyle of the individual, or vice-versa. If we really want to make a revolution in our system of health, and in the health of upcoming generations, we must work in a trans-disciplinary manner, with a holistic approach to the person. With this global vision, and with all the information gathered across the participating nodes of the federation, we will be closer to identify the significance of those natural variants and, hopefully, we will find a cure.
The GNU Health Federation project aims to build a community based, federated health network among different regions and in a country, and, why not, among countries around the globe. A federation can be as large as you want. From a small regional federated network with several nodes, to a large, nationwide health network with thousands / millions of participating nodes.
The current problem
[edit | edit source]Most EMR / HIS are transactional systems. They work on specific frameworks, generating transactions / processes on the institution and storing the information on their local database. Some examples are medical encounters, prescriptions, hospitalizations, stock management or billing. The main objective is to “get the job done”.
Even though this approach can work at local level (eg, a particular health institution), it has some intrinsic issues, to know:
- Interoperability problems: Most systems are designed to work on that specific framework, making it hard for other environments to exchange information
- Data Analysis problems: Transactional systems usually don’t excel in reporting. The user normally has to write specific reports, and on-the-fly reporting / or data analysis is not trivial, and it takes a big toll on performance, impacting on the normal operation of the institutions.
- Data isolation: Today there are a lot of silos in health informatics. Each institution has its own system / systems, completely alienated from others. This isolation generates very limited benefits for the public health system.
GNU Health Federation benefits
[edit | edit source]These scenarios resulted in the design of a new approach, that I call the GNU Health Federation model. This new approach should overcome this issues, since it combines the strength of transactional models for the daily operation and needs of institutions with the power of NoSQL for the documental / reporting / aggregation. The following are a summary of benefits of the Federation model
- Autonomy: Each node can work independently
- Interoperability: Each node can use its own technology . For instance, the HMIS node, mostly used in the hospitals can co-exist with a mobile application, or with a research institution, each of them use different technology and frameworks, yet their results can be shared among them.
- Selectivity: Each node decides which information to share in the federation.
- Scalability: The data coming from the different nodes will be collected and processed in a set of NoSQL databases. This allows growing without impacting the the performance of transactional daily operations of each node.
- High Availability : Since each node is independent, the high availability at local level is guaranteed. Moreover, the NoSQL / document oriented databases allow replication to ensure both high availability and load balancing.
- Big Data: The GNU Health federation model allows storing very large amount of data, where aggregation, data analysis and reporting can be done in real time.
- Standard based: In order to integrate all the nodes participating in the Federation, they have to “talk” a common language.
- Trans-disciplinary cooperation : Different entities (the person, health professionals, researchers , social workers, .. ) are all active members of the federation, with the particularity of both being independent but yet, an integral part of the network.
GNU Health Federation components
[edit | edit source]
Each GNU Federation is made of three main components:
- Nodes : Each autonomous participant on the federation (HMIS, LIMS, PHR, mobile devices) is a node.
- GNU Health message server (Thalamus) : Middle man between the nodes and the Health Information System. It also controls the access level of each node / person to different objects.
- GNU Health Information System: A Document oriented database that holds the Person Master Index, demographics, medical information and the Pages of Life.
Integration of GNU Health HMIS node
[edit | edit source]The traditional GNU Health HMIS is now integrated to the GNU Health Federation. Most of the information coming out from daily medical practices can now be sent to the Federation, and be shared across the network.
Currently there are two main blocks where the information can be shared from the HMIS node :
- Demographics : Main demographic information about the person (dob, gender, address... )
- Pages of Life : Any relevant event on the person's life, from biographical, medical, social or demographic

Asynchronous communication
[edit | edit source]One important and key aspect of GNU Health federation is that each node is autonomous. That is, they don't need a network to function independently. In many places the information gathered can not be sent immediately due to network outages or lack of communication. In other cases, the information needs to be validated before sharing it with the other nodes.
The HMIS node keeps the information generated on the Federation Queue that can be send later on to the GNU Health Information System
To access the Federation Queue manager, you can type in the command FEDQ
Requirements : In order to use the Federation functionality from the HMIS, you need to install the health_federation package of GNU Health
Setting up the HMIS node
[edit | edit source]In order for the Health Management Information System (HMIS) to be part of the GNU Health Federation the following main steps must be done :
- Install the Health Federation package ("health_federation")
- Create the health institution
- Configure the communication parameters to Thalamus, the message server
Install the Health Federation Package
[edit | edit source]
Select the "health_federation" module and mark it to install. For more information about installing packages on the HMIS node, please refer to the general installation section.
Create the Health Institution
[edit | edit source]The Federation uses the name of the health institution as part of he default node identifier process. You should have it already in place, since it's part of the basic setup of the GNU Health HMIS, regardless of the Federation installation. Follow this link for more information on the creation of Health Institutions
Thalamus
Introduction
[edit | edit source]Thalamus is the message and authentication server of the GNU Health Federation.
The Thalamus project provides a RESTful API hub to all the GNU Health Federation nodes. The main functions are:
- Message server: A concentrator and message relay from and to the participating nodes in the GNU Health Federation and the GNU Health Information System. Some of the participating nodes include the GNU Health HMIS, mobile PHR applications, laboratories, research institutions and civil offices.
- Authentication Server: Thalamus also serves as an authentication and authorization server to interact with the GNUHealth Information System
In order to communicate to the Health Information System, a node must go through Thalamus. The user/node must provide proper credentials, and after checking for the access level, it will grant access to the resource with the appropriate method.
Installation Instructions
[edit | edit source]If you want to install Thalamus, or want detailed technical information, refer to the GNU Health Federation Technical Guide
Socioeconomics
Introduction to Socioeconomics
[edit | edit source]The module health_socioeconomics takes care of the input of all the socio-economic factors that influence the health of the individual / family and society.
Among others, GNU Health includes important factors such as living conditions, educational level, infrastructure, family affection (APGAR), drug addiction, hostile environment, teenage pregnancy, working children, etc.
Main Tab
[edit | edit source]
The Main factors assess the general quality of life through the housing conditions, education level, occupation, workplace and its conditions. The information in this menu is supplemented by a free text box where you can add relevant notes of interest. In each category, we found a wide spectrum that will allow us to accurately define the socioeconomic status of the patient and determine its living conditions.
In the particular case of this example, we see that the patient Ana Betz has a middle socioeconomic level, has completed university education and works as a teacher. Ana Betz also spends 10 hours away from home, does not work at home and her workplace is not a hostile area.
Infrastructure Tab
[edit | edit source]
Regarding the Infrastructure tab, we find the checklist of the patient basic services such as sanitary sewers, gas supply, telephone, internet...as we can see in the next example:
Note that the checklist is designed to uncheck the service that is lacking. All services are already tagged for an easier way to complete the list.
Family Tab
[edit | edit source]
The Family tab provides information about the family through the Family APGAR. The Family APGAR has been widely used to study the relationship of family function and health problems in family practice offices. This index will provide a score that assess adult satisfaction with social support from the family. We can also complete the information with Other Family issues such as drug adiction, family abuse, domestic violence, working children, etc.
Lifestyle
Introduction to Lifestyle
[edit | edit source]Individuals health depends a lot on their lifestyle. Maintaining physical and mental health are crucial to an individuals longevity. The more time spent on hygiene, physical fitness, and diet regulation, the healthier lifestyle they have. Mental illness may occur through various variables. For example, depression may promote mental illness through stress and anxiety. Reasons for being depressed can be due to a number of things including job loss, recently widowed, divorce, etc. Depression may lead to or increase the frequency of poor habits not promoting physical health. Poor habits may eventually lead to a poor even dangerous lifestyle.
The module health_lifestyle collects the information of the patient's lifestyle working on various aspects such as diet and exersice, addictions, sexuality and safety.
Diet and Exercise Tab
[edit | edit source]
Proper diet and exercise are the mainstays for a healthy lifestyle. GNU Health includes some features such as Physical Exercise, Sleep and Meals. The information in this menu is supplemented by a free text box where you can add relevant notes of interest.
Addictions Tab
[edit | edit source]

Regarding to addictions there are two tabs, the main one with basic info about smoking and alcoholism and another more specific about Recreational Drugs.
The main menu give us a first glimpse of generally more socially acceptable drugs that gives us valuable information about the patient addictive behavior and therefore its impact on his health.
In the menu of recreational drugs GNU Health has a full list of these classified by different categories and a search engine filters very comfortable and useful.
Sexuality Tab
[edit | edit source]
Sexuality plays a major role in most people's lives, and encompasses a range of behaviors and meanings that are shaped by individual, social and cultural factors. Promoting sexual well-being, and preventing sexual health problems (such as HIV and other STI's, sexual violence, unwanted pregnancies, stigmatization and discrimination based on sexual behavior/identity, and violations of sexual and reproductive autonomy) are vital tasks for public health. GNU Health gives importance to factors such as sexual preferences, partners, sexual practices or anticonceptive methods.
Safety Tab
[edit | edit source]
Safety refers to the awareness and education of risks and potential dangers in and around a home which may cause bodily harm, injury, or death to those residing in and around the physical structure of a home. It includes mitigating or preventing the unwanted dangers through testing, research and accepted standards of applications and practices.
The Safety tab covers the basic aspects of drive and home safety through a checklist that evaluates certain behaviors that impact on the risks of accidents. The following is an example where we can see that the pacient is a motorcycle rider that uses helmet and obeys traffic laws. When travelling by car, the patient uses seat belt and take safety measures for children. We can also state that this person takes security measures at home.
Note that the checklist is designed to uncheck the service that is lacking. All services are already tagged for an easier way to complete the list.
Functioning and Disability
|
|
This section applies to version 3.0 of GNU Health. |
Gynecology
Introduction to Gynecology
[edit | edit source]Gynecology is dedicated to the health of the female reproductive system. All gynecology related information can be stored in the OB/GYN tab in lower half of the Patient form.
General Tab
[edit | edit source]
This tab provides a general overview of the basic gynecological conditions of the patient. We can discriminate whether the patient is of a fertile age, is currently pregnant or is menopausal.
In the OB Summary section the key figures from the obstetrics history are displayed: number of Pregnancies, Premature Births, Abortions, and Stillbirths.
Below you can track the menstrual history of the patient with specific information including items such as date of last menstrual period (LMP), Length, Frequency or Volume.
Screening Tab
[edit | edit source]
Screening is the strategy of testing members of a population for certain diseases without signs or symptoms of that disease. The intention behind screening is to identify and treat patients at an early stage of the disease in the hope to reduce mortality and suffering.
In the Screening tab of the patient form, four gynecological tests can be documented:
- Breast Self-Examination: Check the box to indicate that the patient has performed such a test
- Mammography: Check the box to open the Mammography History (see below)
- PAP Test: Check the box to open the PAP Smear History (see below)
- Colposcopy: Check the box to open the Colposcopy History (see below)
Mammography History
[edit | edit source]The Mammography History allows you to document any number of mammographies, each with Date, Result (normal/abnormal), Remarks, Reviewed (name of health professional) and Institution.
PAP Smear History
[edit | edit source]The PAP Smear History allows you to document any number of Pap tests, each with Date, Result (Negative, ASC-US, ASC-H, ASG, LSIL, HSIL, AIS), Remarks, Reviewed (name of health professional) and Institution.
For more information about the Pap test, please refer to this Wikipedia article.
Colposcopy History
[edit | edit source]The Colposcopy History allows you to document any number of colposcopical examinations, each with Date, Result (normal/abnormal), Remarks, Reviewed (name of health professional) and Institution.
Obstetrics
Introduction to Obstetrics
[edit | edit source]
All information related to pregnancy, childbirth and the postnatal period can be found in the Obstetric History which can be accessed via the Related button in the Patient form. Due to the complexity of this information, it is not a section within the Patient form; to view or edit the obstetric history of a patient, click the Relate button in the toolbar and select Obstetric History instead. This will present you a list of all pregnancies of that patient.
The form for a single pregnancy has basically four sections:
- some general information (top and bottom of the form)
- a list with Prenatal Evaluations
- a list with Perinatal and Intrapartum Information
- a list with Puerperium Monitor records
General Pregnancy Information
[edit | edit source]The following fields allow you to store general information about a pregnancy:
- Patient ID: The name of the patient (link to a Patient record).
- Health Prof: The name of the doctor (link to a Person record).
- Institution: The health institution (link to a Institution record).
- Pregnancy #: The number of the pregnancy for this patient. GNU Health will prevent you from using the same number twice; however, it will not force you to start with number 1 or to use consecutive numbers.
- LMP: The date of the last menstruation period.
- Pregnancy Due Date: The expected date of birth for the baby (automatically calculated based on the LMP date).
- Current Pregnancy: Check this box to indicate that this is the most recent pregnancy. GNU Heath will make sure that you have only one current pregnancy per patient. If you uncheck this box, the fields End of Pregnancy and Result must be filled in, because GNU Health assumes that this pregnancy has ended.
- Fetuses: The number of fetuses.
- Monozygotic: Check this box if a pregnancy consists of more than one fetus and they are monozygotic.
- IUGR : To indicate a intrauterine growth restriction. Choose between symmetric and asymmetric.
- Warn: Check this box if the pregancy is (or was) not normal.
The following fields are only available if the box Current Pregnancy has been unchecked:
- Reverse: Check this box if the patient does not know the date of her last menstruational period. This will make the field Pr. Weeks visible (see below).
- End of Pregnancy: The date when the pregnancy has ended.
- Pr. Weeks: The duration of the pregnancy in weeks. This field is only visible if you check the Reverse checkbox (see above). Entering a value in this field will delete the date in the LMP field (see above).
- Result: Choose between Live birth, Abortion, Stillbirth and Status unknown.
- Home Birth: Check to indicate if a patient gave birth at home.
- BBA (Born Before Arrival): Check to indicate if a patient gave birth on her way to the health institution.
Prenatal Evaluations
[edit | edit source]
In the Prenatal Evaluations section of the Obstetrics History you can store the results of all evaluations before birth. For each evaluation the following fields are available:
General information:
- Date: The date of the evaluation
- Gestational Week: Calculated automatically
- Institution: The health instituation where the evaluation took place
- Health Prof: The health professional responsible for the evaluation
Information about the mother:
- Hypertension: Check this box if the mother has hypertension.
- Preeclampsia: Check this box if the mother has pre-eclampsia.
- Overweight: Check this box if the mother has overweight or obesity.
- Diabetes: Check this box if the mother has glucose intolerance or diabetes.
Information about the placenta:
- Placenta Previa: Check if applicable
- Placentation: Choose between Normal decidua, Accreta, Increta, Percreta
- Vasa Previa: Check if applicable
Information about the fetus:
- Fundal Height
- Fetus Heart Rate
- EFW (Estimated Fetal Weight)
- BPD (Biparental Diameter)
- HC (Head Circumference)
- AC (Abdominal Circumference)
- FL (Femur Length)
Perinatal and Intrapartum Information
[edit | edit source]The Perinatal Info section documents everything that happens immediately before or after the birth of the baby, that is, from week 28 of gestation until about the first seven days after birth. Each Perinatal and Intrapartum Information record has a Main tab and a Additional Info tab.
Main Tab
[edit | edit source]
- Gestational Weeks
- Admission: Date and time of admission
- Code
- Delivery Mode: Choose between "Vaginal – Spontaneous", "Vaginal - Vacuum Extraction", "Vaginal - Forceps Extraction", or "C-section".
- Fetus Presentation: Choose between "Cephalic", "Breech", or "Shoulder".
- Monitors: See "Perinatal Monitor Dialog" below
- Notes
- Institution
- Health Professional
Perinatal Monitor Dialog
[edit | edit source]
The Monitors section allows you to record all vital signs of both mother and fetus. Each Perinatal Monitor record provides the following values:
Mother:
- Date and Time
- Systolic Pressure and Diastolic Pressure
- Mother's Heart Frequency (as opposed to Fetus Heart Frequency - see below)
- Contractions
- Cervix Dilation
- Fundal Height
Fetus:
- Fetus Position: Choose between "Occiput / Cephalic Posterior", "Frank Breech", "Complete Breech", "Transverse Lie", or "Footling Breech".
- Fetus Heart Frequency (as opposed to Mother's Heart Frequency - see above)
Complications:
- Bleeding: Check if appropriate
- Meconium: Check if appropriate
Additional Info Tab
[edit | edit source]
The Additional Info tab provides the following fields:
- Dystocia
- Episiotomy
- Lacerations: Choose between "Perineal", "Vaginal", "Cervial", "Broad Ligament", "Vulvar", "Rectal", "Bladder", or "Urethral".
- Hematoma: Choose between "Vaginal", "Vulvar", or "Retroperitoneal".
- Placenta Anomalies: Check the Incomplete, Retained, and Abruptio Placentae boxes if appropriate.
Puerperium Monitor
[edit | edit source]
The Puerperium is the period beginning immediately after the birth of a child and extending for about six weeks. It is a time in wich the mother's body, including hormone levels and uterus size, returns to a non-pregnant state.
The Puerperium Monitor section allows you to document this phase. Each record provides the following data:
- Institution
- Health Professional
- Date and Time
- Fundal Height
- Lochia Amount: Choose between "normal", "abundant", or "hemorrhage".
- Lochia Color: Choose between "rubra", "serosa", or "alba".
- Lochia Odor: Choose between "normal" or "offensive".
Genetics
Overview
[edit | edit source]
One goal of genetic research is to identify genes related to human health and disease, and understand how these genes are influenced by a person's environment and lifestyle.
GNU Health genetic related packages integrate hereditary risks, family history and individual relevant genetic information. GNU Health aims to improve people's health by using the best approach to an individual including, combining and adjusting his / her lifestyle, nutrition, and other external factors with the person's unique genetic information. We also want to build the bridge between the clinician and the research community.
GNU Health genetic functionality brings together both the molecular and environmental bases of many health conditions, foundation for precision medicine.
GNU Health incorporates information from The National Center for Biotechnology Information (NCBI) as well as from the UniProt Consortium protein-related human health conditions and natural variants.
Genetic Information
[edit | edit source]For each individual, GNU Health stores the details on each of the genes / proteins that might be involved on a person health condition. This information can be accessed from the "Genetics" tab on the patient main form.
- Gene / Protein involved : Information about the gene. The gene code, official long name, chromosome and locus. It also provides information about the protein encoded and the link to UniProt protein code. On this example, the BRCA1 gene is associated to the protein code P38398, which can be reached directly from GNU Health clicking on the Protein URI.
- Natural Variant : The specific change at amino acid level that might make the person susceptible to a health condition. In the example above, the natural variant code is "VAR_007766", with a change of Tyrosine by Aspartic acid, at position 465 on the protein encoded by the BRCA1 gene.
- Phenotype : This field is used only if the person shows clinical signs associated to the expression of that gene / protein variant.
- Onset : Age (expressed in years) when the first clinical signs where reported
- Notes : Comments contextualized to the individual.
Most of the time, single natural variants do not result in disease. The health professional must take in consideration other factors of the individual (annotated in GNU health) that have an impact on her or his health, such as living conditions, nutrition or lifestyle. Biology plays a role on our health, but even more important to one's health are the environmental, external factors. The combination of biology and environment is the right way to approach personalized medicine.
Family History
[edit | edit source]
Gathering a complete and accurate family medical history is becoming more important as genetic medicine explains more diseases. As genes are passed down from generation to generation, medical conditions and diseases, or the increased risk for disease, tend to run in families due to gene abnormalities. Researchers and Health professionals now better understand how irregular genes are passed from one generation to the next and have an increased ability to test for hundreds of inherited illnesses.
GNU Health shows extra info related to diseases including the name, code and main disease category, genetic data and a free text box for adding relevant extra info.
Protein Related Diseases
[edit | edit source]GNU Health helps you searching the disease gene through a very useful searching filter with different categories such as affected chromosome, dominance, official long name and official symbol.

Natural Variants
[edit | edit source]
GNU Health has selected the relevant mutations that might be involved in health conditions. These natural variants are mapped to UniProt list of protein related diseases. Some of the fields on each Protein natural variant are :
- Gene involved
- Change in amino acid
- Phenotypes / susceptibility to health conditions related to this particular variant
In GNU Health we firmly believe that knowing the details at molecular level is key for personalized / precision medicine, that will help provide the best medical and therapeutical approach.
Surgery
Introduction to Surgery
[edit | edit source]GNU Health allows you to document all surgical procedures performed per patient and in a health institution overall. It uses the ICD-10 Procedure Coding System (ICD-10-PCS) of the World Health Organization (WHO) to identify the type of surgery.
ICD-10-PCS
[edit | edit source]The ICD-10 Procedure Coding System (ICD-10-PCS) is a World Health Organization medical classification used for procedural codes. When procedures are performed for specific diseases or disorders, the disease or disorder is not contained in the procedure code. There are no codes for procedures exclusive to aneurysms, cleft lip, strictures, neoplasms, hernias, etc. The diagnosis codes, not the procedure codes, specify the disease or disorder.
Surgeries per Patient
[edit | edit source]
To view and edit the surgeries of a specific patient, open the Patients form and switch to the Surgeries tab in the lower half of the form. There you will find a list of all surgical procedures this patient had (if any).
The list view provides the following information:
- Description
- Base Condition
- Urgency
- Date (including Time)
- Duration
- Operation Room
- Age of the patient at the time of the surgery
- Institution
To see the full record, double click on a list entry. This will bring up the Surgery form (see below).
To add a new Surgeries record, click the Relate button from the toolbar and choose Surgeries. This will open the list in a new window where you are able to add new records.
All Surgeries
[edit | edit source]In the Health → Surgeries section you will find a list of all surgeries in the system. This is the way to look for a surgery when you don't know the name of the patient, and it allows you to get a broader picture of what is going on in the operation room.
The columns of that list are the same as in the Patients form (see above). To see the full record, double click on a list entry. This will bring up the Surgery form (see below).
Surgeries Form
[edit | edit source]

For every surgery you can store the following information:
- Patient: Link to a Patient record.
- Date (including time)
- Age of the patient at the time of the surgery: Calculated based on the date of birth and the date of the surgery.
- Code
- Description
- Base Condition: Link to a Diseases record.
- Urgency: Choose between "Optional", "Required", "Urgent", or "Emergency".
- Operating Room: Link to an Operating Room record (see Health Institutions: Operating Rooms).
- Surgeon: Link to the health professional who was responsible for the surgery.
- Anesthesist: Link to the health professional who was responsible for the anesthesia.
- Patient Surgical Risk Assessment section:
- ASA PS: Choose between "PS1: Normal healthy patient", "PS2: Patients with mild systemic disease", "PS3: Patients with severe systemic disease", "PS4: Patients with severe systemic disease that is a constant threat to life", "PS5: Moribund patients who are not expeted to survive without the operation", or "PS6: A declared brain-dead patient who organs are removed for donor purposes".
- RCRI: See section "Revised Cardiac Risk Index" below.
- Mallampati Score: In anesthesia, the Mallampati score is used to predict the ease of intubation. It is determined by looking at the anatomy of the oral cavity. A higher Mallampati score is associated with more difficult intubation as well as a higher incidence of sleep apnea. Choose between "Class 1", "Class 2", "Class 3", or "Class 4".
- Preoperative Checklist section:
- Risk of Massive Bleeding: Check if appropriate
- Pulse Oximeter in Place: Check if appropriate
- Surgical Site Marking: Check if appropriate
- Antibiotic Prophylaxis: Check if appropriate
- Sterility Confirmed: Check if appropriate
- Procedures section: As we can see in the screenshot, GNU Health helps you searching the procedure using a filter with two different categories, code and long text.
- Code
- Notes
- Details / Incidents
- Anesthesia
- End
- Duration
- State: As long as the record is not signed, the state is "In progress". As soon as you click the Sign button, the state will change to "Done".
- Signed by: As soon as the record is signed it will show the name of the signing health professional where the Sign button was.
Revised Cardiac Risk Index (RCRI)
[edit | edit source]
The Revised Cardiac Risk Index (RCRI) is a method to indicate a patient's risk for perioperative cardiac complications. The RCRI Score and Class are entered via a dialog which allows you to indicate the following risk factors:
- High Risk Surgery
- Preoperative Diabetes
- History of Ischemic Heart Disease
- History of Cerebrovascular Heart Disease
- History of Congestive Heart Disease
- Preoperative Kidney Disease
Based on this data, GNU Health automatically calculates the Score (0 .. 6) and the RCRI Class (I .. IV).
Pediatrics
Introduction to Pediatrics Section
[edit | edit source]The Health → Pediatrics section has the functionality for pediatric patients. It focuses on the basic pediatric evaluation, making emphasis in the nutritional, growth and development of the infant and child.
Neonatology
[edit | edit source]

Creating a Newborn Record
[edit | edit source]When a baby is born, you create a new record in the Health → Pediatrics → Newborn section. This allows you to store information that is specific to newborns like APGAR scores, reflexes, neonatal signs and symptoms, and congenital diseases.
A Newborn record is linked to a Patient record which is linked to a Party record. So to store a baby in the system you have to create all three records, but this can easily be done from within the Health → Pediatrics → Newborn section:
- Create a Newborn record and fill in the DoB (date and time of birth), Sex and Newborn ID fields.
- In the Baby field, click on the Search a record icon (or press F2).
- In the search dialog, click the New button to create a Patient record.
- In the Patient form, click on the Search a record icon near the Person field (or press F2).
- In the search dialog, click the New button to create a Party record.
- In the Party form, enter the name of baby and fill in the other mandatory fields of the party record, then click the OK button to close the Party form.
- The baby's name is automatically filled into the Person field of the Patient record. Simply click the OK button to close the Patient form.
- The baby's name is automatically filled into the Baby field of the Newborn record. Simply click the Save button to store the record. At this point, the QR code is generated to be used for the wristband (see below).
- Continue to fill in additional information about the newborn as appropriate.
During the procedure described above, the PUID (Person Unique Identification Number) will be generated automatically, and the Date of Birth will be copied from the Newborn record. Please be aware that the Sex field in the Newborn and Person records are not synchronized, so make sure to enter the correct information in both fields.
Please note that the antenatal information and the puerperium remains in the Gynecology and Obstetrics section.
Newborn and Mother Wristbands
[edit | edit source]
To maximize security and identification of the newborn, the system assigns a newborn ID, and allows to print the four identification bands including QR codes to place it on the baby's and the mother's wrists and ankles. QR codes can be read from most mobile devices through the build-in camera, and they can store a lot more information than traditional bar codes.
To print a wristband for the baby, open the newborn form and click the Report button. Depending on your needs, choose the Newborn ID or Newborn ID - QR option. This will generate an ODT file and open it in your word processor (e.g. LibreOffice Write or Microsoft Word).

PSC (Pediatrics Symptom Checklist)
[edit | edit source]

GNU Health has incorporated the Pediatric Symptoms Checklist (PSC) developed by Dr. Michael Jellinek and Dr. Michael Murphy from the Massachusetts General Hospital. The authors define the PSC as "a brief screening questionnaire that is used by pediatricians and other health professionals to improve the recognition and treatment of psychosocial problems in children."
GNU Health uses the standard PSC form – to be completed by the parents – and will include the Y-PSC. The system automatically calculates the total PSC score, based upon form values. It also highlights the evaluations that might indicate a child psychosocial impairment. The PSC cutoff values will be localized to the different countries (Japan, Germany, Holland ...), so it will fit their recommended cutoffs.
Nursing
| This page or section is an undeveloped draft or outline. You can help to develop the work, or you can ask for assistance in the project room. |
Introduction to Nursing
[edit | edit source]The health_nursing module provides functionality to document Roundings (for inpatients) and Amulatory Care (for outpatients) alike. This functionality can be found in the Health → Nursing section of GNU Health.
Roundings
[edit | edit source]Main Tab
[edit | edit source]ICU Tab
[edit | edit source]Procedures Tab
[edit | edit source]Medication Tab
[edit | edit source]Stock Moves Tab
[edit | edit source]Ambulatory Care
[edit | edit source]Main Tab
[edit | edit source]The Main tab provides some basic information plus the procedures to be performed by the nurses during ambulatory care. The following fields are available:
- ID
- Health Professional
- Ordering Physician
- Patient
- Base Condition
- Related Evaluation
- Session #
- Start: Date and time
- Procedures, each consisting of a Code and Comments
- Summary
- Warning
- End: Date and time
- Next Session: Date and time
- State
Other Tab
[edit | edit source]The Other tab allows you to store some very basic parameters regarding the patients overall condition. The following fields are available:
- Temperature
- Systolic Pressure and Diastolic Pressure
- Heart Rate
- Respiratory Rate
- Oxygen Saturation
- Glycemia
- Evolution: Choose from "Initial", "Status quo", "Improving", or "Worsening".
Medication Tab
[edit | edit source]The Medication tab for ambulatory care is very much the same like the Medication tab for roundings. The only difference is that the location (in terms of stock management) is labelled Care Location (instead of Hospitalization Location).
Stock Moves Tab
[edit | edit source]The Stock Moves tab for ambulatory care is identical to the Stock Moves tab for roundings.
Imaging
Default imaging module
[edit | edit source]The default GNU Health imaging module (health_imaging) provides basic imaging support and workflow. Only basic, non-DICOM images are supported. No DICOM viewer is provided.
Creating a request
[edit | edit source]- Create draft request
- Wizard under Imaging > Dx Imaging - New

Imaging request wizard - Fill in:

Imaging request form - Patient
- Urgent or not
- Specific test(s)
- Requesting doctor
- Click Request
- Wizard under Imaging > Dx Imaging - New
- Generate order
- Find draft requests under Imaging > Dx Imaging - New > Draft

List of imaging requests - Click Request button on the draft request in the detailed view

Request imaging order - Request will now be under the Requested tab
- Find draft requests under Imaging > Dx Imaging - New > Draft


Generating results
[edit | edit source]- Click Generate Results button on the form (under Dx Imaging Requests)
- Fill in data (available under the Dx Imaging - Results menu item)
- Add images under the Images tab
- Add comments under the Comment tab
View results
[edit | edit source]Results are found under the Imaging > Dx Imaging - Results menu item.

Configuring available tests
[edit | edit source]Available tests can be configured under the Configuration > Dx Imaging menu item.
There are two sub-sections:
- Dx Imaging Test Types (MRI, Ultrasound, etc)
- Dx Imaging Tests (available tests)
Orthanc Integration
[edit | edit source]Introduction
[edit | edit source]This module (health_orthanc) provides a light integration between Orthanc DICOM servers and GNU Health. The module uses the robust REST API provided by Orthanc to synchronize patient and study information in GNU Health. Put simply, the code asks the Orthanc REST API what studies and patients it has and then saves that information locally in GNU Health. No image files are saved. No DICOM viewer provided.
Usage
[edit | edit source]A new dropdown menu titled Orthanc is available under Health > Imaging.

The menu has 2 sub-sections:
- Patients
- Studies
These sub-sections provide the list of studies and patients on the known Orthanc servers. You can filter and search normally. The views are generally read-only. On the list of Orthanc patients, however, some patients will be linked to local patients if the remote and local MRN/PUID match. Otherwise, Orthanc patients can be manually linked to a local patient by updating their patient field.
Note: When an imaging request is completed, the result can be directly linked to Orthanc studies through the new Studies tab under the Imaging > Dx Imaging - Results entry.

Administration
[edit | edit source]Server configuration
[edit | edit source]A new dropdown menu titled Orthanc is available under Health > Configuration

The menu has 2 sub-sections:
- Add Orthanc Server
- Servers
To add a new remote server click Add Orthanc Server. This will open a wizard that guides the user through adding a server:

- Fill in the label (must be unique), full domain, username, and password.
- Click Begin
After a short time, a success message should appear.

In case of invalid domains or credentials, there will be an error page instead of a success page.

The Servers page lists the current servers. Clicking on a specific server will show its credentials, validated status, and other important information. Of note, updating the domain, username, or password will trigger a background, remote check to validate the newly updated information.

Synchronization
[edit | edit source]The module provides a trytond-cron job which by default synchronizes all validated servers every 15 minutes. This can be changed through the Scheduled Actions configuration under Administration > Scheduler.


Servers can by manually synchronized by clicking the Sync button on their individual view.

Troubleshooting
[edit | edit source]Server(s) not automatically synchronizing
[edit | edit source]Make sure trytond-cron is running.
Inpatient Management
Introduction to Inpatient Management
[edit | edit source]If a patient is not only seeing a doctor (outpatient) but staying at the hospital (inpatient), you have to manage a lot more information about this patient. This information is stored in Hospitalizations records which can be found in the Health → Hospitalizations section of GNU Health. For each stay at the hospital you create a separate Hospitalizations record.
Note: To use the functionality described in this chapter you must have the modules health_inpatient and health_inpatient_calendar installed. (More information about modules.)
Admission Process
[edit | edit source]At the moment a patient is becoming an inpatient you basically need two things to handle the admission in GNU Health: a Patients record and a Hospitalizations record. If the Patients record does not exist already, create one first (for more information see the Patient Management chapter). Then, create a Hospitalizations record.
Administrative Data Tab
[edit | edit source]In the Administrative Data tab you can store the following data:
- Registration Code
- Patient: A link to a Patients record (mandatory).
- Hospital Bed: A link to a bed (mandatory). For details, see the "Assigning a Bed" section below.
- Hospitalization Date: mandatory
- Expected Discharge Date: mandatory
- Calendar Event
- Attending Physician
- Operating Physician
- Admission Type: mandatory
- Reason for Admission
- Extra Info
- Transfer History
Assigning a Bed
[edit | edit source]

For obvious reasons you can not hospitalize a patient without assigning him a free bed. This happens in the Hospital Bed field, where you link the Hospitalization record to a Bed record. (For more information about how to configure beds in your system, please refer to Health Institutions: Beds.)
There are mainly two ways to do this:
- If you already know the ID of the bed for this patient, then you can simply type this ID. As soon as you type, the system will offer you matching IDs to choose from.
- If you don't know the bed ID already and want to check for available beds first, click the button on the right hand side. This will present you a list with all beds including their availability status (free, occupied, reserved).
Once the bed is chosen the system will give you the option to confirm the admission and, if there is no error, the status will change to “confirmed”.
It is important to emphasize that at this point if we check the beds section, this particular bed we just assigned will have a status of “reserved” and that it will change into “occupied” at the moment that we confirm the admission.
Nutrition Tab
[edit | edit source]In the Nutrition tab you can find all information about eating habits and diets the patient must follow:
- Belief: Some religions have specific rules regarding the consumption of food. For example, Jews and Muslims are not allowed to eat pork meat. Therefore it may be helpful to indicate the belief of the patient here. Please note that this is a lookup field where you can select existing entries or create a new entry.
- Vegetarian: Choose from "None", "Vegetarian", "Lacto-Vegetarian", "Lacto-Ovo-Vegetarian", "Pescetarian", or "Vegan".
- Meals / Diet Program: Add any number of diets. Please note that the Diet field is a lookup field for a Therapeutic Diet record where you can select existing entries or create a new entry.
- Other Nutrition Notes / Directions
Managing Beliefes
[edit | edit source]A Belief record stores the following information:
- Belief: The name.
- Code: A code you might use in your health institution.
- Description: Information about any food related rules for this belief.
Managing Therapeutic Diets
[edit | edit source]A Therapeutic Diet record stores the following information:
- Diet Type
- Code
- Diet Description and Indications
Medication Plan Tab
[edit | edit source]In the Medication Plan tab there is a list with all medications (i.e. the application of medicaments) for a patient during his or her hospitalization. Each entry in this list is a Inpatient Medication record, consisting of the following data:
General Info tab:
- Medicament
- Indication
- Treatment Period Start and Treatment Period End
- Administration Form
- Administration Route
- Dosage
- Administration Times
Extra Info tab:
- Status: Active, Course Completed and/or Discontinued
- Adverse Reactions and Notes
- Log History: Each entry records Date & Time, Health Professional, Dose, Dose Unit, and Remarks.
Care Plan Tab
[edit | edit source]In the Care Plan tab there are simply two text fields allowing you to enter all information related to the Nursing Plan and the Discharge Plan.
Intensive Care Unit
Introduction to the ICU Functionality
[edit | edit source]The module health_icu provides basic functionality for Intensive Care Units (ICU). It covers both Intensive Care medicine and the processes related to the Intensive Care Unit, such as procedures and stock management.
The functionality is divided into two major sections:
- Patient ICU Information
- Patient Roundings
Patient ICU Information
[edit | edit source]All information about a patient that is related to the ICU is managed in the Health → Hospitalization → Intensive Care → Patient ICU Info section. Every Patient ICU Info record is linked to a Hospitalizations record (not to a Patients record directly).
The Patient ICU Info form allows you to have an idea of the patient status, days since admission at ICU and use of mechanical ventilation, among other functionalities.
By clicking the Relate button you can directly create and evaluate the following data for a given patient:
- Acute Physiology and Chronic Health Evaluation II (APACHE II)
- Electrocardiograms (ECG)
- Glasgow Coma Scale (GCS)
APACHE II
[edit | edit source]The Acute Physiology and Chronic Health Evaluation II (APACHE II) is a classification system for the severity of disease. It is applied within 24 hours of admission of a patient to an ICU. A score between 0 and 71 is computed based on several measurements, where higher scores correspond to more severe disease and a higher risk of death. (Read more about APACHE II.)

The APACHE II form in GNU Health contains the following information:
- Registration Code: Link to the inpatient record of the patient (mandatory).
- Date: Date and time of the evaluation (mandatory).
- Age
- Temperature
- MAP
- Heart Rate
- Resporatory Rate
- FiO2
- PaO2
- PaCO2
- A-a DO2
- pH
- Sodium
- Potassium
- Creatinine
- Hematocrit
- WBC
- ARF: Check if appropriate.
- Chronic condition: Check if appropriate.
- Score: The resulting APACHE II score (calculated automatically).
ECG
[edit | edit source]In the Health → Hospitalizations → Intensive Care → ECG section of GNU Health you can document any electrocardiograms taken from a patient.

The ECG form provides the following information:
- Registration Code: Link to the inpatient record of the patient (mandatory).
- Date: Date and time when the ECG was taken (mandatory). Please note: Currently you have not access to this field in the form view, only in the list view.
- Lead: Choose between I, II, III, aVF, aVR, aVL, V1, V2, V3, V4, V5, or V6.
- Axis: Choose between "Normal axis", "Left deviation", "Right deviation", or "Extreme right deviation" (mandatory).
- Rate: (mandatory)
- Pacemaker: Choose between "Sinus node", "Atrioventricular", or "Purkinje" (mandatory).
- Rhythm: Choose between "Regular" or "Irregular" (mandatory).
- PR
- QRS
- QT
- ST Segment: Choose between "Normal", "Depressed", or "Elevated" (mandatory).
- T Wave Inversion
- Interpretation: (mandatory)
At the bottom of the form you can add an image of the electrocardiogram plot.
GCS
[edit | edit source]The Glasgow Coma Scale (GCS) is a standard to evaluate the level of consciousness of neurological patients. Based on three factors - eye opening, verbal response, and motor response - an overall score between 3 and 15 is calculated. A higher value indicates a higher level of consciousness and a better chance to recover. (Read more about the Glasgow Coma Scale.)

The GCS form in GNU Health provides the following fields:
- Registration Code: Link to the inpatient record of the patient (mandatory).
- Date: Date and time when the GCS was evaluated (mandatory).
- Eyes: Choose between "1: Does not open eyes", "2: Opens eyes in response to painful stimuly", "3: Opens eyes in response to voice", or "4: Opens eyes spontanously" (mandatory).
- Verbal: Choose between "1: Makes no sounds", "2: Incomprehensible sounds", "3: Utters inappropriate words", "4: Confused, disoriented", "5: Oriented, converses normally" (mandatory).
- Motor: Choose between "1: Makes no movements", "2: Extension to painful stimuli (decerebrate response)", "3: Abnormal flexion to painful stimuli (decorticate response)", "4: Flexion / Withdrawal to painful stimuli", "5: Localizes painful stimuli", or "6: Obeys commands" (mandatory).
- Glasgow: The resuling score (calculated automatically).
Patient Rounding
[edit | edit source]The health_icu module adds the ICU tab to the Roundings form (which can be found in the Health → Nursing → Roundings section). In this assessment (that can have different frequencies, depending on the center policies), you should enter the basic information starting at the Main tab first; once you are done with this tab, switch to the ICU tab. The assessment is divided into the following sections:
Neurologic
[edit | edit source]((Details to be added))
Respiratory (incl. X-Ray)
[edit | edit source]((Details to be added))
The ICU rounding allows to place an X-ray (or other imaging diagnosis image). Unlike attachments related to the object, that you can also use, this image is even more contextual and graphic. Of course, this image should be very recent to the evaluation itself.
Drainages
[edit | edit source]((Details to be added))
Chest drainages are input from a One2Many widget. This permits to have as many as in the patient, and with their own characteristics.
Cardiovascular
[edit | edit source]((Details to be added))
Blood and Skin
[edit | edit source]((Details to be added))
Digestive and Abdomen
[edit | edit source]((Details to be added))
Neglected Tropical Diseases
Introduction to Neglected Tropical Diseases
[edit | edit source]Neglected tropical diseases (NTD) are a group of infections which are common in developing regions of Africa, Asia, and the Americas. They are medically diverse in terms of pathogens, prevention measures, and treatments. Compared to the big three diseases targeted by the UN Millennium Development Goal No. 6 (HIV/AIDS, tuberculosis, and malaria), NTDs get less funding for treatment and research. The World Health Organisation (WHO) has prioritized 17 neglected tropical diseases which are common in almost 150 countries, affecting more than 1.4 billion people. (Read more about neglected tropical diseases.)
Note: To use the functionality described in this chapter you must have the modules health_ntd, health_ntd_chagas, and health_ntd_dengue installed. (More information about modules.)
Chagas Disease
[edit | edit source]The Chagas disease is caused by a protozoa and spread by contact with infected feces of the triatomine bug. The protozoan can enter the body via the bug's bite, skin breaks, or mucous membranes. Infection can result from eating infected food and coming into contact with contaminated bodily fluids. There are approximately 15 million people infected with Chagas disease. The chance of morbidity is higher for immuno-compromised individuals, children, and elderly, but very low if treated early. The Chagas disease can be diagnosed through a serological test (although the test is not very accurate) and treated etiologically or with drugs (although the drugs have severe side effects). (Read more about Chagas disease.)
Chagas Related Surveys
[edit | edit source]
The module health_ntd_chagas adds the Chagas DU Survey form to GNU Health. This allows you to evaluate a domiciliary unit for risks regarding the Chagas disease. You can find this survey by opening the Domiciliary Units form and choosing the Chagas DU Survey via the Relate button in the toolbar.
The Chagas DU Survey allows to store the following information about a domiciliary unit:
- Survey Code: A code to identify the survey (created automatically).
- DU: The domiciliary unit which was evaluated (set automatically).
- Date: The date of the evaluation.
- Status: Choose from "Initial", "Unchanged", "Improved", or "Worsen" to give a summary of your findings.
Presence of triatomines:
- Triatomines: Check if triatomines were found.
- Nymphs: Check if nymphs were found.
- Domiciliary: Check if triatomines were found in the house.
- Peri-Domiciliary: Check if triatomines were found around the house.
- Vector: Choose from "T. infestans", "T. brasiliensis", "R. prolixus", "T. dimidiata", or "P. megistus".
Areas to improve:
- Roof: Check if appropriate.
- Walls: Check if appropriate.
- Floor: Check if appropriate.
- Peri-domiciliary: Check if the situation around the house (rather than the house itself) needs improvement.
Preventive measures:
- Bug Traps: Check if bug traps are in place.
- Fumigation: Check if the domiciliary unit has been fumigated.
- Insecticide Paint: Check if the domiciliary unit has been treated with insecticide-containing paint.
Chagas Related Laboratory Tests
[edit | edit source]The module health_ntd_chagas also adds some Chagas disease related tests to the list of available laboratory tests, including:
- CHAGAS BLOOD SMEAR
- CHAGAS ELISA
- CHAGAS INDIRECT IMMUNOFLUORESCENCE - IFA
- CHAGAS PCR
- CHAGAS STROUT
- CHAGAS XENODIAGNOSIS
Dengue Fever
[edit | edit source]Dengue fever is caused by a virus transmitted via mosquito bites. The fever is usually not fatal, but infection with one of four serotypes can increase later susceptibility to other serotypes, resulting in a potentially fatal disease called severe Dengue. There are 50–100 million dengue fever infections annually in Asia, Latin America, and Northern Australia. No treatment for either Dengue or severe Dengue exists beyond palliative care. (Learn more about dengue fever.)
Dengue Related Surveys
[edit | edit source]
The module health_ntd_degnue adds the Dengue DU Dengue form to GNU Health. This allows you to evaluate a domiciliary unit for risks regarding dengue fever. You can find this survey by opening the Domiciliary Units form and choosing the Dengue DU Survey via the Relate button in the toolbar.
The Dengue DU Survey allows to store the following information about a domiciliary unit:
- Survey Code: A code to identify the survey (created automatically).
- DU: The domiciliary unit which was evaluated (set automatically).
- Date: The date of the evaluation.
- Status: Choose from "Initial", "Unchanged", "Improved", or "Worsen" to give a summary of your findings.
Presence of larvae:
- Larvae: Check if aedes aegypti larvae were found.
- Domiciliary: Check if larvae were found in the house.
- Peri-Domiciliary: Check if larvae were found around the house.
Areas to improve:
- Tyres: Check if appropriate.
- Animal Water Containers: Check if appropriate.
- Flower Vase: Check if appropriate.
- Potted Plants: Check if appropriate.
- Tree Holes: Check if appropriate.
- Rock Holes: Check if appropriate.
Preventive measures:
- Ovitraps: Check if ovitraps are in place.
- Fumigation: Check if the domiciliary unit has been fumigated.
General:
- Notes
- Next survey: The date of the next evaluation of this domiciliary unit.
Dengue Related Laboratory Tests
[edit | edit source]The module health_ntd_dengue also adds some dengue fever related test to the list of available laboratory tests, including:
- DENGUE ELISA
- DENGUE IgG
- DENGUE PCR
- DENGUE PRNT
Reporting
Introduction
[edit | edit source]The Reporting module provides an easy interface for gathering summary statistics on a variety of metrics, including patients, health professionals, and more.
Demographics Summary
[edit | edit source]This entry generates a demographics report within the provided timeframe.
To generate the report, click the menu entry and a new window should appear. Select the institution and relevant dates for the report, then click Open. The generated report should open in your default word processor.
The report includes a patient census, age pyramid, and more.
Patient Evaluations
[edit | edit source]This view provides a summary of all patient evaluations on the system. As it is a readonly list view, you cannot edit nor add to this information.
Top Diseases
[edit | edit source]This entry generates a disease report outlining the number of cases of a certain disease group within the provided timeframe.
To generate the report, click the menu entry and a new window should appear. Select the disease group (e.g., vascular), relevant dates for the report, number of records, and click Open.
A list should appear with diseases and cases. To see a graph view, use the Switch view button.
Note: At the moment, many diseases do not have defined groups. Consequently, the report is invariably sparse and of limited value but hopefully that will change soon!
Injury Surveillance System Registration
[edit | edit source]This view provides a summary report of the Injury Surveillance System (ISS), including injuries, patients, and more. As it is a readonly list view, you cannot edit nor add to this information.
Specialties by health professionals
[edit | edit source]As the title suggests, this view provides a list of health professionals and their specialties. As it is a readonly list view, you cannot edit nor add to this information.
Evaluations Report
[edit | edit source]This entry generates a report of patient evaluations grouped by health professional, specialty, or sector.
To generate the report, click the menu entry and a new window should appear. Select the relevant dates, grouping (by health professional, specialty, etc.), and click Open.
A list should appear of your selected grouping and correspending evaluations. To see a graph view, use the Switch view button.
Demographics
| This page or section is an undeveloped draft or outline. You can help to develop the work, or you can ask for assistance in the project room. |
Epidemiology
| This page or section is an undeveloped draft or outline. You can help to develop the work, or you can ask for assistance in the project room. |
Installation
The corresponding official chapter: https://docs.gnuhealth.org/his/techguide/installation/vanilla.html |
Requirements
[edit | edit source]The latest stable GNU Health Federation ecosystem uses these main resources:
- Operating system: GNU/Linux or FreeBSD for the server.
- RDBMS Database: PostgreSQL >= 10.x
- Document-oriented Database for Health Information System / Person Master Index: PostgreSQL :>= 10.x
- Python: >= 3.6
- uwsgi : >=2.0
- Flask : 1.0
- Tryton 6.0
- Bash shell
- PIP for Python 3, verify through:You should see python3, as in:
pip --versionpip x.x.x from /usr/local/lib/python3.6/site-packages (python 3.6)
If you see python2.x then stop and get pip for Python 3.
Errata
[edit | edit source]Before you continue, please read the Errata chapter for the latest issues involved the installation or upgrade procedure.
Installing GNU Health on GNU/Linux and FreeBSD
[edit | edit source]Operating System requirements
[edit | edit source]The following table contains the instructions to setup your operating system for a standard GNU Health installation. The operating systems and their version shown in the list have been tested using the instructions for each OS.
The installation instructions for the different operating systems and distributions have been done on a fresh installation. For simplicity's sake, the server environment was installed without a GUI. No firewall was configured (we will cover this on the security section), and OpenSSH server was installed.
The instructions – written here – have been applied and verified with the following operating systems as shown below.
Verify that you are using the operating system version documented on the following table |
| Operating System | Version | Link | Notes |
|---|---|---|---|
| openSUSE | Leap 15.4 | openSUSE setup | |
| FreeBSD | FreeBSD 12.1 | FreeBSD setup | |
| CentOS | 7.8 | CentOS setup | |
| Ubuntu | 20.04 | Ubuntu setup | |
| Armbian | 20.05 | Armbian setup | |
| Debian | 10.1 | Debian setup |
Setting up Network Time Protocol (NTP)
[edit | edit source]In order to properly run GNU Health, you need to make sure that the time on both the server (database and central instance) and clients are properly set and in sync. The best way to do this is to keep your clock synchronized with a NTP Server .
This is a critical step, not only for the smooth functioning of GNU Health, but also because many documents will have a timestamp associated with them that can have legal value.
Creating the Operating System User
[edit | edit source]Do this step only if you didn't create the user during the installation of the operating system. |
The following steps will create the GNU Health operating system user. Please note that many operating systems give you the option to create a regular user at installation time. If you already created the "gnuhealth" operating system user, you can skip this section, otherwise, create it now.
Run the following command as root:
adduser gnuhealth
Note: If your Operating System doesn't include the adduser command, you can use the useradd command:
useradd -m gnuhealth
Verify PostgreSQL authentication method
[edit | edit source]Note: You can skip this section if you made a standard installation on FreeBSD
PostgreSQL uses different authentication methods (MD5, ident, trust ... ). Depending the Operating System, the postgreSQL server authentication method will vary.
The standard GNU Health installation uses the trust authentication method, so you need to check the postgreSQL authentication file configuration.
Locate the pg_hba.conf file and verify that the trust method is set.
The location of this configuration file varies across operating systems; under UNIX/Linux, the full pathname of the file can be obtained with the following command, to be executed as root:
su - postgres -c "psql -t -P format=unaligned -c 'show hba_file'"
You may need to start the postgres server at least one time as this file may be created during first startup. Usually this file is located at /etc/postgresql/10/main or /var/lib/pgsql/data.
An example configuration file entry specifying use of the trust method is given in the following line:
local all all trust
The following example in particular may address issues with establishing a working database connection as reported in the context of the creation of the GNU Health database upon first use of the Tryton client (see further down; Symptom: the "Create" button is not displayed):
host all all 127.0.0.1/32 trust
host all all ::1/128      trust
Make sure you edit the file as user 'postgres', not root. Otherwise, postgres may have trouble reading the changed file. After any changes to the file, the postgreSQL server needs to be restarted.
Many authentication errors (e.g., database connection errors) arise because of not having correctly configured this file. Of course, you can use other authentication methods, and you can adapt the tryton / GNU Health configuration file to each of them. For the sake of simplicity, we based the documentation and sample files in this book on one specific method (trust).
Make sure you restart your postgresql server:
sudo service postgresql restart
Creating the Database User
[edit | edit source]The following command switches to the postgres administration user and gives permissions to your newly created gnuhealth administrator:
Execute as root:
su - postgres -c "createuser --createdb --no-createrole --no-superuser gnuhealth"
Downloading and Installing GNU Health
[edit | edit source]Do the following steps with your newly created gnuhealth user, do not use root. |
Running the GNU Health Installer
[edit | edit source]Become user gnuhealth
[edit | edit source]su - gnuhealth
cd $HOME
Download GNU Health from GNU.org
[edit | edit source]wget https://ftp.gnu.org/gnu/health/gnuhealth-latest.tar.gz
Verify the package signature
[edit | edit source]First get the signing key if you haven't done so:
gpg --recv-key --keyserver keyserver.ubuntu.com 0xC015E1AE00989199
The key is issued by Luis Falcon (meanmicio at GNU) <falcon@gnu.org> and its fingerprint is ACBF C80F C891 631C 68AA 8DC8 C015 E1AE 0098 9199. This information can be seen issuing:
gpg --with-fingerprint --list-keys 0xC015E1AE00989199
Then, verify the signature, using the matching version number for the latest. For instance, if latest GNU Health version is 4.0.4, then
Download the detached signature:
wget https://ftp.gnu.org/gnu/health/gnuhealth-4.0.4.tar.gz.sig
Verify the package using the detached signature:
gpg --verify gnuhealth-4.0.4.tar.gz.sig gnuhealth-latest.tar.gz
If the file is correctly validated, the output should be something like:
 gpg: Signature made Sat 01 Jul 2017 11:06:25 PM WEST
 gpg:                using RSA key ACBFC80FC891631C68AA8DC8C015E1AE00989199
 gpg: Good signature from "Luis Falcon (GNU) <falcon@gnu.org>" [ultimate]
 gpg:                 aka "Luis Falcon (GNU Health) <lfalcon@gnusolidario.org>" [ultimate]
The important part is the Good signature from "Luis Falcon ....". The WARNING means that, even if the file and signature are OK and validated correctly, you aren't trusting that key; and it's OK. You can read more about this in The GNU Privacy Handbook, Chapter 3. Key Management.
Uncompress GNU Health HMIS package
[edit | edit source]tar xzf gnuhealth-latest.tar.gz
Change to the GNU Health installation directory matching your version
[edit | edit source]cd gnuhealth-4.0.4
Download the latest GNU Health installer
[edit | edit source]wget -qO- https://ftp.gnu.org/gnu/health/gnuhealth-setup-latest.tar.gz | tar -xzvf -
Run the GNU Health installer
[edit | edit source]bash ./gnuhealth-setup install
Debian Family: How do I solve "error: externally-managed-environment" everytime I use pip3?
- OR remove file
/usr/lib/python3.x/EXTERNALLY-MANAGED, - OR use
pip's argument--break-system-packages, - OR add following lines to
~/.config/pip/pip.conf:[global]break-system-packages = true
Enable the BASH environment for the GNU Health admin
[edit | edit source]Finally, enable the BASH environment for the gnuhealth user.
source ${HOME}/.gnuhealthrc
Activate Network Devices for the JSON-RPC Protocol
[edit | edit source]The Tryton GNU Health server listens to localhost at port 8000, not allowing direct connections from other workstations. If necessary, enter the following:
editconf
You can edit the parameter listen in the [web] section, to activate the network device so workstations in your net can connect. For example, the following block
[web]
listen = *:8000
will allow to connect to the server in the different devices of your system.
Setting up a Local Directory for Attachments
[edit | edit source]By default, Tryton uses a system-wide directory to store the attachments. It is advisable, in GNUHealth to keep the attachments in the gnuhealth user space.
If necessary, edit the server configuration file trytond.conf and enter the attach directory under the [database] section, for instance:
editconf
[database]
path = /home/gnuhealth/attach
Since debian systems connect to database over a UNIX socket, add an extra / under the [database] section, for instance:
[database]
uri = postgresql:///localhost:5432
Configuring the log file (optional)
[edit | edit source]The way the server logs and tracks events is based on a log configuration file, that resides in the config directory "${GNUHEALTH_DIR}"/tryton/server/config/.
A default version is shipped, called gnuhealth_log.conf. If necessary, enter the following into gnuhealth_log.conf:
[formatters]
keys: simple

[handlers]
keys: rotate, console

[loggers]
keys: root

[formatter_simple]
format: [%(asctime)s] %(levelname)s:%(name)s:%(message)s
datefmt: %a %b %d %H:%M:%S %Y

[handler_rotate]
class: handlers.TimedRotatingFileHandler
args: ('/home/gnuhealth/gnuhealth/logs/gnuhealth.log', 'D', 1, 30)
formatter: simple

[handler_console]
class: StreamHandler
formatter: simple
args: (sys.stdout,)

[logger_root]
level: WARNING
handlers: rotate, console
In this example (and in the standard file) the log file is written in the default logs directory. You can change it to fit your specific installation.
In order to use logging, you need to provide the --logconf option, along with the path to the log configuration file gnuhealth_log.conf as argument, when invoking the Tryton server in the next section (e.g. trytond --logconf "${GNUHEALTH_DIR}"/tryton/server/config/gnuhealth_log.conf).
For more information, check the following resources:
- Python logging facility logging tutorial: https://docs.python.org/3/howto/logging.html#logging-basic-tutorial
- Tryton Server logging documentation: http://trytond.readthedocs.org/en/latest/topics/logs.html
Initialize the database instance
[edit | edit source]Create the database
createdb health
| database name | |
|---|---|
| We use "health" as an example, choose the name of your database, but keep it short and only alphanumeric chars |
Change to your newly installed system (use the alias cdexe):
cdexe
and initialize the instance:
python3 ./trytond-admin --all --database=health
You will be asked to provide a password for the "admin" user.
If everything goes well, you are ready to start the GNU Health HMIS node server.
Start the GNU Health HMIS node
cd
./start_gnuhealth.sh
| Logconf path | |
|---|---|
| As mentioned in the previous section, use the --logconf [path] option to specify the path of the logging configuration |
You can execute the GNU Health server in the background (using nohup ./start_gnuhealth.sh &) and check the output in the file nohup.out.
Creating a Systemd service for the GNU Health server
[edit | edit source]If you use the standard installation method, you can use the following scripts to automate the startup/stop of the GNU Health instance using systemd services.
GNU Health service unit file
[edit | edit source]Create the GNU Health Unit file under /usr/lib/systemd/system/gnuhealth.service:
For Ubuntu 18.04 LTS users: /etc/systemd/system/gnuhealth.service:
[Unit]
Description=GNU Health Server
After=network.target

[Service]
Type=simple
User=gnuhealth
WorkingDirectory=/home/gnuhealth
ExecStart=/home/gnuhealth/start_gnuhealth.sh
Restart=on-abort

[Install]
WantedBy=multi-user.target
Starting and Stopping the GNU Health service
[edit | edit source]You can issue the commands:
systemctl start gnuhealth
or:
systemctl stop gnuhealth
Enable the service to start at boot time
[edit | edit source]If you want to automatically start the GNU Health server whenever you start the operating system, you can enable the service with the following command:
systemctl enable gnuhealth
Using a WSGI Server for GNU Health Hospital Management Component
[edit | edit source]GNU Health HMIS uses by default the werkzeug server. This should be valid only for development scenarios. For production servers, GNU Health HMIS will benefit from a Web Server Gateway Interface (WSGI), such as uWSGI and a web server that supports reverse proxy, as NGINX.
Your Trytond configuration file
[edit | edit source]Edit your trytond.conf file to meet the requirements. You can edit this file directly using the alias "editconf" with the gnuhealth user.
This sample enables access both to the GTK and webclient.
[database]
uri = postgresql://localhost:5432
path = /home/gnuhealth/attach

[web]
listen = localhost:8000
root = /home/gnuhealth/sao/package
uWSGI configuration file
[edit | edit source]This is a sample for the gnuhealth uwsgi .ini ("gh.ini") file. Make sure NINGX user has the appropriate permissions to the uwsgi socket.
[uwsgi]

master = true
processes = 5
plugins = python3

socket = /tmp/uwsgi.sock
chmod-socket=660

module=trytond.application:app
Configuring NGINX as a reverse proxy for GNU Health HMIS
[edit | edit source]In this sample, NINGX will listen to 8100 in HTTPS mode, to requests coming from the web clients. It also listens to port 8000 for the native GTK client.
# Virtual host for demo web client using TLS and listening in 8100
    server {
        listen       8100 ssl;
        server_name  your_hostname;

        ssl_certificate      /path/to/your/gnuhealth.crt;
        ssl_certificate_key  /path/to/your/gnuhealth.key;

        ssl_session_cache    shared:SSL:1m;
        ssl_session_timeout  5m;

        ssl_ciphers  HIGH:!aNULL:!MD5;
        ssl_prefer_server_ciphers  on;

        location / {
            include         uwsgi_params;
            uwsgi_pass      unix:/tmp/uwsgi.sock;
        }

    # Virtual host for GNU Health GTK Client on 8000
    server {
        listen       8000;

        location / {
            include         uwsgi_params;
            uwsgi_pass      unix:/tmp/uwsgi.sock;
        }
    }
}
Putting everything together and booting the GNU Health server
[edit | edit source]Once you have configured the three elements (Trytond server, uwsgi and NGINX) is time to put in into production
- Make sure your NGINX server is running:
- Start uWSGI with the corresponding gnuhealth .ini file:
uwsgi $HOME/gh.ini --enable-threads &Installation of the GNU Health Client
[edit | edit source]Requirements
[edit | edit source]openSUSE
[edit | edit source]Tested on openSUSE Leap 15.1 and Tumbleweed
- Disable Non-OSS repositoriess
- Desktop with KDE Plasma
- Create user "gnuhealth"
- Login as "gnuhealth" user
- Get the required packages / dependencies
$ sudo zypper install cairo-devel pkg-config python3-devel gcc gobject-introspection-devel python3-cairo python3-gobject-cairo python3-gobject-Gdk typelib-1_0-Gtk-3_0
GNU Health Client installation with pip3
[edit | edit source]- Update PATH. To make changes permanent, add this line in $HOME/.bashrc
$ export PATH=$HOME/.local/bin:$PATH
- Update pip3
$ pip3 install --upgrade --user pip
- Install GNU Health client
$ pip3 install --user --upgrade gnuhealth-client
The following command will boot your GNU Health client:
gnuhealth-client
Alternative Methods
[edit | edit source]System Packages
[edit | edit source]Instead from source as described above, you can install the GNU Health Client from pre-build packages as well. openSUSE offer packages that you can install with your systems package manager. Make sure you get the current gnuhealth-client version 4.0.x
Microsoft Windows and macOS
[edit | edit source]As GNU Health is free/libre software, developed primarily for free/libre operating systems and with the philosophy of free software in mind, it is recommended to use free/libre software with GNU Health, and GNU/Linux or other free/libre operating system for the client. The development of all GNU Health components (server, client, plugins, Thalamus, GNU Health Federation) is done and focused on Free / Libre operating systems. |
If you use Microsoft Windows or macOS, you can try using the Tryton 6.0 client, which may be compatible with GNU Health 4.0. Keep in mind that the windows client does not have the GNU Health commands, nor the plugins like GNU Health GNUPG crypto or GNU Health Camera and Federation Resource Locator.
Download the Tryton client executable (Windows) and follow the instructions.
Logging into the Application
[edit | edit source]
Now that you're back at the login screen, you'll notice that the selected profile is the one you've just created. Fill in the login form:
- User name: the one you used previously (usually admin)
- Password: the one entered twice in the previous section
Login credentials for The Demo database: GNU Health/The Demo database#Connection to the GNU Health HMIS and LIMS
Installing the Default Modules
[edit | edit source]
From this point on, you will use the client for almost every process. Start with the installation of the basic functionality:
- After you've created the database, the system will ask you to create some new users. You can skip this step for now.
- You are then presented with a list of modules that will provide the functionality you desire. If you don't see the Modules window, navigate to it on the left side: Administration → Modules → Modules.
- Select the health_profile module, and click on Mark for installation.
Click on the Action icon (two cogwweels, previous versions used a blue rotated square) and select Perform Pending Installation/Upgrade:

Step 5: Perform pending installation/upgrade after clicking on the Action icon Tryton will automatically select all the dependent modules required for the installation:

Step 5/6: Packages to be installed, Start upgrade button Click on Start Upgrade. This process will take a while, depending on the computer where GNU Health is being installed on. Once it's done, the following message appears.

Step 6, system upgrade finished


Creating a Company
[edit | edit source]The next thing you need to do is to create the initial company, that will be your health center. You will be presented with a wizard to create it.

Press F3 to create a new company.
Note: At the party form, please make sure you set the institution attribute. You will link this company to your main health institution later on. Please refer to the screenshot provided in this section for details.

Disabling demo users in production environments
[edit | edit source]For security reasons, you must deactivate demo users in production environments. |
GNU Health comes with a set of pre-defined users for demo purposes. They all have the prefix demo_ (demo_doctor, demo_front_desk, demo_nurse... ).
To deactivate the users:
- Navigate to Administration > Users > Users in the sidebar.
- In filters, choose
Login: demo_andActive: True - Unset the "active" flag of each of them (untick the "Active" boxes). The demo users are now de-activated in your environment.

Look at the screenshot captioned Deactivation of demo users in production environments for an example (the Active checkboxes haven't been unticked).
Customizing the GNU Health Client
[edit | edit source]For GNU/Linux and other free operating systems, the GNU Health GTK client configuration file can be found at:
$HOME/.config/gnuhealth/<VERSION>/gnuhealth-client.conf
For example:
$HOME/.config/gnuhealth/4.0/gnuhealth-client.conf
Using a custom greeter / banner
[edit | edit source]You can customize the login greeter banner to fit your institution.
In the section [client], include the banner parameter with the absolute path of the png file.
Something like:
[client]
banner = /home/yourlogin/myhospitalbanner.png
The default resolution of the banner is 500 x 128 pixels. Adjust yours to approximately this size.
Completion
[edit | edit source]Congratulations! You have completed the initial installation of GNU Health. In the next chapter we will discuss how to add functionality by installing additional modules.
Administration
| This page or section is an undeveloped draft or outline. You can help to develop the work, or you can ask for assistance in the project room. |
About the Administration Section
[edit | edit source]At the lower end of the main navigation you will find the Administration section. This is the area where system administrators configure users (and their access rights), data structures (like models and fields), modules, elements of the user interface, or languages.
While the Health → Configuration section is specific to GNU Health, the Administration section is a basic part of Tryton. And while the Configuration section will be managed by medical or administrative staff of a health institution, the Administration section is under the control of IT staff.
Overview
[edit | edit source]The Administration sections consists of the following sub-sections:
- User Interface
- Models
- Sequences
- Scheduler
- Localization
- Modules
- Users
- Countries
- WebDAV
Please refer to the following chapters of this book for details about these sub-sections.
User Interface
| This page or section is an undeveloped draft or outline. You can help to develop the work, or you can ask for assistance in the project room. |
Models
| This page or section is an undeveloped draft or outline. You can help to develop the work, or you can ask for assistance in the project room. |
Sequences
| This page or section is an undeveloped draft or outline. You can help to develop the work, or you can ask for assistance in the project room. |
Scheduler
| This page or section is an undeveloped draft or outline. You can help to develop the work, or you can ask for assistance in the project room. |
The localization utility allows you to translate any untranslated module of the software. You will get an interface with the original name (in english) and a field to fill with the translation. Once you've finished you can save the registry as you can save any other registry in the software.
Localization
Translating GNU Health
[edit | edit source]The language of the GNU Health user interface is controlled through gettext language packs.
Language packs are are managed, stored and distributed through an online translation platform. This makes maintaining translations easier and faster, and it makes your GNU Health installation leaner, since it contains only the languages needed by your health institution.
The official GNU Health translation portal is now hosted at Weblate
There is a mailing list for all translation related discussions at https://lists.gnu.org/mailman/listinfo/health-i18n . If you are a GNU Health translator, you should subscribe to this mailing list.
When translating GNU Health to your language, please start from the health module which contains the core of GNU Health.
Installation of Language Packs
[edit | edit source]We will go through an example on how to enable the Spanish language and to install the language pack. For this example, we will work on the demo database gnuhealth_demo_generic.
Step 1: Declare your language and make it translatable. This can be done in the Administration → Localization → Languages section.

Remember the code of the language (in this case es).

Step 2: Download and uncompress the language pack file for your language and for the specific resource from the translation server.
With the GNU Health administrator user (gnuhealth) execute the following commands .
Note : Substitute the language sample code (es) by your language.
The language files that are retrieved come from development translation server! The official version and languages are shipped in the standard installation. Always try in a development environment before use in production.This overwrites the existing translation files ! |
./gnuhealth-control getlang es
This installs all the modules translation files for the Spanish Spain (es) language.
Step 3: Change your user preferences to your new language:

Step 4: Log out and stop your GNU Health Tryton server (if it's running).
Step 5: Update your GNU Health instance with the command
./trytond-admin --all --database=gnuhealth_demo_generic
Step 6: Start your sever with the new language for your module installed.
Setting the User Language
[edit | edit source]Please remember that the language is a user preference. In the same database, you can have different users using different languages.
Modules
Installing Extra Modules
[edit | edit source]The default modules of GNU Health are just a subset of the modules available and provide basic functionality. Depending on your health institution, you will most likely want to install some of the other modules that come with GNU Health.
Installation Process
[edit | edit source]((Details to be added))
Dependencies
[edit | edit source]Some modules are depending on other modules: You can not install this module without having installed the other modules as well. You can see these dependencies by double-clicking on a module in the Administration → Modules → Modules section.
For example: The module health_inpatient_calendar (which adds caldav support to the inpatient management functionality) depends on health_inpatient (which privides the basic inpatient management functionality) and calendar (which implements the basic caldav functionality).
Available Modules
[edit | edit source]GNU Health consists of the following modules:
- health: This is the core module providing the basic functionality of GNU Health. See Core Module.
- health_archives: Functionality to store and track old or paper-based clinical records.
- health_calendar: Calendar / caldav functionality.
- health_crypto: Ensures confidentiality, integrity and non-repudiation in GNU Health. Allows digital signatures on prescriptions, patient evaluations, surgeries or lab tests. See Security.
- health_genetics: See Genetics.
- health_gyneco: See Gynecology.
- health_history: Generates the patient clinical history reports.
- health_icd10: WHO International Classification of Diseases.
- health_icd10pcs: ICD-10 Procedure Coding System.
- health_icpm: WHO International Classification of Procedures in Medicine.
- health_icu: Functionality for Intensive Care Units. See Intensive Care Unit.
- health_imaging: Support for management of Diagnostic Imaging
- health_inpatient: Functionality to manage inpatients (or hospitalizations). See Inpatient Management.
- health_inpatient_calendar: Adds caldav support for hospitalizations. See Inpatient Management.
- health_lab: See Laboratory Management.
- health_lifestyle: See Lifestyle.
- health_mdg6: World Health Organization Millennium Development Goal 6. Functionality to fight Malaria, Tuberculosis and HIV/AIDS.
- health_ntd: See Neglected Tropical Diseases.
- health_ntd_chagas: Implements functionality for the Chagas disease. See Neglected Tropical Diseases.
- health_ntd_dengue: Implements functionality for the denge fever. See Neglected Tropical Diseases.
- health_nursing: Procedures, roundings and inpatient / outpatient care. See Nursing.
- health_pediatrics: See Pediatrics.
- health_pediatrics_growth_charts: Charts and reports to evaluate the child growth.
- health_pediatrics_growth_charts_who: WHO child development / growth tables.
- health_profile : Template to load common modules (deprecated).
- health_qrcodes: Permits identifying the patient and the newborns with 2-dimensional Quick-Recognition codes.
- health_reporting: Statistics on different indicators (diseases, doctor assignments, .. ). It also creates different charts
- health_services: Registers all the services done to a patient, in an ambulatory or inpatient scenario. It will also generate invoices on selected services.
- health_socioeconomics: See Socioeconomics.
- health_stock: See Stock Management.
- health_surgery: See Surgery.
- health_synchro: Implements the functionality to exchange data between several GNU Health installations. See Synchronization Guide.
- health_who_essential_medicines: WHO essential medicines.
- health_iss: Injury Surveillance System. Records and georeferences violent injuries, such as accidents, suicides, sexual assaults or robberies.
Custom Modules
[edit | edit source]If you are a software developer, you can customize existing modules or develop your own custom modules according to the needs of your health institution. For more information, please refer to the section Customizing and Creating Your Own Modules.
The next chapters will guide you through the customization of GNU Health to meet your health center needs.
Users
| This page or section is an undeveloped draft or outline. You can help to develop the work, or you can ask for assistance in the project room. |
Countries
| This page or section is an undeveloped draft or outline. You can help to develop the work, or you can ask for assistance in the project room. |
Central Authentication
Introduction
[edit | edit source]For large, distributed GNU Health installations, such a network of public hospitals, you might want to consider a central user authentication model.
Under this method, the users and their login credentials are managed centrally, so it's easy to create, modify, and/or revoke them when necessary.
The central authentication model in GNU Health is quite flexible, allowing different roles per health facility. For example, a health professional can work in two different health centers. Dr. Cameron Cordara works in the morning as a family medicine physician at GNU SOLIDARIO Hospital, and in the afternoon, she cooperates with the social workers, meeting with the community at the local primary care facility. Two different roles in two different centers, yet one single person and one single login.
Note: This documentation is based on a installation under FreeBSD and OpenLDAP, but it should work fine on other Free/Libre Operating Systems, such as GNU/Linux . There are also many configuration and deployment options, such as Public Key Infrastructure (PKI), LDAP replication, etc... that are not covered in this introductory, conceptual document.
Components
[edit | edit source]- OpenLDAP server (slapd)
- Tryton server modules : trytond_ldap_authentication
Central Authentication Workflow
[edit | edit source]- The health professional enters the username / password at the login prompt.
- The credentials are checked against the OpenLDAP server.
- Scenario 1: The user exists in the OpenLDAP database. If the password provides is correct, then she logins with her local authorization profiles. If she enters an incorrect password, she will be get the login prompt again.
- Scenario 2: The user does not exist in the OpenLDAP database. The credentials are checked against the local GNU Health database at the health facility.
- Scenatio 3: The OpenLDAP server is unreachable (network outage, server down, ... ). Same rule as in Scenario 2 applies.
Installation
[edit | edit source]Creating the Organization and Users on the LDAP Server
[edit | edit source]After you installed OpenLDAP, you need to create the organization, the roles and the users, so the LDAP client and GNU Health can interact with the server.
The following LDIF file to the basic organization and users, just for demonstration purposes.
Sample LDIF file
# The GNU Health Organization
dn: dc=gnuhealth,dc=org
objectclass: dcObject
objectclass: organization
o: GNU Health Nation
dc: gnuhealth

dn: cn=Manager,dc=gnuhealth,dc=org
objectclass: organizationalRole
cn: Manager

# PEOPLE Organizational UNIT (first level hierchy)
dn: ou=people, dc=gnuhealth,dc=org
ou: people
description: All people in organisation
objectclass: organizationalunit

# Actual users
dn: cn=Cameron Cordara,ou=People,dc=gnuhealth,dc=org
objectClass: inetorgperson
cn: Cameron Cordara
sn: Cordara
uid: cameroncordara
userPassword: SecretPass
You can now populate the initial OpenLDAP database uploading your newly created LDIF, for instance
$ slapadd -l <your_ldif_file>
Configuring LDAP in GNU Health
[edit | edit source]
After you have configured the OpenLDAP server and created your users, you need to configure your GNU Health Tryton instance to communicate with it.
- Install the following Tryton module
- trytond_ldap-authentication
- Create a new LDAP connection (Administration → LDAP → Connections)
- Fill in the information to meet your LDAP server specification.
- Save the connection
- Create a user in GNU Health (Administration → Users → Users)
You can now create a user matching the uid on the LDIF file, and assign local roles to her. In this case, we would match the "login" name on he screen, with the uid of the user on your Organization. In the case of our Doctor Cameron Cordara, the login name would be cameroncordara. Again, this is just for demo purposes. In real-life scenarios you would use unique identifiers for login names.
Note: You will notice that the password field is already "filled in". This is because the actual user password resides now in the LDAP server, and not in your local instance database.
If everything went right, you now have GNU Health enable for central authentication. Try to login as "cameroncordara". Her credentials will be checked on the LDAP server.
Patches and Patchsets
About GNU Health Patchsets
[edit | edit source]Since version 2.2.1, patchsets will be released for the GNU Health stable versions (those with even minor number, e.g. 1.2.3 ).
Suppose the following scenario: The health center GNU SOLIDARIO HOSPITAL installs version 2.2.0. After some weeks of running the server in the production environment, a bug is discovered that affects the health_service module. It's not a critical bug but it should be addressed shortly.
In the meantime, the bug has been reported and it has been fixed and documented. The system administrator at GNU SOLIDARIO HOSPITAL has two options:
- Download and apply the individual patch using the patch tool.
- Wait and apply the latest patchset.
It will be the context that will determine which method to use, but a general rule, unless you are in the context of a critical bug, you should use the patchset approach.
Some general ideas:
- The patches and patchsets don't require to do the whole installation again. The scripts are usually small and the installation time is very short in general.
- The patchsets are valid for minor numbers (e.g. 2.0.x, 2.2.x).
Whenever a patchset is generated, a new GNU Health version is released, with the patchlevel number of the patchset.
Patches vs Patchsets
[edit | edit source]This section discusses the general concepts behind a patch and a patchset, and when to use one or the other.
Patches
[edit | edit source]Generally speaking, a patch is a portion of code that fixes a program or its components. In GNU Health, a patch is a "patch file" generated in a Mercurial specific Changeset .The patch file (diff) modifies specific sections of code, not replacing the whole file. It is applied with the Patch command. As stated before, the patch is associated to a specific changeset, but not necesarily to the latest patch-level number (third component of the version number, e.g. 1.2.3).
Pros of patches:
- They are available immediately: If it's a critical bug, you can patch it immediately, no need to wait for the patchset.
- Very specific: Because of this high specificity, many times you could apply a patch in GNU Health with a running system, not affecting the availability.
Cons of patches:
- Requires more technical knowledge
- Very specific
- More cumbersome when dealing with binary files, like LibreOffice Reports
- Need to keep track of other un-applied patches
The high specificity of the patch makes it both a pro and a con. So it's quite operator dependent. We recommend avoid using patches unless is a critical bug that must be applied immediately.
Patchsets
[edit | edit source]Patchsets act at a higher level than patches, dealing with entire files and not chunks of code. They are packaged in the form of a compressed ŧar file.
Applying a patchset is also a selective operation, in the sense that only part of the GNU Health kernel is modified.
Pros of patchsets:
- Specific
- Can be re-applied after a patch
- Applies all patches in that time-frame, including non-critical patches that were collected over time
- Easier periodic installation / updates process
- Linked to a specific GNU Health version (the patchlevel number)
Cons of patchsets:
- Not as immediate as patches. Although the time for critical patches should not exceed 24 hours.
Criteria for a New Patchset Release
[edit | edit source]- Bugs marked as critical / blockers
- Important security issues
- The number of non-critical bugs
Applying Patchsets
[edit | edit source]|
|
This chapter applies to version 3.0 of GNU Health. |
Since GNU Health 3.0, we have a new tool, the GNU Health Control Center. GNU Health control center facilitates common administration tasks, such as backups or system updates.
To check the status of your Tryton and GNU Health kernel and modules, as well as to keep your system uptodate, please visit the section The GNU Health Control Center
Go to the GNU Health Control Center for the documentation on how to install the patchsets.
Applying Patchsets manually (Unsupported)
[edit | edit source]The following method allows you to apply the patchset into a standard GNU Health installation, without using the official tool (gnuhealth-control). The manual installation does not check for the latest Tryton updates, is more complicated and should not be used. Please use The GNU Health Control Center tool unless you know what you're doing.
GNU Health does not support this method |
- Read the instructions related to the patchset in Savannah. Depending on the patch you might need to update the module(s).
- Stop the GNU Health instance.
- Backup your kernel and database (always, no matter how small is the patch).
- Log in using the gnuhealth account.
- Don't change directories. Stay at your $HOME. Verify that you are in the /home/gnuhealth.
- Download the latest patchset for your Major.minor number. For example, if you are in version 3.0.x:
wget http://ftp.gnu.org/gnu/health/gnuhealth_patchset-3.0.latest.tar.gz
- Uncompress the patchset:
tar -xzvf gnuhealth_patchset-3.0.latest.tar.gz
- Restart the server.
Upgrade
About GNU Health Upgrades
[edit | edit source]GNU Health is in constant development. Upgrades fix bugs and keep your system with the latest functionality. Therefore, you are advised to keep your production system with the latest version.
GNU Health will always provide the scripts and tools for you to keep your health center updated.
Gathering Information
[edit | edit source]Get the latest GNU Health versions and announces: A key point to keep your GNU Health environment in good shape is to become part of the community. We publish GNU Health version updates and other relevant news in different media. Make sure you subscribe at least to the General users and to the health announce mailing lists.
Verify your current GNU Health version: You can check your current GNU Health database version from the client, via Administration → Modules.

Always upgrade all the GNU Health modules: When we release a version, we always pack all the official modules on it. This is important, because we test the integrity and cross-functionality among modules. So, you should never use modules from different versions. For example, you should not use health_genetics version 1.6.3 with health 1.6.2 . This is not supported and can create serious inconsistencies on your database!
Prepare your Upgrade
[edit | edit source]Plan your upgrade process, resources and downtime: Upgrading a hospital information system requires careful planning. Make sure you choose the right time, and notice your colleagues about the new release.
Test the upgrade process in another computer: It is highly recommended that you count with a separate server, where you can test your upgrade process in a controlled environment, without impacting your production installation. Write down all the steps and issues that you run into.
The Upgrade Process
[edit | edit source]This section summarizes the upgrade process steps for a standard installation, using the modules included in the official release at GNU.org FTP site. Any version specific information will sent via the health-announce@gnu.org mailing list, along the new release announcement, so make sure you are subscribed!
BACKUP YOUR INSTANCE ! Backup the database, attachments and kernel (modules) |
Step 1: Stop your Tryton server.
Step 2: Backup your database and GNU Health directories
./gnuhealth-control backup --backdir <directory> --database <dbname>
Step 3: Rename the current kernel directory, with gnuhealth user:
cd $HOME
mv gnuhealth gnuhealth_your_current_version_number
Step 4: Download the new GNU Health version. The official GNU Health tar file contains all the modules.
Step 5: Extract the kernel and follow the instructions as in a new Installation.
Step 6: Update the Tryton configuration file trytond.conf to fit your needs. Make sure you have the right values for your installation. Compare the values with your current version, they should match. Some critical variables are:
- path
The best way to edit the configuration file is to use the GNU Health user alias editconf:
editconf
Step 7: Upgrade the database:
cdexe
./trytond-admin --all --database=your_database_name
Step 8: Apply possible post-upgrade scripts at PostgreSQL level (one-time process)
You apply this step if you are upgrading from 3.0 to 3.2. Please remember to apply this script only once !
cd gnuhealth-3.2.0/scripts/upgrade/3.2
psql your_db_name < upgrade_32.sql
Step 9: Start the Tryton server:
cdexe
nohup ./trytond &
You should be now in your new GNU Health version!
Backups and High-Availability
Backups
[edit | edit source]Refer to the GNU Health Control Center for more information
Security
Securing Your GNU Health Environment
[edit | edit source]Security is a multi disciplinary task, involving components from networking, operating system, database and application (Tryton), to human resources, to name a few.
This page will try to give an overview of some basic concepts that will help you to enhance the access control to your system. We will also talk about enabling Public-key cryptography to sign documents and records from different models.
By no means this introductory page will replace the advice of computer security specialists for your specific installation |
GNU Health Security Advisories
[edit | edit source]GNU Health releases Security Advisories (SA) anytime a vulnerability is found. The security advisory format is inspired on FreeBSD.
The GNU Health security advisories are sent to all subscribers in the "health-security" mailing list. See the "Resources" chapter to subscribe.
You can check the current security advisory list in https://ftp.gnu.org/gnu/health/security/security_advisories.html
Access Control
[edit | edit source]Default server Ports
[edit | edit source]The Tryton server JSON-RPC listens by default in port 8000. It's a advisable to change to another port in production environments.
The server super user encrypted password has been updated, in the corresponding section of the trytond.conf file. Here is a sample of such file
[database]
uri = postgresql://localhost:5432
path = /home/gnuhealth/attach
[session]
super_pwd = JonB./CoLl8F6
Disable demo users in Production environments
[edit | edit source]For security reasons, deactivate demo users in production environments |
GNU Health comes with a set of pre-defined users for demo purposes. They all have the suffix "demo_" ( demo_doctor, demo_front_desk, demo_nurse... ).
Please deactivate them in production environments.
To deactivate the users, follow the following path : Administration -> Users -> Users
In filters, you can choose : login name : demo_
Unset the "active" flag of each of them. The demo users are now de-activated in your environment.
Public-key Cryptography in GNU Health
[edit | edit source]GNU Health Cryptographic Module
[edit | edit source]


The module goal is to achieve the concepts of confidentiality, integrity and non-repudiation in GNU Health.
The health_crypto module currently provides the following functionality:
- Document Serialization
- Document hashing (MD)
- Document signing
- Document verification
The module will work on records from models that will need this functionality such as prescription, patient evaluations, surgeries or lab tests.
The Serialization includes the information in a predefined format (JSON) and encoding (UTF8).
There will be a field that will contain the Message digest of the serialization process, and that will check for any changes. If the case of alteration of any fields
The signing process will be upon that Message Digest field, whereas the encryption process will work on row or column level.
Public-key / asymmetric cryptography will be used for signing the documents.
The standard models that are included are Prescription, Birth Certificate and Death Certificate. Of course, you can apply the functionality to any model that you feel like is necessary. In addition, and based on the community requests, we will incorporate new models in the next versions.
Using Digital Signatures in GNU Health
[edit | edit source]

GNU Health works along with GNU Privacy Guard for digitally signing and verifying documents. Please refer to the GNU Health Plugins section for the installation
Reporting a security vulnerability
[edit | edit source]We take security very seriously, and we appreciate your help on this !
If you believe you have found a vulnerability in GNU Health, please send an email to security@gnuhealth.org
Troubleshooting
| This page or section is an undeveloped draft or outline. You can help to develop the work, or you can ask for assistance in the project room. |
FHIR REST server
About FHIR and REST
[edit | edit source]Fast Healthcare Interoperability Resources (FHIR) is a standard for exchanging healthcare information electronically developed by HL7. For more information about FHIR, please see http://hl7.org/fhir
Representational State Transfer (REST) is a software architecture style for scalable web services developed by the W3C Technical Architecture Group (TAG). REST based systems can be accessed over the Hypertext Transfer Protocol (HTTP), the same protocol that is used by Web browsers to request Web pages from and to send data to a Web server. For more information about REST, please see https://en.wikipedia.org/wiki/Representational_state_transfer
Installation
[edit | edit source]The server requires Flask and a few of its addons. And, of course, a working GNU Health installation.
It is recommended to install the packages into a virtual environment using virtualenv.
Setup the environment (as the gnuhealth user):
$ pip install virtualenv                # Install virtualenv using python (may require root)
$ cd my_work_folder                     # Wherever you want to put the virtual environment folder
$ virtualenv -p /usr/bin/python2 venv   # Create the environment, with the Python 2.x interpreter
$ source venv/bin/activate              # Active the environment
Now install the packages using the requirements file:
$ pip install -r requirements.txt
Some of the packages (like pywebdav) are already installed on the system. However, it’s usually easier to administrate and debug the Flask server when working in a virtual environment.
More help with virtualenv.
Configuration
[edit | edit source]The server ships with a simple production config file. However, it needs to be edited.
server/config.py
----------------
TRYTON_DATABASE = ''    # GNU Health database
SERVER_NAME = ''        # Domain name of the server (e.g., fhir.example.com)
SECRET_KEY = ''         # Set this value to a long and random string
There are other options available for Flask and its addons: * Flask * Flask-Login * Flask-Tryton * Flask-Restful * Flask-WTF
Security
[edit | edit source]Use TLS. Sensitive medical information must be protected and confidential.
By default, all FHIR endpoints except the Conformance statement require user authentication. The user authentication and access follows Tryton’s model, respecting model and field access rights.
The same credentials used to sign into GNU Health are used to access the FHIR REST server.
Running the Server
[edit | edit source]The server ships with a simple script (run_server.py) in the server/ folder to run the server using Tornado.
The script expects itself to be located one directory level above the server/ folder. Consequently, move the run_server.py script up one directory level. For example:
$ mv /example/base/server/run_server.py /example/base/run_server.py
With the virtual environment activated and as the gnuhealth user, run the server.
$ python run_server.py
However, most production servers use nginx, lighttpd, or apache in front of the Tornado server. For example, a common practice is to have nginx sit in front of multiple Tornado instances, acting as a load balancer, handling SSL, and serving static content (like images and common javascript). How to configure an nginx/lighttpd + tornado + flask setup is beyond this document, although it is not complicated, especially with nginx.
Troubleshooting
[edit | edit source]Cannot connect to database
[edit | edit source]Make sure you are running as the gnuhealth user.
Flask-Tryton should automatically find and parse the Tryton config file. If it is not found:
server/config.py
----------------
TRYTON_CONFIG = ''      # Set this to the path of the Tryton configuration file (e.g., '/weird/tryton/weird-tryton.conf')
No database with that name
[edit | edit source]This is related to the previous error, and occurs when Flask-Tryton cannot find the Tryton config file. Following the previous procedure should hopefully fix it.
Using the FHIR REST server
FHIR Overview
[edit | edit source]Fast Healthcare Interoperability Resources (FHIR) is a standard for exchanging healthcare information electronically developed by HL7. The standard defines a common interface for medical software interoperability. For more reading, look at the FHIR standard.
URL Structure
[edit | edit source]The FHIR standard defines a REST API, a set of interactions with each resource. Each resource handles different types of information. Currently, the GNU Health FHIR server supports 12 resources:
- Conformance: Describes the server's FHIR capabilities.
- Patient: Patient information, like email, address, SSN, etc.
- DiagnosticReport: Completed lab tests, but not the data
- Observation: Lab data, like Uric Acid values
- Practitioner: Health professionals and their information
- Procedure: Surgeries/operations
- Condition: Diseases/diagnoses
- FamilyHistory: Family histories of patients
- Medication: Medications (not prescriptions!)
- MedicationStatement: Medications taken by a patient
- Immunization: Immunizations
- Organization: Institutions, departments, companies, etc.
Each resource has its own endpoint. For example, the Patient endpoint is found at /Patient, the DiagnosticReport endpoint at /DiagnosticReport, and so on. The only exception to this naming schema is the Conformance endpoint which is found at / and /metadata.
The interactions use HTTP verbs. Simple read and search interactions with GET, and so on.
For further reading into the REST design, read the documentation
Note: Currently, the GNU Health FHIR server has no write functionality.
Authentication
[edit | edit source]All resources, except for Conformance, require authentication. The server authenticates with the user credentials of the underlying GNU Health/Tryton server. Login with your user credentials at /auth/login. Logout at /auth/logout. There is a simple welcome page for logged-in users at /auth/home.
Searching / Listing
[edit | edit source]To search a resource, simply add arguments to the endpoint to refine the search. For example, /Patient, will return all the patients on the server. /Patient?name=ana will return all the patients with Ana in their name.
Note: Many search criteria for the GNU Health FHIR server are not supported yet. Refer to the FHIR documentation for more information.
Test Server Examples
[edit | edit source]Some examples with the community FHIR server (may need to sign in):
Release Process
Introduction to the GNU Health Release Process
[edit | edit source]GNU Health stable versions (those with even minor number, eg 1.2.3) .
Starting from version 3.0, stable versions are released approximately every 12 months, but it also depends on the number of new features. It's released on a Sunday.
Stages of the Release Process
[edit | edit source]For each version, around two months before the actual release, GNU Health enters in a feature freeze stage, and a month before, Health enters in code freeze stage. At this moment, a Release candidate version is created; and the demo community server updated and the translator teams notified.
Upcoming Release Schedule
[edit | edit source]The next stable GNU Health HMIS node version will be 4.4.0. Estimate dates are the following, subject to changes.
| Event | Expected date | Comments |
|---|---|---|
| Feature freeze | August 31th, 2023 | |
| Code freeze | Oct 31th, 2023 | Beta1 |
| Release 4.4.0 | November 26, 2023 |
Security fixes
[edit | edit source]The period of security fixes for a stable version is determined by the next two stable GNU Health releases. For instance, security fixes for series 2.4 will end when version 2.8.0 is released.
Contributing
Contributors Wanted!
[edit | edit source]GNU Health is a FLOSS project, you are very welcome to contribute to it. There are several ways to do so, most of which not requiring you to know how to code!
Translating the Software
[edit | edit source]Providing GNU Health in a user's native language is a big part of the success. You can help by improving existing translations, or creating a new translation in your own language. Translating GNU Health is easy, it does not require technical knowledge, and is all done via a web interface. Have a look at the Localization page for more details on the process.
Writing and Translating the Documentation
[edit | edit source]The GNU Health documentation on Wikibooks (which you are reading right now) is not complete, and it needs adjustments or additions with every GNU Health upgrade.
And if you don't want to write documentation, you can still contribute by translating it into your language to make it easier for health professionals to work with GNU Health.
Reporting Bugs
[edit | edit source]Unfortunately almost any software contains bugs. While we are actively working on fixing them so you don't have to struggle, please do report any bug or anomaly that you encounter.
Reporting a bug does not take much time. It is done via Savannah.
Tip: For faster resolution, please include a description of the steps you performed to get to the bug, and if possible include screenshots of the issue. But be careful: Don't include patient information in the screenshots or your description!
Coding
[edit | edit source]GNU Health is mostly a set of Tryton modules, the programming language used is Python. The code is hosted on Savannah and versioned under Mercurial.
Obtaining Your Copy of the Code
[edit | edit source]You can get your copy of the latest code by doing an anonymous checkout:
hg clone http://hg.savannah.gnu.org/hgweb/health/
You can also browse the code online.
Coding style
[edit | edit source]The coding style should follow the Tryton guidelines or else Python best practices.
Customizing and Creating Your Own Modules
[edit | edit source]Chances are that if you are installing GNU Health for your center, you will be customizing it to meet your specific needs. Reports, access control rules and views are just some of the objects that are normally customized. The main concept is to not edit the standard code or modules, since it will be overwritten in the next update and most probably will end up in a broken system.
The recommended steps to customize GNU Health to your center are:
- Create your module: It's recommended that you use the following naming convention for your local modules: z_health_<modulename>. For example, if your project is called catalina, your local module name would be z_health_catalina. This way makes is easy to detect and differentiate your modules from the base code. You can also easily make backup of them following the pattern.
- Inherit the objects.
- Modify or create new models.
If you create a new custom field, you should also use the z_<fieldname> naming convention. This avoids collision with future field names of the official releases. We will not use any module, class, or model name starting with z_.
The "local" modules directory
[edit | edit source]There is a directory called local under ~/gnuhealth/tryton/server/modules. Please put your local modules that contain the customizations for your project under this directory. When using this approach, it makes sure that the update procedure does not overwrite your packages.
Also, sometimes you might want to include another existing package from Tryton or the community. This local modules directory is the place to place them.
Please note that can only support those packages that are included on each GNU Health HMIS distribution.
Submitting Patches
[edit | edit source]Regular contributors have write access to the code repository. However, if you're just starting out, we want to make sure that your changes get reviewed. The way to do this is to open a bug describing the issue you've fixed or the feature you've added, and to attach a patch to that bug report. One of the developers will review your patch and commit it to the main development branch if approved.
Different ways to test GNU Health
About this page
[edit | edit source]Are you a doctor, a nurse, a hospital administrator or a representative of a health department? Do you want to try out GNU Health by yourself? Then you have several options described on this page. Each option has its advantages and disadvantages. Some of them are simpler than others, but you don't have to be a programmer or system administrator to use them.
Please note that the only purpose of this page is to give you an overview and to allow you to choose the option that fits your needs best. For detailed instructions please follow the indicated links.
Option 1: Connect to the Demo Database
[edit | edit source]What to do
[edit | edit source]- Download and install the free Tryton client software on your computer.
- Start the Tryton client software and connect to the GNU Health Demo Database over the Internet.
Please refer to this chapter for more information.
Advantages
[edit | edit source]- This option is the quickest and simplest way for your first hands-on experience with GNU Health.
- The Tryton client is available for Windows, Mac OS and GNU/Linux.
Disadvantages
[edit | edit source]- You have to be connected to the Internet.
- The Demo Database will be reset periodically, which is not ideal for a long-term test.
- You are sharing the Demo Database with other users, so they might interfere with your data.
Option 2: Run GNU Health from CD/DVD or USB Stick
[edit | edit source]What to do
[edit | edit source]- Download the Live CD image and burn it to a CD/DVD or write it to an USB stick.
- Boot your computer from this CD/DVD or USB stick. This will turn your Windows computer temporarily into a GNU/Linux computer (e.g., an openSUSE operation system with KDE desktop environment) with a preinstalled GNU Health server including the Demo Database.
Please refer to this chapter for more information.
Advantages
[edit | edit source]- After the download you will not need an Internet connection anymore.
- This option gives you full access to the GNU Health server.
- You can install the system from the running Live-CD to your computer
- It is possible to setup your own database(s) besides the demo database (USB only)
Disadvantages
[edit | edit source]- Booting and running a computer from a CD/DVD is slow. (It's quicker from the USB stick but still slow.)
- CD's cannot store much data(up to 650 MB/4.7-9.4 GB for DVD). This means that even if you do use a rewritable CD, you will be space-limited on what you can save.
- You need to know how to write a CD image to a CD or USB stick and how to change the boot sequence in the BIOS settings of your computer.
- Some computers do not allow for booting from CD or USB.
- While using the Live CD you don't have access to the programs on your computer, so you can't test GNU Health and work with your Windows applications in parallel.
- This method may not work on Apple-brand PCs.
Option 3: Run GNU Health in a Virtual Machine
[edit | edit source]What to do
[edit | edit source]- Download the virtual machine image to your harddisk and unpack it. (The virtual machine image can be found on the same webpage like the Live CD image – see option 2.)
- Download and install the VirtualBox software (or any other emulator) on your computer.
- Run VirtualBox, locate the virtual machine image and start your virtual machine.
Please refer to this chapter for more information.
Advantages
[edit | edit source]- This option gives you all advantages of the Live CD (option 2) without its disadvantages.
- The VM can serve as a base for a later production use.
Disadvantages
[edit | edit source]- The virtual machine is stored on your harddrive. Therefore it needs a bit more effort to pass the test installation to someone else compared to the Live CD.
- The performance will be slower as the virtual machine is also sharing the power of your machine.
The Demo database
Introduction to the Demo Database
[edit | edit source]GNU Health default installation comes with no data. It's interesting, for academic and training purposes to have some demo data that exemplifies concepts and improves the learning curve.
The demo database is an ongoing project and it will be adapting to the each new GNU Health version. The clinical history will also grow with time.
For consistency sake, it's important to have the main characters information constant (family members name, birth dates and place, health centers, family doctors etc.). The information and characters are fictitious and we should try to make it valid for different cultures.
The Zenon-Betz Family
[edit | edit source]The story goes around the Betz family, and the main character, Ana Betz, a primary school teacher.
- Health Center: GNU Solidario Hospital in Las Palmas, Spain
- Family Doctor: Cameron Cordara
- ID: 765870
- Speciality: Family Medicine
- Institution: GNU Solidario Hospital
- Family: Zenon-Betz family
- John Zenon (SSN: 40556644)
- Ana Betz (Fed ID: ESPGNU777ORG) born October 4th, 1985, the main character
- Matt (SSN: 97234436), born March 15th 2010, their son
Demographics Information
[edit | edit source]- Sex: Female
- Marital Status: Married
- Profession: School teacher
- Education Level: University
- Domiciliary Unit
- Housing Conditions: Comfortable and good sanitary conditions
Patient Information
[edit | edit source]- Socio-Economic Status: Middle class
- Allergies: β-lactam hypersensitivity
- Diseases: Type 1 Diabetes diagnosed on November 10th 1993
- Medication: Insulin since November 10th 1993
- Genetic Information
- Family history
- Maternal Grandfather: Marfan's Syndrome (Q87.4)
- Father: Essential (primary) hypertension (I10)
- Disease Genes
- BRCA1: breast cancer 1, early onset
- Family history
- Obstetric Information: G1P1A0
- Newborn: Matt, epidural, vaginal birth
- Lifestyle
- Ex-smoker
- Addictions: No recreational drugs
- Sexuality: Heterosexual, monogamous, practices safe sex
- Safety: Motorcycle rider, uses helmet
Other Information
[edit | edit source]- Family information (Family functionality level, members, operational sectors...)
- Medical Imaging (X-rays, CTs, MRIs...)
- Genetic info / risks
- Lab orders and results
- Clinical history of the family
Online Community Servers
[edit | edit source]We have two main community servers available in the Internet so you can connect and try the latest GNU Health. This is probably the simplest way to check out GNU Health for the first time.
- federation.gnuhealth.org: The GNU Health Federation community hub. Contains the latest stable version
- health.gnusolidario.org : This server holds the previous stable version of GNU Health HMIS and LIMS servers (3.2)
GNU Health Federation Community Hub
[edit | edit source]federation.gnuhealth.org: The GNU Health Federation community hub. Contains the latest stable version of the following components :
- Thalamus message server
- Health Information System and Person Master Index
- GNU Health HMIS and LIMS nodes
- GNU Health WebDAV server and calendaring system
The community Hospital Management demo server runs behind a web server (NGINX) and a WSGI server (UWSGI).
Connection to the GNU Health HMIS and LIMS
[edit | edit source]1. Install the GNU Health client (GNU/Linux, FreeBSD or other *NIX)
Proceed as explained in the GNU Health Client Installation section
2. Use the following server and credentials . Please note that the Database name can change. You can use the "profile" to select the DB from the list
Server: federation.gnuhealth.org Database: health42rc2 |
Note : The community server database resets itself everyday at 00:30 UTC , so we have clean demo data. That means that you can also play and experiment with it without fear of "breaking" the DB :) .
Note : Please do not change the language of the admin account! Instead, copy the admin account to a new account, e.g. admin_fr, and set this accounts language to the desired language!
Connection to the Health Information System via Browser
[edit | edit source]You can connect to the community hub using the web interface. Please note that this is alpha and not intended for production systems yet.
https://federation.gnuhealth.org:8900
Development server
[edit | edit source]For developers : There is a developer database that runs on the latest development version. To connect to the developer community server, use port 9555, with the same credentials. Needless to say, the developer version is highly unstable, and is just for developers.
The Webdav server is at port 9080
Local Demo Database
[edit | edit source]This method should give the most up-to-date demo database.
As the gnuhealth user, use the GHealth demo DB installer script. You can download the latest version from GNUHealth at Savannah mercurial repository ( https://hg.savannah.gnu.org/hgweb/health/file/tip/tryton/scripts/demodb )
$ ./install_demo_database.sh 40
This will download the demo database of version 4.0.x . It will also create the database locally.
Now enter the database through the GNU Health client. For example, for 4.0.x releases:
- Database: ghdemo40
- Username: admin
- Password: gnusolidario
There is a user "admin_es" that uses the Spanish language.
You can browse the current demo databases, from our GH site download area:
https://www.gnuhealth.org/downloads/postgres_dumps/
Remember that databases with odd minor numbers (eg, 41) are unstable. They are the development version of the upcoming release, and for dev / testing purposes. |
References
[edit | edit source]
The Live-CD
The Live-CD
[edit | edit source]The GNU Health Demo Database is available as Live-CD. This gives interested users the option to run GNU Health on their own PC, and, if desired, install the GNU Health demo database directly from the CD.
Similar as the demo database, the live-CD is an ongoing project and it will be adapting to the each new GNU Health version. The clinical history will also grow with time.
There is a video tutorial available demonstrating the installation of the GNU Health 3.0 Live CD in a Virtual Box.
Download the Live-CD
[edit | edit source]The Live-CD was built on SUSEStudio, and is currently available with the following flavours:
- GNU Health 3.0: openSUSE Leap 42.1 / KDE5 / 64bit
- GNU Health 3.0: openSUSE 13.1 / KDE4 / 32bit
- GNU Health 3.0: SLES 12SP1 / Text-based Server version / 64bit
- GNU Health 2.8: openSUSE Leap 42.1 / KDE / 64bit / UEFI
- GNU Health 2.6: Archived, available on request
- GNU Health 2.4: Archived, available on request
Please note: The user name and password necessary to access the GNU Health server on the Live-CD can be found on that download page as well.
Unlike the full version of openSUSE, the Live-CD contains only packages that are required to run GNU Health. Feel free to add required programs later on from the openSUSE repositories.
It is recommended to use the Server version SLES 12 on a virtual machine, as it comes with no client! See Documentation
Install the Live-CD
[edit | edit source]In order to use the Live-CD, you have to install it on a CD or a USB stick.
USB-Stick / Hard Disk Image
[edit | edit source]The hard disk image comes as packed raw format. After download, first unpack the *.tar.gz file
- On Linux/Mac-OS, use your favorite archiving program, or use 'tar -xvzf *tar.gz' from the command line
- On Windows, use an advanced packer like 7-Zip
After unpacking, you have to install the RAW-file to a stick. See instructions. (Create a Live USB stick using Windows)
Note: When booting the first time from the USB-Stick, the boot process takes a bit longer, as the stick is being optimized (data and swap space creation). Second boot will be much quicker.
ISO-Image / CD
[edit | edit source]If you have downloaded the ISO image to burn a CD, you can find the relevant instructions here.
Install the Live-CD to your hard drive
[edit | edit source]The Live-CD offers the option to install the system and the GNU Health Demo-DB to your hard drive. The relevant program can be found in the My Computer section of the start menu (the little green button on the lower left corner of the screen).
Virtual Machine Images
[edit | edit source]The live-CD is available in various container formats that allow easy integration into a virtual environment. Currently the following formats are published:
- Xen Guest (.img)
- OVF Virtual Machine / ESXI (.ovf)
- VMware Workstation / VirtualBox (.vmdk)
- SUSE Cloud / OpenStack / KVM (.qcow2)
- Hyper-V Virtual Hard Disk (.vhd)
- Amazon EC2 Cloud (.ami)
We have recorded a Screencast that shows the setup of a Virtual machine.
Running the Virtual Machine as Server
[edit | edit source]Several times the question came up 'How can I access my Live-CD from another desktop'? This should not be too difficult if you consider some points. The following example bases on Virtualbox, but should be similar on other virtual environments:
- When setting up the network, make sure you select 'Bridged Network'. In this case the virtual box will receive the IP-Address from your DHCP-Server, not from the host-machine
- Make sure the network-name of your virtual box is updated to your DDNS-Server. Even better, you may assign a fix network address to your virtual box, say 192.168.2.100
- Try to ping the box from an external client on the network: open a console and type: ping 192.168.2.100
- If this works, and your GNUHealth server is running, check if you can access the server from outside: telnet 192.168.2.100 8000
If this works, everything is good.
If not, its time to check the firewall settings of your box. From the Start Menu, select System → Administration → YaST. Enter the password for 'root': tryton , and go to 'firewall Settings'. Check the external zone (right interface name?) or even add an exception for the 192.168.2.100/24 network
Adjustments
[edit | edit source]- You may want to change the language and keyboard to your preferred setting. From the Start Menu, select System → Administration → YaST. Enter the password for 'root': tryton . You have reached the administration settings. From the 'System' Section select 'Language' to change the primary language.
- You may want to run an online update. From the Start Menu, select System → Administration → YaST. Enter the password for 'root': tryton . You have reached the administration settings. From the 'Software' Section select 'Online-Update'.
- You may want to increase the display resolution of your virtual machine (which may be as low as 640 x 480 pixel). From the Start Menu, select System → Administration → YaST. If the system asks you to log in, enter root as user and tryton as password. From the YaST main screen select Software in the left column, then Software Management in the right column. Then search for virtualbox, select all packages with the word guest in their name and install them. After rebooting your virtual machine you should have higher resolutions available.
- You may want to install additional software. From the Start Menu, select System → Administration → YaST. Enter the password for 'root': tryton . You have reached the administration settings. From the 'Software' Section select 'Software Management'.
Federation Technical Guide
Introduction
[edit | edit source]In this chapter we will go through the technical aspects behind the GNU Health Federation.
The GNU Health Federation has three main components
- Nodes
- Message Server
- Health Information System / Person Master Index
The HMIS node installation and configuration has already been described in previous chapters. In this chapter we will mainly focus on the Health Information System and the Message / Authentication server (Thalamus).
In this chapter we show users and passwords as examples. Never use these passwords in production. |
Health Information System Server (HIS) configuration
[edit | edit source]The Person Master Index and Health Information System are both included in the HIS component of the GNU Health Federation.
Thalamus configuration
[edit | edit source]The Thalamus project provides a RESTful API hub to all the GNU Health Federation nodes. The main functions are:
- Message server: A concentrator and message relay from and to the participating nodes in the GNU Health Federation and the GNU Health Information System. Some of the participating nodes include the GNU Health HMIS, mobile PHR applications, laboratories, research institutions and civil offices.
- Authentication Server: Thalamus also serves as an authentication and authorization server to interact with the GNUHealth Information System
Technology
[edit | edit source]RESTful API: Thalamus uses a REST (Representional State Transfer) architectural style, powered by Flask technology
Thalamus will perform CRUD (Create, Read, Update, Delete) operations. They will be achieved via the following methods upon resources and their instances.
- GET : Read
- POST : Create
- PATCH : Update
- DELETE : Delete.
The DELETE operations will be minimal.
JSON: The information will be encoded in JSON format.
Create a new user thalamus with PostgreSQL permissions
[edit | edit source]- Install PostgreSQL
- Locate the pg_hba.conf file and add the following line:
local all all trust
If you don't find the file refer to Verify PostgreSQL authentication method
- Restart PostgreSQL:
$ sudo systemctl restart postgresql.service
- Give permissions to the newly created thalamus user:
$ sudo su - postgres -c "createuser --createdb --no-createrole --no-superuser thalamus"
Installing Thalamus
[edit | edit source]Thalamus is a flask application, and is pip installable. Using the thalamus operating system user, install Thalamus server locally.
$ pip3 install --user wheel
$ pip3 install --user thalamus
$ pip3 install --user flask-cors
Initializing PostgreSQL for the HIS and Person Master Index
[edit | edit source]The following documentation applies to a demo / test database, that we will call "federation"
1) Create the database
$ createdb federation
2) Locate thalamus
$ pip3 show thalamus
$ cd /path/thalamus/demo/
3) Create the Federation HIS schema
Inside the "demo" directory in Thalamus execute the following SQL script
$ psql -d federation < federation_schema.sql
4) Set the PostgreSQL URI for demo data
In import_pg.py adjust the variable PG_URI to fit your needs. It could be sufficient to just put "dbname='federation'" into psycopg2.connect(...) if your setup fits the default settings.
5) Initialize the Federation Demo database
$ bash ./populate.sh
6) Set the PostgreSQL URI for runtime
Just like in the second step either modify POSTGRESQL_URI in etc/thalamus.cfg or modify psycopg2.connect(...) directly in thalamus.py (not in the demo directory).
At this point you can run and test Thalamus directly from the Flask Werkzeug server,:
$ python3 ./thalamus.py
This is ok for development and testing environments, but for production sites, always run Thalamus from a WSGI container, as described in the next section.
Running Thalamus from a WSGI Container
[edit | edit source]In production settings, for performance reasons you should use a HTTP server. You will find examples on running Thalamus from uWSGI and gunicorn.
Running Thalamus from uWSGI
[edit | edit source]uWSGI is a very robust and fast application that is used as a Web Server Gateway Interface in the context of Thalamus, to forward requests to Thalamus coming from other applications (eg, the Federation Portal or the HMIS node).
First of all install uWSGI and its plugins for HTTP & Python your operating system. For example on Ubuntu:
$ sudo apt install uwsgi uwsgi-plugin-router-access uwsgi-plugin-python3
We have included a uwsgi sample configuration file (etc/thalamus_uwsgi.ini). In order to test uWSGI with HTTP change it into the following:
[uwsgi]
master = 1
# https = 0.0.0.0:8443,/opt/gnuhealth/certs/gnuhealthfed.crt,/opt/gnuhealth/certs/gnuhealthfed.key
http = 0.0.0.0:8080
wsgi-file = thalamus.py
callable = app
processes = 4
threads = 2
block-size = 32000
stats = 127.0.0.1:9191
plugins = http,python
To execute Thalamus with the default configuration file:
$ uwsgi --ini etc/thalamus_uwsgi.ini
All these arguments can also be passed to the command line.
Running Thalamus from Gunicorn
[edit | edit source]Note: There are some issues with delay on requests and closing connections when using SSL from the vueJS portal on gunicorn.
Gunicorn supports WSGI natively and it comes as Python package. We have included a simple, default config file (etc/gunicorn.cfg) to run Thalamus from Gunicorn with SSL enabled.
For example, you can run the Thalamus application from Gunicorn as follows. The default configuration file uses secure (SSL) connections:
$ gunicorn --config etc/gunicorn.cfg thalamus:app
Enable SSL for encrypted communication
[edit | edit source]Either get an official certificate or generate a self-signed certificate and private key
$ sudo openssl req -newkey rsa:2048 -new -x509 -days 3650 -nodes -out gnuhealthfed.crt -keyout gnuhealthfed.key
If uWSGI should handle HTTPS, place the certificate (gnuhealthfed.crt) and private key (gnuhealthfed.key) in a directory where the thalamus user has read permissions. Afterwards change etc/thalamus_uwsgi from HTTP to HTTPS using the correct paths. Keep a backup of them in a safe place.
Alternatively keep uWSGI as internal HTTP server and configure a HTTPS reverse proxy. Using apache2 you can create a file thalamus.conf as site with the following content:
<IfModule mod_ssl.c>
<VirtualHost *:443>
    SSLEngine on
    SSLCertificateFile /etc/ssl/certs/gnuhealthfed.crt
    SSLCertificateKeyFile /etc/ssl/private/gnuhealthfed.key
    ServerName domain
    ProxyPass / http://your_host:8080/
    ProxyPassReverse / http://your_host:8080/
</VirtualHost>
</IfModule>
Depending on the operating system place this inside /etc/apache2/vhosts.d/ (openSUSE) or /etc/apache2/sites-available/ (Debian/Ubuntu). For the last case enable it afterwards using the a2ensite command. Finally enable some modules and restart apache:
$ sudo a2enmod headers ssl proxy proxy_http
$ sudo systemctl restart apache2.service
Create a systemd service
[edit | edit source]In order to control Thalamus with systemctl and enable it to be activated after startup create a service file thalamus.service with the following content:
[Unit]
Description=Thalamus Server
After=network.target

[Service]
User=thalamus
WorkingDirectory=/path/thalamus
ExecStart=uwsgi --ini etc/thalamus_uwsgi.ini
Restart=on-abort
Type=notify
KillSignal=SIGQUIT
StandardError=syslog

[Install]
WantedBy=multi-user.target
For the working directory take the path from above for the pip directory.
Put this in the appropriate directory for your operating system: For example /etc/systemd/system/ on Debian/Ubuntu or /usr/lib/systemd/system/ on openSUSE. Afterwards start and enable the service:
$ sudo systemctl start thalamus.service
$ sudo systemctl enable thalamus.service
Using a virtual environment
[edit | edit source]If you want to use a virtual environment create and activate the virtual environment before installing Thalamus:
python3 -m venv /home/thalamus/venv
source /home/thalamus/venv/bin/activate
Besides add the following line to etc/thalamus_uwsgi.ini:
venv = /home/thalamus/venv/
Access Control
[edit | edit source]Thalamus uses a “role” approach related to Authorization. It’s basic, yet versatile.
Each role has the following methods permissions: GET, PATCH, POST, DELETE
The permissions work at endpoint level. Examples of endpoints are "person" or "page" of life.
Following there is sample of the “roles.cfg” file, which shows three main roles: end_user, health_professional and root.
[
    {"role": "end_user",
     "permissions": {
        "GET": ["person", "book","page","password"],
        "PATCH": ["person","page"],
        "POST": ["page", "password"],
        "DELETE": [],
        "global": "False"
        }
    },

    {"role": "health_professional",
     "permissions": {
        "GET": ["people","person","book","page"],
        "PATCH": ["person", "page"],
        "POST": ["person", "page"],
        "DELETE": [],
        "global": "True"
        }
    },

    {"role": "root",
     "permissions": {
        "GET": ["people","person","book", "page","password"],
        "PATCH": ["person","page"],
        "POST": ["person","page",  "password"],
        "DELETE": ["person","page"],
        "global": "True"
        }
    }
]
Once the user has provided the right credentials, she / he will have the access level to the documents associated to the roles. A user can have one or multiple roles. For example, a health professional usually belongs to two groups:
- person : she create and read her documents, change her password, etc. Usually her domain is restricted to herself. She can not act on others documents
- health_professional : She can see her patient medical history, but she can not change her password.
If you executed populate.sh you can use the user/password combination ITAPYT999HON:gnusolidario to test the connection.
Developer's corner
Welcome to the GNU Health Developer's corner
[edit | edit source]This chapter focus on the development of the upcoming version in different components of GNU Health
The developer's corner is highly volatile. It's chaotic and unstable, and we love it like that ;)
Please respect the target build of each component.
Uwsgi config
[edit | edit source]The following templates are samples used for GH HMIS (on Tryton) and for Thalamus
HMIS server sample ini file (gh.ini)
[uwsgi]
master = true
processes = 3
socket          = /tmp/uwsgi.sock
http-socket=0.0.0.0:8020
chmod-socket=666
daemonize = /home/gnuhealth/logs/gnuhealth-hmis.log
module=trytond.application:app
You can invoke it by
$ uwsgi -c /home/gnuhealth/gh.ini --enable-threads
Thalamus sample ini file
[uwsgi]
master = 1
https = 0.0.0.0:8443,/opt/gnuhealth/certs/gnuhealthfed.crt,/opt/gnuhealth/certs/gnuhealthfed.key
chdir = /home/gnuhealth/.local/lib/python3.9/site-packages/thalamus/
wsgi-file = thalamus.py
callable = app
processes = 4
threads = 2
socket = /tmp/thalamus.sock
daemonize = /home/gnuhealth/logs/thalamus.log
Hospital Management Information System
[edit | edit source]Target build : 4.0
openSUSE Leap <=15.3 and other OS using Python 3.6 It's highly recommended to use Python versions >=3.7
If your distribution uses Python 3.6, then you must enforce the following dependencies versions:
- apiron==5.1.0
- beren==0.7.0
Wishlist
[edit | edit source]- New GNU Health WebGUI which supports all GNU Health features and works as well on Tablet and Smartphone. It should have a new UX Design and clearly not replicate the GTK design
- Redesign GTK Client - Etienne mentioned some improvements
- Interface to AI providers like Planet-AI
- Integration of the Tryton pos module with the pharmacy module
- Integration with DHIS2
Upgrade
[edit | edit source]BEFORE THE UPGRADE:
- Execute the script "before.sql"
- update tryton server (./trytond-admin --all)
AFTER THE UPGRADE:
- Execute the script "after.sql"
- The Calendar and Webdav menus might shown twice. Just deactivate the obsolete first instance (Administration -> User Interface -> Menu)
GTK Client
[edit | edit source]The GNU Health GTK client beta is at testpypi
You can download it using the following command:
python3 -m pip install --index-url https://test.pypi.org/simple/ --extra-index-url https://pypi.org/simple/ gnuhealth-client==4.0b1
Plugins
[edit | edit source]The search path for plugins goes like this:
1. <config dir>/plugins
Example: /home/lfm/.config/gnuhealth/3.5/plugins
2. <current_gnuhealth_dir>/tryton/plugins
Example: /home/lfm/health/gnuhealth-client/tryton/plugins
3. $HOME/gnuhealth_plugins
Example: /home/lfm/gnuhealth_plugins
The third one ($HOME/gnuhealth_plugins) is the recommended place for most users. It makes easy automation and allows convenient drag and drop for plugins.
The first option is recommended for users that have different GH GTK client versions installed.
Web Client
[edit | edit source]The webclient is based on the Tryton SAO Webclient. It does not have the current functionality, desktop integration and security features as the GTK client. For developers only...
INSTALLING SAO (as gnuhealth user)
- download https://downloads.tryton.org/6.0/tryton-sao-last.tgz
- cd $HOME
- mkdir sao
- cd sao/package
- npm install
- cd /home/gnuhealth/sao/package/node_modules/.bin
- ./grunt
On the [web] section :
root = /home/gnuhealth/sao/package
Interfaces
[edit | edit source]GNU Health Federation
[edit | edit source]Thalamus
[edit | edit source]GH Federation Portal
[edit | edit source]MyGNUHealth mobile application
[edit | edit source]Installation of MyGNUHealth PinePhone and Manjaro Plasma Mobile
[edit | edit source]Install requirements
- Update de system (pacman -Syu)
- Install gcc (pacman -S gcc)
- Install base devel tools (pacman -S base-devel)
- Install pyside2 package (pacman -S pyside2-es2) (Make sure you use this package! The regular "pyside2" won't work. Thanks Anupam!)
Installation on PinePhone and KDE Neon
[edit | edit source]- Install in a SD card the plasma-mobile latest image (https://images.plasma-mobile.org/pinephone/)
Install required packages
- apt-get install python3-pip
- apt-get install qt5-qmake
- apt-get install cmake
- apt-get install qtbase5-dev
- apt-get install clang clang libclang-6.0-dev
- apt-get install qtbase5-private-dev
- apt-get install qtdeclarative5-dev qtdeclarative5-private-dev
Create a swapfile (it will be needed during the building process)
- sudo bash
- cd /opt
- dd if=/dev/zero of=swapfile bs=1G count=1
- mkswap swapfile
- swapon swapfile
(you can later add it to the fstab if you want to have it permanent)
add to /etc/fstab
/opt/swapfile swap swap defaults 0 0
Download,extract and build PySide2 https://doc.qt.io/qtforpython/gettingstarted-linux.html#getting-pyside2
Fix the following symlinks that are broken:
$ cd pyside2/pyside-setup/pyside3_install/py3.6-qt5.14.2-64bit-release/bin$
$ ln -si /usr/bin/qtchooser ./designer
$ ln -si /usr/bin/qtchooser ./rcc
$ ln -si /usr/bin/qtchooser ./uic
Installation on the Desktop
[edit | edit source]Nightly Builds to install MyGNHealth on a GNU/Linux Desktop are available at OpenBuildService
Orthanc integration
[edit | edit source]Notes obtained from C:
PACS / DICOM goals
For providers:
- Consistent access to imaging studies in multiple views / tabs
- Including accurate imaging information including type of imaging (CT, MRI, ultrasound, etc), date/time, location, and final report (essential if available)
- Quickly copy/paste images and reports (eg, into notes)
- Easy imaging viewing through a robust PACS viewer
- Upload new (or newly obtained) imaging studies to local PACS server from outside sources
- Patients frequently bring imaging discs with previous studies which should be stored for better continuity of care and medical decision-making. Furthermore, outside images should be able to be stored for quicker access and local evaluation.
- Send imaging studies to other locations and / or patients
- CD / DVD saving / “burning” (likely location specific)
- Send to outside medical office / provider via network (or CD/DVD)
- This assists in transfers of care and patient access to medical records.
- Notify provider on new imaging results (configurable as appropriate)
For developers (see implementing the above goals with some notable details below)
- Synchronization of relevant data in fault-tolerant and error-free way
- Reliability and accuracy are much more important than speed
- Support Orthanc and other servers (as possible)
- Providers should interface with data in intuitive manner with appropriate data viewers
- Zero config for the providers
- Imaging studies → PACS viewer
- Final reports / etc→ PACS viewer or PDF / text viewer (if not built-in to PACS viewer)
- Bidirectional interactions with PACS server
- PACS authentication should be seamless for the multiple types of users (providers, admin, etc)
- Connecting remote studies to local patients
- Uploading imaging studies (as above) should be attached to local patient
- Expose multiple PACS endpoints / tasks to administrators
- Other:
- Appropriate access restrictions for data and tasks
- Continuous access to data for providers (no downtime for updates or similar)
- Minimize bandwidth used (via avoiding unnecessary transfers) given resource restricted environments
- Network interactions should be encrypted via TLS or other similarly appropriate mechanism
Ideas from G, rather details than general concept:
- Target error codes, until here only 401, "Invalid Domain" or "Success"
- When creating a patient in HMIS from patient in Orthanc: Adopt/suggest name, dob & ID automatically
- Support DICOM preview inside client (Orthanc: Only link to open in browser yet, health_imaging: DICOM not supported)
- Add series & instances as ressources? Orthanc module supports only patients & studies, but Orthanc itself has patients, studies, series & instances as ressources
Open task/bug:
- “When requesting a DX image, have the possibility to send this to Orthanc “
- “When creating the DX imaging result, have the possibility to link the images/studies to data coming from orthanc”
Bug #59872
Issues
[edit | edit source]The following are issues that need to be fixed:
- FIXED:
DRM_IOCTL_MODE_CREATE_DUMB failed: Cannot allocate memory at startup. Using CMA=340m as a kernel boot param gives enough CMA memory. Colleagues at the KDE plasma channel said they would include it in next image.
Code of Conduct
The GNU Health Code of Conduct
[edit | edit source]GNU Health is, first and foremost, a social project to bring freedom and equity in health care around the World. GNU Health involves much more than just technology. We strive to generate a friendly, welcoming and positive environment around the GNU Health community.
We expect everyone involved with the GNU Health project to follow this Code of Conduct. This not only includes developers and contributors to GNU Health but also anyone posting to GNU Health mailing lists or using the GNU Health Forums or chatting on GNU Health IRC channels, wiki, web site, public meeting, or private correspondence, or otherwise interacting with the GNU Health community. We will remove any and all access to GNU Health resources or privileges for whatever period it deems fit, up to and including a permanent ban where it rules that a transgression has happened.
- Be respectful to other members, as well as people outside or new to the community. Personal attacks, hate speech, trolling, arrogance, baiting, spamming, and discrimination on the basis of such things as gender, race, and sexuality, will not be tolerated.
- Avoid foul or abusive language: remember that cultural standards differ, and that what may seem to you to be a very mild statement can be deeply shocking to another.
- Be mindful : Our actions directly affect others, including colleagues and the public, and reflect on GNU Health work as a whole. Please keep it in mind when posting in the mailing list or chatting in the IRC or other communication media.
- Be grateful for the effort, time and talent of others, keeping in mind that often times the labor was completed simply for the good of the community. Be attentive in your communications, whether in person or online, and tactful when approaching differing views.
- Differing views are a strength, and they should be resolved constructively, always with an eye toward finding common ground. Try to pacify any disruptive situations as early as possible to prevent conflicts from escalating.
- Be concise : Most of us are very busy, and certainly don't appreciate never-ending, reiterative or out-of-topic threads. Please remain focused, clear, concise, and on-topic when creating or responding a thread.
- Avoid heated arguments, since they have a way of dragging in bystanders and mutating until the original point is lost. Keep focus and provide solid arguments. Never descend to the personal level.
- Developers: If contested, back out your changes first, then argue your case. Objections are hardly likely to be raised for trivial reasons, and commits can always be re-applied. Before committing code, share your ideas or patches. Asking for approval on any change is never a bad thing, and certainly courteous.
- Be positive : Positive attitude at personal level generates positive communities. Positivity builds motivation and allows to find solutions instead of living on problems. It’s the perfect ingredient for a successful, happy, optimistic and healthy community.
The GNU Health Code of Conduct is inspired in the FSF LibrePlanet and FreeBSD Code of Conduct.
Glossary
ICD-10-PCS
[edit | edit source]The ICD-10 Procedure Coding System (ICD-10-PCS) is classification standard for surgical procedures proposed by the a World Health Organization (WHO). See Surgery.
Company
[edit | edit source]A company is a legal entity that has employees. You may define hierarchical company structures by assigning a parent company. The company sets the currency as well as header and footer texts for reports. GNU Health users belong to a company as well. Technically speaking, a company is an extension of a party.
ECG
[edit | edit source]Short for electrocardiography or electrocardiogram. See Intensive Care Unit.
Employee
[edit | edit source]An employee is a person that works for a company. An employee record in GNU health simply links a person to a company.
Glasgow Coma Scale
[edit | edit source]The Glasgow Coma Scale (GCS) is a standard to evaluate the level of consciousness of neurological patients. See Intensive Care Unit.
GSC
[edit | edit source]Short for Glasgow Coma Scale. See Intensive Care Unit.
ICU
[edit | edit source]Short for Intensive Care Unit.
Inventory
[edit | edit source]An inventory is a list of all items in stock at a given time. It allows to control and update the quantities of the products in stock. See Stock Management.
Module
[edit | edit source]GNU Health consists of many modules which add specific functionality to the system. Depending on the needs of your health institution, you may or may not install certain modules. See Modules.
Move
[edit | edit source]A move documents the relocation of a certain amount of a single product. Several moves are grouped to shipments. See Stock Management.
Party
[edit | edit source]Parties are used to represent organisations and people in GNU Health. A party is a generic concept and needs to be specified when you create one. Examples for parties are companies, health institutions, patients, and health professionals.
Patient
[edit | edit source]A patient is a person that gets treatment in a health institution. Technically speaking, a patient is an extension of a party that is defined as Person and Patient. See Patient Management.
Pediatrics Symptom Checklist
[edit | edit source]The Pediatrics Symptom Checklist (PSC) is an evaluation standard for children. See Pediatrics.
Person
[edit | edit source]A person is a human being. Persons can be further specified as patients or health professionals.
Person Unique Identification Number
[edit | edit source]The Person Unique Identification Number (or PUID for short) is the unique identifier for every person stored in the system.
Product
[edit | edit source]A product can be a physical product that a company owns or sells, but it can also be a service (i.e. a medical treatment, a test in a laboratory). Each product has a price and is the basic building block of billing in GNU Health.
PSC
[edit | edit source]Short for Pediatrics Symptom Checklist.
PUID
[edit | edit source]Short for Person Unique Identification Number.
QR Code
[edit | edit source]A Quick Response Code (or QR Code for short) is a machine readable tag that stores information like an ID, a URL, or other information. QR codes can be decoded with most smartphones or tablets as long as they have a built-in camera and an appropriate app. In GNU Health, QR codes are used for patient ID cards (see Patient Management) and newborn wristbands (see Pediatrics).
Shipment
[edit | edit source]A shipment is a collection of moves and documents the relocation of physical products. There are Supplier Shipments, Customer Shipments and Internal Shipments. See Stock Management.
User
[edit | edit source]A user is someone who uses GNU Health. A user record has at least a user name and a password. A user belongs to a company and can be linked to one or more employees who are logging into the system with that user. Access rights of a user are defined by assigning the user to one or more user groups. The language of the GNU Health user interface is defined on the user level as well. See Access Management.
FAQ
General Questions
[edit | edit source]Who is behind GNU Health?
[edit | edit source]GNU Health is from GNU Solidario, a non-for-profit, non-government-organization that delivers health with free software. In 2011, the Free Software Foundation adopted GNU Health, and today is an official package of the GNU project. GNU Health belongs to humanity and to public health, at no cost.
What is the license of GNU Health?
[edit | edit source]GNU Health is licensed under the GNU General Public License, GPL v3 or later.
What is the main site of GNU Health?
[edit | edit source]Where can I download GNU Health ?
[edit | edit source]GNU Health is hosted at GNU.org. You can get the latest version at http://health.gnu.org/download
I want to get involved in the GNU Health community. Where can I get more information?
[edit | edit source]Refer to the Resources section of this book.
On which operating systems can GNU Health be installed?
[edit | edit source]The GNU Health server can be installed in any GNU/Linux and *NIX based systems with a Python interpreter. Some people have installed GNU Health server on Microsoft Windows.
The client can be installed in GNU/Linux systems, OpenBSD, FreeBSD and other *NIX systems, as well as in Microsoft Windows and Apple Mac OS X (Macs with Intel processors only).
What is the software versioning model in GNU Health?
[edit | edit source]GNU Health uses a sequence-based schema, using the "major.minor.revision" identifiers. GNU Health uses odd minor numbers for development versions, and even minor numbers for stable releases.
For example: 3.16.1 would correspond to a stable release, whereas 2.15.0 would be a development release. Development releases are not meant to be used in productive environments, and they are intended to be used by developers.
Demo Database
[edit | edit source]I can not connect to the GNU Health Demo Database. What shall I do?
[edit | edit source]- Make sure that you are using the correct version of the client. This is not necessarily the most recent version. Please refer to the chapter about the Demo Database.
- Make sure your Internet connection is up and running. (Temporary communication problems between the Tryton client and the Demo Database may be caused by unstable or very slow connectivity.)
Mailing lists
[edit | edit source]I have a question about GNU Health, what is the best way to ask ?
[edit | edit source]The GNU Health general mailing list is "health @ gnu . org" . For general users (non-developers) this is the best place to start. You can subscribe here https://lists.gnu.org/mailman/listinfo/health
What is the right format for emails ?
[edit | edit source]Please don't use HTML for emails. Use plain text
Can I include screenshots in my mails ?
[edit | edit source]Please don't. They take a lot of space in our mailboxes. The best way is to upload the screenshot to your favorite image hosting community, and provide the link in the mail. One example is imgur.
What is the recommended way to reply a message ?
[edit | edit source]We recommend using interleaved (inline) posting when replying a message. Please respond to the specific mail, not to a daily "Digest" message. Replying to the digest "breaks" the thread and it is hard to contextualize the messages.
Subjects on the emails
[edit | edit source]Please use short, concise and contextualized subjects when writing to the mailing lists.
As mentioned in the previous section, please don't use the "Digest" as the subject to reply.
Operating System-Specific Notes
|
|
This chapter applies to version 3.6 of GNU Health. |
openSUSE
[edit | edit source]
This section provides the instructions for the official and standard (vanilla) installation on openSUSE.
If you want to use the openSUSE package based installation, please refer to the Community pages |
Download and install the Operating System
[edit | edit source]- Download the openSUSE Leap Network CD image
- Check the partitioning and FS options (we use ext4 filesystem)
- Select SERVER (text only) installation
- Enable SSHD server
- Create the user "gnuhealth" when prompted at installation time.
Install the requirements
[edit | edit source]sudo zypper in patch gcc libxml2-devel postgresql postgresql-server unoconv python3-pip python3-devel
Initialize the PostgreSQL environment. The next systemctl start command will generate the initial pg cluster.
systemctl start postgresql
Update locally pip3
[edit | edit source]su - gnuhealth
pip3 install --upgrade --user pip
Continue with the GNU Health Installation
Debian
[edit | edit source]|
|
This chapter applies to version 3.6 of GNU Health. |
Download and install the Operating System
[edit | edit source]- Download the Debian OS image
- Check the partitioning and FS options (we use ext4 filesystem)
- Deselect the "Debian desktop environment" if you just want a server (no graphical interface)
- Enable SSHD server
- Create the user "gnuhealth" when prompted at installation time.
Install the requirements
[edit | edit source]apt-get install postgresql patch python3-pip unoconv
Continue with the GNU Health Installation
FreeBSD
[edit | edit source]|
|
This chapter applies to version 3.8 of GNU Health. |
At Operating System installation
[edit | edit source]- Select SSHD
- Create the gnuhealth user at installation time
Install requirements
[edit | edit source] # pkg install postgresql13-server wget bash py37-pip \
# py37-lxml py37-pillow patch rust
Initialize PostgreSQL
[edit | edit source] # /usr/local/etc/rc.d/postgresql oneinitdb
# sysrc postgresql_enable=yes
# service postgresql start
Create Python3 links
[edit | edit source] # ln -si /usr/local/bin/python3.7 /usr/local/bin/python3
# ln -si /usr/local/bin/python3 /usr/local/bin/python
Change /bin/bash to /usr/local/bin/bash
[edit | edit source]The first line of script that starts gnuhealth (start_gnuhealth.sh) is pointing to /bin/bash. On FreeBSD you have to change that to /usr/local/bin/bash.
Continue with the GNU Health Installation
CentOS
[edit | edit source]Install Python 3.8
[edit | edit source]# yum install python3 # yum install python3-devel
Install PostgreSQL 12
[edit | edit source]# yum -y install https://download.postgresql.org/pub/repos/yum/reporpms/EL-7-x86_64/pgdg-redhat-repo-latest.noarch.rpm # yum -y install epel-release yum-utils sudo yum-config-manager --enable pgdg12 sudo yum install postgresql12-server postgresql12
Continue with the GNU Health Installation
Ubuntu
[edit | edit source]- These instructions apply to Ubuntu 20.04 and Armbian 20.05 version
- Create the gnuhealth user at installation time
Update the Sources
[edit | edit source]apt-get update
Install requirements
[edit | edit source]apt-get install postgresql-server-dev-12 libxml2-dev libxslt-dev python3-dev pkg-config libfreetype6-dev postgresql patch python3-pip unoconv libpng-dev libjpeg8-dev
Continue with the GNU Health Installation
Armbian
[edit | edit source]- These instructions apply to Armbian 20.05 version
- Create the gnuhealth user at installation time
Update the Sources
[edit | edit source]apt-get update
Install requirements
[edit | edit source]apt-get install postgresql-server-dev-12 libxml2-dev libxslt-dev python3-dev pkg-config libfreetype6-dev postgresql patch python3-pip unoconv libpng-dev libjpeg8-dev
Continue with the GNU Health Installation
Packaging Guidelines
In order to make the GNU Health installation and documentation process valid for the vast number of operating systems available, we need to specify some basic guidelines. These guidelines should be taken into account if you want to create a package for your operating system or distribution.
Please note that the package is not required to install GNU Health. The GNU Health installer, detects most operating systems and installs the system and requirements as explained in the installation guide.
If want to create and/or maintain a package for your operating system, please follow these (partial) general guidelines. Note that these guidelines will change from time to time in order to adapt to the new releases.
- Operating System user : The operating system user is "gnuhealth"
- Installation directory : Installation directory is the $HOME directory of the operating system
- RC file : GNU Health comes with a set of pre-defined environment variables and aliases. These are stored in the $HOME/.gnuhealthrc file. It's important that this file is always loaded at login time. The documentation and control programs heavily make use these variables and aliases.
- Shell : The default shell, used by the installation script is BASH
- GNU Health installer : This is the main installer, since GNU Health 3.0 the name is gnuhealth-setup, and is included in the main GNU Health tarball. Invoking this script would probably be the easiest way.
- Directory Structure : Please follow the directory structure and links that are set during the standard installation.
- Tryton configuration file : GNU Health comes with a basic Tryton server configuration file, tailored for the general use.
- GNU Health control center : This program is the base for controlling the GNU Health instance (status, backup, updates, language packs ... ). Since GNU Health 3.0 resides in the "util" directory.
In addition to these basic guidelines, there are a list of per-requisites as per Operating System that must be included. Please check the installation section for your particular Operating System.
Desktop Entry
[edit | edit source]The GNU Health client contains the ".desktop" file, called gnuhealth-client.desktop. For system-wide installation, it can be installed on "/usr/local/share/applications/gnuhealth-client.desktop" in FreeBSD or under "/usr/share/applications/gnuhealth-client.desktop"
When installing the package locally, the gnuhealth-client desktop file can be installed under $HOME/.local/applications.
Icon
[edit | edit source]The icon we recommend using for the application menu is the scalable "gnuhealth.svg" file (under gnuhealth/data/pixmaps/gnuhealth), that can go on the generic /usr/local/share/icons/hicolor/scalable/apps/gnuhealth.svg (FreeBSD) or /usr/share/icons/hicolor/scalable/apps/gnuhealth.svg on many GNU/Linux distros.
Community Pages
The following are links to individuals and communities related to GNU Health.
We can not verify whether the information on these links is correct, up-to-date, or comply with the GNU Health guidelines, such as Packaging Guidelines. Use at your own risk |
| Community | Link | Comments |
|---|---|---|
| Debian | ||
| openSUSE | https://en.opensuse.org/GNUHealth_on_openSUSE | Package-based one-click-install |
| user group Deutsch | https://hagenbichler.at/usergroup.html | info and reports in German |
Errata
In GNU Health we strive to have a system free of bugs and issues, but we know that is not possible :)
This chapter addresses those issues that may impair the installation or upgrade process.
3.6
[edit | edit source]Context: Installation (gnuhealth-setup)
Issue : GNU Health installer needs to be updated due to incompatibility of Werkzeug 1.0 with Trytond Kernel 5.0
Solution:
Make sure you complete the step of downloading and installing the latest gnuhealth-setup as described in the installation documentation.
The gnuhealth-setup version must be 3.6.2 or later.
$ gnuhealth-setup version
3.4
[edit | edit source]Context: Upgrade process
Issue: Error when migrating the product templates and/or categories.
Solution:
- Run the script upgrade_34.sql as documented in the upgrade process for 3.4
- Execute the following SQL commands, as indicated in the Tryton migration
delete from ir_property where res like 'product.category,%' and SUBSTRING(res, POSITION(',' IN res) + 1)::integer not in (select id from product_category);
delete from ir_property where res like 'product.template,%' and SUBSTRING(res, POSITION(',' IN res) + 1)::integer not in (select id from product_template);