Blender 3D: Noob to Pro/Soft Body with wind
|
|
Applicable Blender version: 2.49. |
Prologue
[edit | edit source]This is the Blender wind and soft body tutorial. This tutorial will try and help your knowledge of using Soft Body and the Fields and Deflection panels in Blender 3D. (For best results, I recommend you use Blender version 2.43 or higher). Don’t forget to save your work at various points throughout the tutorial.
Setting up scene
[edit | edit source]The plane
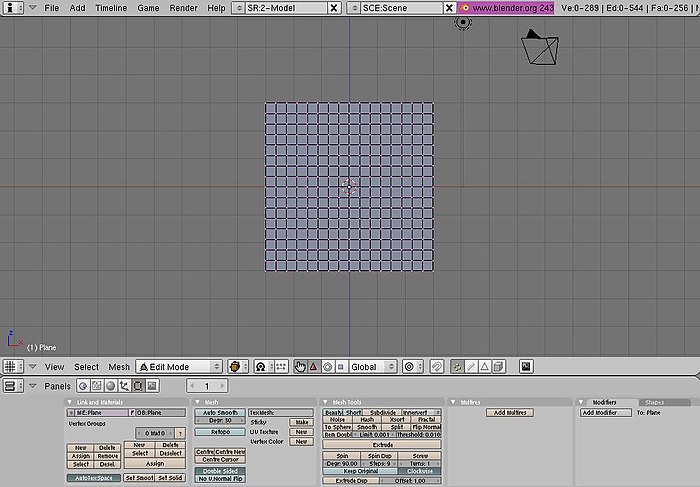
[edit | edit source]Delete the default cube [X key, or yes, even the Delete key] and enter Front view mode [Num. Pad 1]. Add a plane, scale 3 times [S key, 3, Enter] and sub-divide 4 times until you get something like the shape below. If your computer can handle more, and you want more, sub-divide as many times as you like, but if your PC is struggling with this, undo once or twice.
The wind items
[edit | edit source]TAB out of edit mode (if you haven’t done so already), enter side view [Num Pad 3] and add an empty. Clear the rotation [ALT + R] and rotate it 90° [R, 90]. Place it about -5 from the centre [G, y, -5] and make sure its still in the middle of the X axis. Your scene should look like the picture below:
For the second wind item, add an empty like before and clear its rotation, but DON’T rotate it any more. Move it along the Y axis by 4 places [G, Y, 4] and -10 by the Z [G, Z, -10]. And now your scene should look something like this (with all items selected).
And that’s all your items you’ll need for this. Onto the harder part.
Designating each object's job
[edit | edit source]The plane
[edit | edit source]Now, the plane will become a soft body, so enter the Object Panel [F7], click on the Physics Button (beside the three arrows, see second picture below) and click on the soft body button. You will get a load of boxes, but we only need to look at the Grav, Goal, and the bottom parts:
Change the values of these as shown above. Change the Aero part to 732 (if you go up to 1000, it changes the final output by a bit).
Now, click on the Soft Body Collision tab and click on the Self Collision and Deflection buttons. You don’t need to change any of the numbers here. The buttons window should look something like this:
Now we will move on to the Empty items which will be the wind.
Creating the wind
[edit | edit source]The two empty’s we created earlier will be the items that will act like wind, and when you render at the end, they will be invisible, just like the wind. Anyway, select one of the empty’s and enter the Physics panel. Click on the box under the Fields and select “Wind”. (Blender 2.5+ note: First you will have to choose "Force Field", then change the Type to "Wind".) Change the Strength to 20, click on Use MaxDist and change MaxDist to 2.5.
Do the same for the other empty. Your scene should look something like this:
The movement
[edit | edit source]This is probably the most complicated part, but shouldn’t take long.
The Empty on the left
[edit | edit source]In side view [Num pad 3], select the empty on the left and do the following: 1. Press [I key] and then select LocRotScale from the list it gives you. This inserts a key frame, saying that on this frame, keep the Location, Rotation and scale the same throughout the rest of the movie, unless it comes across another key frame, which might tell it to move or stay the same. Now, press the Up Arrow Key until you get to frame 31 (about 3 times). If you don’t know where the box is that tells you what frame your on, check the following picture:
Number 1 shows the current frame number and the name of the selected object while number 2 shows the current frame and allows you to change the frame with the arrows on either side.
Back to the movement
[edit | edit source]On frame 31, select the empty on the left (the one selected in the picture above) and press [G key]. Now press [Y key] and press “4”, then [Enter key]. Now press [I key] and select LocRotScale again. Now, if you press and hold the Left Arrow Key, you should see the Empty move back to its starting place. Now, to check the curve guide (called the "IPO Curve Editor"); right-click on the top panel (number 1 in picture below), then select "Split Area" and click when the line is a bit out from the side (number 2 in picture below).
Now, click on the box (shown below) and select "IPO Curve Editor" from the menu.
Noob note In Blender 2.6+ the IPO Curve Editor has been replaced by the Graph Editor, which allows you to edit F-curves.
This window just shows where the key frames you entered are, and how much the shape changes, moves or rotates. Now, go back to frame 1 and press [ALT]+[A], which plays the animation. You should see the "wind" hit the sheet and the sheet will blow away. Pretty nice, huh? Now, it would be fine like that (I’ll show you how to get rid of the blockyness in the last part), but say you want to hit the sheet again and send it upwards? We will use the second empty for this.
Select the second empty (the one on the bottom). Insert a key frame ([I key], LocRotScale) on frame 1 and frame 50. Go to frame 60, grab the empty and move it up 8 places ([G key], [Z key], 8). Insert a key frame ([I key], LocRotScale) and then go back to frame 1. You have completed the basics, and the most of this tutorial. Now, press [ALT]+[A key] and watch your animation.
Finishing touches
[edit | edit source]Blockiness
[edit | edit source]Now, to sort out the blockiness, go to the Editing buttons panel [F9] and select the "Set Smooth" button.
Now if you preview again ([ALT]+[A]) you should see the plane is smoother, but might be a bit unrealistic (i.e. not acting like real cloth). Now, that can’t be helped, the only way to get rid of it is to subdivide the plane several more times, but that will put a LOT of strain on your computer, so I wouldn’t recommend doing it unless your computer can handle it.
Background
[edit | edit source]First of all, got to the Scene panel [F10] and over at the Format panel, change SizeX to 400 and SizeY to 300. Now, to change the background colour when you render, go to the shading panel [F5] and select the World buttons. Now, in the World panel change HoR to 0, HoG to 0.80 and HoB to 1.0.
All that does is just changes the background colour to a brighter, nicer shade of blue. Now, I’m just getting a bit lazy, so I’ll just explain this part with a picture: (don’t forget to select the plane).
Change the values and press the buttons shown in the picture. This will change the colour of the plane to white.
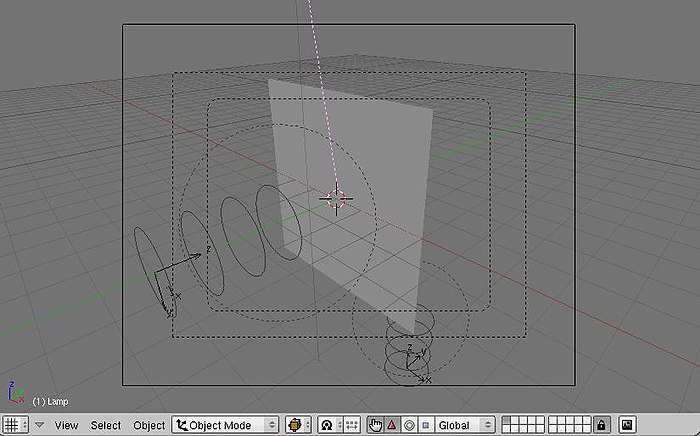
The only problem now is the light. Press [F12] and you should see what I mean. There's no light shining on the plane where the camera is, so its just shaded dark. To fix that, select the light and go to the shading panel [F5]. You now have options for the light. Click on the "Sun" button and press [ALT]+[R] to clear rotation. Now, in side view [Num pad 3] press [R] and then type -45. Enter top view [Num pad 7] and press [R] and then -45. This now shines the light in the direction of the plane, but, if like mine, the light is above the plane in top-view, press [G], [Y] and then -5. The line coming out of the light source should be roughly pointing at the centre of the plane. Here’s what your window should look like:
The pink line is the light. This was taken in camera view [Num pad 0]. Render the frame and you should see what the final product looks like. Move to any frame you want and press [F12] and it will show the rendered image for that frame. Now, rendering the entire animation might, in fact, will take a long time unless you have a completely new PC, are using a big server like DreamWorks (one of the big PC’s, used for rendering images faster) or have a quicker renderer, I don’t use any external renderers, and am stuck using a PC that is about 2 years old (in other words, full of junk). It took my PC less than 5 minutes to render 100 frames, and the last 25 were just blank (as the plane just flew above the camera). To change the amount of frames to render, and to render the full animation, here’s what you press:
The box that says End:100 lets you select what frame you finish rendering the animation on (NOTE: the Sta:1 button lets you select what frame to start rendering the animation). When you press the ANIM button, it starts rendering the animation. The Box covered in blue, that says Jpeg, lets you change the format of the image in the end.
To export the animation as an AVI format, select the AVI button shown below, then press OK. Now, you need to Animate the sequence again, so press the ANIM button again.
The finished.AVI will be saved in a folder with the rest of your rendered images. It should be saved in a folder called tmp, which (on a Microsoft computer) is in My Computer/tmp. The name of the file will be whatever your start and end frames are, so in this movie, mine is called 0001_0100.avi. You can now do whatever you want with your movie now, and hopefully you have learned a trick or two that will be helpful later on in your Blender career.
Final result
[edit | edit source]Here is an animated.gif of my final result: (imported into Macromedia Flash and exported as an animated.gif)You are required to be an auto confirmed user or uploader. I made a gif with a frame-step of 4.


