Blender 3D: Noob to Pro/More Mesh Editing Techniques
|
|
Applicable Blender version: 2.67. |
You previously scratched the surface of the tools that Blender provides for editing meshes. This page will introduce more of them.
Adding More Mesh Pieces
[edit | edit source]Start with the default cube again. Select it and TAB into Edit mode. Press SHIFT + A to bring up the Add menu. Instead of all the submenus with all the objects you could add in Object mode, you will see only a single menu containing only mesh objects. Select another cube, and use G to move it away from the first cube.
If you TAB into Object mode, you will see that the two cubes look like separate, disconnected objects, but they are in fact one object, and cannot be selected separately in Object mode. You can TAB back into Edit mode, and make connections between the vertices of the two cubes, which you cannot do with separate objects. Therefore:
|
A single mesh object can be made of separate, disconnected pieces. |
Linked Selections
[edit | edit source]If you have some part of a mesh selected, pressing CTRL + L will select all other parts of the mesh that are connected to the already-selected parts. In the above case of the object made up of two disconnected cubes, you can RMB on a single vertex of one cube, then use CTRL + L to select all the rest of that cube but not the other.
Another way to do linked selections is to simply move the mouse over some part of the piece you want to select, and press L to immediately select everything connected to that. Conversely, SHIFT + L will unselect everything connected to the vertex under the mouse.
Separating and Joining Meshes
[edit | edit source]You can separate a part of a mesh into its own object. The part you are separating doesn’t have to be disconnected from the rest of the mesh. Simply select the part you want to separate in Edit mode, and press P , and in the menu that appears, choose “Selection”. You will see the selected part immediately change to a reddish-orange highlight, indicating it is part of the object selection but not the active object.
Conversely, you can join two or more mesh objects into one. Select all the desired objects in Object mode, and press CTRL + J , and you will see them all immediately take on the orange-yellow highlight indicating they are all the active object. TAB into Edit mode, and you can confirm all are editable as part of the same mesh object.
Proper Extrusion
[edit | edit source]You previously discovered how to add whole new sections to a mesh with CTRL + LMB . Blender also has a proper Extrude function, which lets you do this with a bit more control.
Start with the default cube, as usual. Go into Edit mode. Select just the top four vertices. Press E to start extruding, and move the mouse roughly along the direction of the Z-axis. You will find yourself dragging out a whole new face formed from four new vertices connected to the ones you previously selected. You will notice also that the movement of the newly-added part of the mesh is automatically constrained to be parallel to the Z-axis. Press LMB or ENTER to finish the extrusion operation.
Deselect everything. Now try selecting another four vertices of the original cube, say making up a face pointing along the X-axis. Now if you extrude these, you will see that the extrusion is automatically constrained to move only parallel to the X-axis.
A quirk of the extrusion function is that if you press E and then immediately abort with RMB or ESC , the additional mesh piece is still created, but it is left in the same position as the original mesh. To really abort the extrusion, you have to undo it with CTRL + Z .
More Extrusion Options
[edit | edit source]ALT + E brings up the Extrude menu, which gives you access to more options, depending on what you have selected:
- “Region”—extrude the entire selected area as one, exactly equivalent to E .
- “Individual Faces”—if you have more than one face selected, then they are extruded separately. In particular, any edge common to two selected faces will give rise to two separate extruded edges, rather than one.
- “Edges Only”—extrudes only the edges; new faces are created only connecting the new edges to the existing ones, not between the new edges.
- “Vertices Only”—extrudes only the vertices; edges are created only connecting the new vertices to the existing ones, not between the new vertices, and no new faces are created.
Edge Loop Selection
[edit | edit source]Edge loops are an important concept when constructing meshes. They are so important that Blender provides a shortcut for selecting an entire edge loop with one click: ALT + RMB on an edge or vertex that is part of the loop you want to select, and it will select the entire loop. Alternatively, ALT + SHIFT + RMB adds an edge loop to the selection; or, if the part you click on is already selected, it will deselect the entire loop.
For example, try experimenting with a UV sphere: every line of “latitude” and “longitude” in this mesh is an edge loop.
Loop Cuts
[edit | edit source]Sometimes you need to add more vertices to the interior part of a mesh, perhaps to flesh in some detail. The loop cut function lets you add more edge loops between existing ones.
Ensure you are in Edit mode. It doesn’t matter what parts of the mesh are currently selected. Press CTRL + R to activate the Loop Cut function. You will see a magenta-coloured loop wrap itself around different parts of the mesh as you move the mouse. You can press RMB or ESC to abandon the operation at this point, or once you see the loop appearing around the correct part of the mesh, you can use LMB or ENTER to proceed. Now the magenta colour changes to the usual orange-yellow selection highlight, and will now restrict itself to sliding along this section of the mesh as you move the mouse. If you press LMB or ENTER at this point, you will end up with a new loop of vertices and edges at the last-shown point, while RMB or ESC will still create the new loop, but leave it positioned at the midpoint.
When the loop is still at the magenta stage, you can use the mouse wheel to increase the number of cuts to 2 or more. You can also type a number of cuts using 0KEY ... 9KEY .
Edge Loop Deletion
[edit | edit source]Conversely, you can get rid of edge loops as well, reducing the complexity of the surface without leaving holes in it. Select the edge loop (the quick way is ALT + RMB on a component edge or vertex as described above), then bring up the deletion menu ( DEL or X ) and select “Edge Loop”. The selected loop will disappear, and adjacent edges and faces will be merged.
Subdividing Parts
[edit | edit source]A loop cut always cuts a complete loop. Alternatively, you can subdivide just a selected part of the mesh: make your selection, then press W to bring up the Vertex Specials menu, and select the top option, “Subdivide”. This will create one cut, but a panel will appear at the lower left of the Toolshelf ( T to make it visible at the left of the 3D view if it’s not), where you can alter the number of cuts and other settings. This same option is also available on Edge Specials CTRL + E .
Another option is the second one on the W menu: “Subdivide Smooth”. This one computes a Catmull-Clark interpolation to give more of a curve rather than a flat subdivision.
Subdivision Surface Modifier
[edit | edit source]A modifier causes some change to the geometry of an object just before it gets rendered. The change does not affect the object as you view and edit it in the 3D view, or as it is stored in the document (unless you apply the modifier, which makes the change permanent). This allows you to create some complicated effects at render time, while the original mesh stays simple and easy to edit. Modifiers for the active object are applied and controlled in the Modifiers ![]() tab in the Properties window.
tab in the Properties window.

A subdivision surface modifier (also known as a “subsurf” modifier) applies the Catmull-Clark interpolation discussed above as a modifier. Being a modifier, it applies to the entire object, not just to selected vertices. But since the original mesh is preserved, you use it as a control cage to adjust the shape of the interpolated curve.

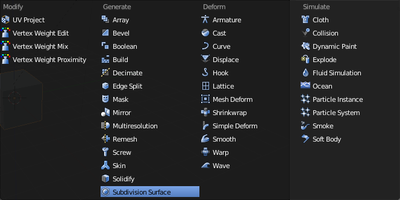
Start with the default cube selected in Object mode, as usual. Go to the Modifiers tab in Properties ![]() . When you select “Subdivision Surface” from the “Add Modifier” menu, a new panel appears as at right.
Notice the two value sliders under the “Subdivisions” heading; 'View' controls the level of subdivision within the 3D view, while 'Render' applies to the actual render; the higher the number of levels, the closer to a curve the interpolated geometry becomes. Having two separate settings for working environment and render allows for faster operation in the 3D view, with the usual tradeoff of lower quality, while still allowing maximum quality for the final render.
. When you select “Subdivision Surface” from the “Add Modifier” menu, a new panel appears as at right.
Notice the two value sliders under the “Subdivisions” heading; 'View' controls the level of subdivision within the 3D view, while 'Render' applies to the actual render; the higher the number of levels, the closer to a curve the interpolated geometry becomes. Having two separate settings for working environment and render allows for faster operation in the 3D view, with the usual tradeoff of lower quality, while still allowing maximum quality for the final render.
|
Keyboard shortcuts: Because the Subdivision Surface modifier is so heavily used, there is a set of hotkeys for adding the modifier to the current object if it doesn’t already have one, and setting the number of subdivision levels in the 3D view: CTRL + 1KEY .. CTRL + 5KEY for setting the view levels to 1 .. 5 respectively. |

As soon as you add the modifier, the appearance of the cube should change to look something like at right (here shown with just one level of subdivision).
The upper part of the panel (from the “Apply” and “Copy” buttons upwards) is common to all modifiers. Note the X button at the right. Clicking it gets rid of the modifier. Notice also a group of 4 icon buttons in the middle, the leftmost two look like a camera and an eye. The icons are defined as follows (from left to right):
- Use the modifier during rendering
- Show the modifier effect in the 3D view
- Show the modifier effect in the 3D view in Edit mode (if this is unchecked and the previous one is checked, the modifier effect disappears while in Edit mode)
- Show the mesh as though the modifier were applied to it in Edit mode.
Unchecking the first one lets you disable the modifier without losing its settings. The remaining three can be handy if you’re trying to disentangle the effects of different modifiers during editing.

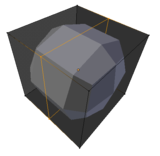
When the third button is enabled, the mesh will look like this in Edit mode. The original mesh remains highlightable and editable. A preview of the effect of the modifier is also visible, and responds immediately to any changes made to the original mesh. (Try moving some vertices around, and see what happens.)

The fourth button goes one step further and acts as if the modifier has already been applied, while allowing you to edit only those parts corresponding to the original mesh. (This button affects the behavior of the third button. It cannot be used independently, and may disappear if the third button is unchecked.)
Sharpening the Curves
[edit | edit source]The subdivision surface modifier offers much more control over the resulting shape than might be apparent from above. For example, you may not want uniform curvature everywhere, you may want some parts of the shape to have sharper edges. This can be achieved in two ways:
- by applying a crease value to selected edges
- by strategic positioning of additional vertices in the control-cage mesh.
Applying a Crease
[edit | edit source]
Select the edges where you want the curve to be sharper. Press SHIFT + E . Note how the curve gets pulled more or less closer to those edges as you move the mouse. The selected edges take on a magenta colour, indicating they have a nonzero crease value applied.
The crease value can be seen and edited in the Transform panel at the top of the Properties Shelf at the side of the 3D view (you can toggle its visibility with N . Values can range from 0.0 (no crease, the default) to 1.0 (maximum sharpness of the edge).
Adding Vertices
[edit | edit source]
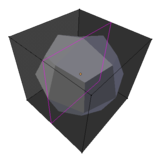
For example, start with the subdivided cube example as above. Press CTRL + R to start a loop cut, and position the magenta outline something like this:

Press LMB or ENTER ...

... and move the mouse so the newly-added loop moves closer to one side of the cube. See how the subdivided mesh develops a sharper curve on this side?
To confirm the placement of the new loop, press LMB or ENTER .
Which to Use?
[edit | edit source]The basic principle is, the closer together the vertices are, the more control you have over the curve at that point. So the question is, do you just want a sharper edge, or do you want more detail? That will govern whether you need to add vertices, or just apply a crease to the existing edges.