Blender 3D: Noob to Pro/Basic Animation/ScreenLayout
|
|
Applicable Blender version: 2.49. |
Intro
[edit | edit source]If you haven't done anything to the default blender startup, starting blender will produce the basic 3D window with a light, a camera, and cube, the buttons window, and the ever-present basic drop down tabs at the top of the screen known as the user preferences window. This is the default setup for modeling, but now that we are starting animation, we are soon going to be looking at a new(ish) set up. You'll see what I mean.
Setup
[edit | edit source]Now the first thing we need to do is enter 'animation mode.' To do so, look at the top of the window, the 'user preferences window.' You should see file, add, timeline, game, render and help. What we want is the little drop down menu next to 'help' that you've probably never touched much less noticed. It should read something like: 'SR:2-model' with little buttons on both sides of the text. Click the button on the left side that looks like two little arrows to open a drop down menu. Click on 1-Animation.
About this setup
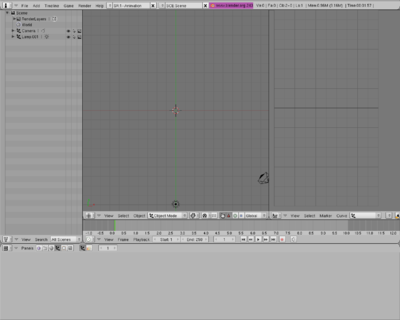
[edit | edit source]No, Blender didn't just go crazy, but as you can see, there are some changes that need to be explained. Blender has just opened a set of new windows, each with its own functions and commands. You can probably recognize three of them. The 3D view is still there, but it's been resized smaller to fit the new stuff. Our old friend the buttons window is still there at the bottom, and of course the user preferences window is still at the top. But enough of what's the same - you're wondering what the heck all the new stuff is for.
There are now three new windows in all. From top left going clockwise, the first is the Scene window. This window is used for finding objects and such located throughout your 3D environment. By clicking on any one of the objects listed here, its counterpart in the 3D viewscreen will be selected. You can also select and tinker with your world settings and render layers from this window. The next window is the IPO (InterPOlation) curve window; it is the window that displays data concerning how your objects will actually move, and can begin to look very technical as we progress. Don't worry, it's normal. The final window is easier to miss. It is essentially a timeline, and is rather thin located between the 3D view/IPO windows and the buttons window. This is the Timeline window. For what we'll be doing for now, it will basically function as a kind of VCR. It is essentially the time codex associated with your animation. Clicking anywhere on the timeline will show you the animation as it is at that point, like fast-forwarding/rewinding then pausing. Like any good VCR the timeline window is equipped with the Play, Stop, Fast-Forward, and Rewind button set.


