Blender 3D: Noob to Pro/Advanced Tutorials/Print version
| This is the print version of Blender 3D: Noob to Pro You won't see this message or any elements not part of the book's content when you print or preview this page. |
Table of Contents
Advanced Tutorials
Python Scripting
- Introduction
- Export scripts
- Import scripts
- Procedural object creation
- Scripts for modifying meshes
- Creating a GUI for your script
Advanced Animation
- Introduction
- Guided tour:
- Working example: Bob
- Working example: Piston, Rod and Crank
Advanced Tutorials
- Letters in brackets i.e.:(z) mean there is addition information at the bottom of the page.
Introduction:
This tutorial is meant to stop all the RVK (Relative Vertex Keys) questions.
Window Layout:
Set the left half of the screen as 3D View. The other half is divided in two. The top is Action and the bottom is IPO (set to vertex display).
Setting your Neutral Pose
Make sure you are on the first frame (a). With the cursor over the 3D View, select the mesh you want to animate. (mesh in object mode) and press the I key. Select Mesh from the pop up menu then Relative Keys from the next pop up menu. A line will appear in the IPO view. This line is your neutral pose.
Setting up your additional Pose Lines
Now, figure out how many key frames you will need. If you want to move both eyebrows up and down then you will need 4 additional IPO lines.
Left Brow Up Left Brow Down Right Brow Up Right Brow Down
Press the up arrow (cursor key) to move to forward 10 frames. Press the I key while over the 3D View and select Mesh. Repeat until you see a total of 5 lines in the IPO window.
Set your Poses
Right click on the Neutral pose line in the IPO window. This sets the mesh to the neutral pose. Now Right click on the next line up in the IPO window. Enter edit mode in the 3D View and move the vertices as desired (in this case you will be moving verts to get the left Brow up pose). Press Tab to exit edit mode. Now right click your Neutral pose line in the IPO window. You will see your object in its neutral state. Right click the next line up and you should see the changes you just made to your object. Set up all your mesh poses following the above instructions.
Name your Poses
RIght click on the Key names in the Action window. Change the name and click OK.
Time to Animate (b)
Click on the arrow next to the Sliders text. This will give you access to the pose sliders. Move to frame 20 to start your action. Move the pose slider but release the mouse when set to 0. Now move 10 frames forward and move the same slider to 1.00 (maximum). Use this method to set up all your actions(c). Remember to add a 0 value frame to end the pose.(d).
Adjust your Slow in & Out
In the IPO View select from the menu to find the IPO curves. You can get back to the Pose lines by selecting KeyIPO from the same menu. Right click the spline you want to edit and press TAB to enter edit mode. Move the handles to adjust slow in/out.(e)
(a) In this case moving to a frame has nothing to do with animation. It is done so that your pose lines are separate from each other. (b) Select your key frame marker and use the usual commands to move <g> and duplicate <d> them. (c) Be subtle by not pushing the slider all the way to 1.00. (d) Try overlapping your poses. (e) When setting slider values they can sometimes go into the negative value. This will give you weird results. Although sometimes they can make your animation more interesting. To fix this edit the IPO, select the point where the line dips below zero and press the V key. Do the same at the other end of the curve if needed.
Warning! Blender has a limit to the number of verts you can use.
Click here to read the advanced animation tutorial guided tour.
Python Scripting
|
|
Applicable Blender version: 2.63. |
One of Blender's powerful features is its Python API. This allows you to interface with Blender through the Python programming language. The Python interface allows you to control almost all aspects of Blender, for example you can write import or export scripts for meshes and materials of various formats or create procedurally generated textures. You can also create complete animations procedurally and write scripts to modify existing scenes in any way you can think of. On top of all, you can easily create a user interface for your script, transforming it into a generally usable tool.
The relevant section of the Blender User’s Manual is here.
Download Python Scripts from the Blender site here.
This forum on blenderartists.org discusses Python scripting.
Chapter contents
- Introduction
- Anatomy Of An Addon
- A User Interface For Your Addon
- Adding A Custom Property
- A Separately Installable Addon
- Object, Action, Settings
|
Scripting in the older 2.49 version of Blender is completely different, and is described here. |
Introduction
|
|
Applicable Blender version: 2.67. |
Python is a powerful, high-level, dynamic language. The version of Python used in Blender 2.67 is 3.3. If you are unfamiliar with Python, start with the Python book. If you are familiar with older (2.x) versions of Python, this page summarizes what’s new in 3.x.
If you are familiar with Python scripting in older versions of Blender, be aware that 2.5x/2.6x is completely different; the old Blender module is gone. Much of the functionality is now available through the bpy module, but don’t expect an exact 1:1 correspondence.
First Steps In Blender Scripting
Open a new, default Blender document. If you haven’t customized your settings, there will be a Timeline ![]() window along the bottom; change this to a Python Console
window along the bottom; change this to a Python Console ![]() . Perhaps increase its height to let you see more lines at once.
. Perhaps increase its height to let you see more lines at once.
To start with, let’s find out what objects are present in the document. At the “>>>” prompt, type
bpy.data.objects
You should see the response
<bpy_collection[3], BlendDataObjects>
which isn’t actually all that informative. In fact what you have here is an iterator; to see its contents, just do the usual Python thing and convert it to a list. Try entering this:
list(bpy.data.objects) #or bpy.data.objects[:]
This time the response should be
[bpy.data.objects["Camera"], bpy.data.objects["Cube"], bpy.data.objects["Lamp"]]
which shows you how to refer to the three default objects you can see in the 3D View window.
Let’s get a reference to the Cube object for more convenient access: type
Cube = bpy.data.objects["Cube"]
Now let’s try querying the value of one of its attributes: type
Cube.delta_location
You should see the response
Vector((0.0, 0.0, 0.0))
The Vector type comes from the mathutils module provided by Blender. But unlike bpy, this is not automatically imported into the Python Console. So let’s bring it in for subsequent use: type
import mathutils
OK, now let’s try changing the location of the default Cube: type
Cube.delta_location += mathutils.Vector((1, 1, 1))
(Note the doubled parentheses: mathutils.Vector takes a single argument, which is a tuple of X, Y and Z coordinate values.)
Were you watching the 3D View when you pressed ENTER ? You should have seen the cube jump to a different position. To make it move again, press UPARROW to bring back the above command, so you can execute it again with ENTER . As soon as you do this, the cube will jump another step, like before. And that’s it—you’re scripting!
The bpy Module
The contents of the bpy module are divided into several submodules, among which are:
bpy.data— This is where you find the contents of the current document.bpy.types— information about the types of the objects inbpy.data.bpy.ops— operators perform the actual functions of Blender; these can be attached to hotkeys, menu items and buttons. And of course they can be invoked from a script. When you write an addon script, it will typically define new operators. Every operator must have a unique name.bpy.context— contains settings like the current 3D mode, which objects are selected, and so on. Also accessible in the Console window via the global variableC.bpy.props— functions for defining properties. These allow your scripts to attach custom information to a scene, that for example the user can adjust through interface elements to control the behaviour of the scripts.
The mathutils Module
The module mathutils defines several important classes that are used heavily in the rest of the Blender API.
Vector: the representation of 2D or 3D coordinates.Matrix: the most general way of representing any kind of linear transformation.Euler: a straightforward way of representing rotations as a set of Euler angles, which are rotation angles about the X, Y and Z axes. Prone to well-known pitfalls such as gimbal lock.Quaternion: on the face of it, a more mathematically abstruse way of representing rotations. But in fact this has many nice properties, like absence of gimbal lock, and smoother interpolation between two arbitrary rotations. The latter is particularly important in character animation.Color: a representation of RGB colours and conversion to/from HSV space (no alpha channel).
See Also
- Scripting & Extending Blender Advanced
- Blender 2.67.0 r56533 API Reference
- Blender site Python scripts catalog
Export scripts
|
|
Applicable Blender version: 2.4x. |
This page is an update of a great tutorial originally built for blender 2.44.
Blender is not just useful to create complete animations, but it's also a great modeller. You can build your complete 3D scene in Blender, and then export it to a useful format. In fact, you can use it for much more, for example I was using it as a level editor for a freeware 2D game someone else made. There was a short deadline for the game to be finished, and 2 weeks before that deadline, there still was no level editor for it. It had a custom ASCII level format, consisting of lists of materials, vertices, triangles and objects. So, remembering the Blender Python exporters, I volunteered to write an export script for Blender, so it could be used as level editor. And it worked out very well, Blender can be completely used as level editor for that game now.
In this tutorial we'll learn how to write a simple Python export script for Blender. Without requiring previous Python knowledge, it will explain how to query the objects in your scene, and how to write them to a file. It will also demonstrate the usefulness of export scripts, by showing how you can process the data while exporting, so you can achieve things that would not work by using any other existing format.
So, open Blender, make sure the default scene is loaded, and let's begin..
Finding out about things in a scene

Before we can export something, we must know what to export. One way to get this information is the Outliner window (SHIFT-F9). It will list all the things currently known to Blender. Now, we want the same information from a script. Click the editor selection button and from the popup menu choose Python Console.
Now, you are ready for the big moment, you are about to execute the first Blender scripting command. Type this and hit RETURN (or you could type into the scripts window import Blender on the topmost line, then these lines below it, precede all the 'dir(x)' lines with print and choose file->Execute):
list(bpy.data.objects)
As a result, you should see this:
[bpy.data.objects["Camera"], bpy.data.objects["Cube"], bpy.data.objects["Lamp"]]
Now, what just happened? The variable given to "list" in "list(bpy.data.objects)" consists of three words, separated by two dots. The dots separate different things. The first, bpy, means to use a function from the bpy module. data is a sub-module of Blender. And finally objects is an iterator of bpy.data. The list() function is used to loop through all data in bpy.data.objects and return that as a list of all available objects. In our case, this is a Camera, a Cube, and a Lamp.
To get more information about an object, you can use the object name as a key in bpy.data.objects, and assign it to a variable, like this:
camera = bpy.data.objects["Camera"]
cube = bpy.data.objects["Cube"]
lamp = bpy.data.objects["Lamp"]
We just assigned the three objects to three variables, camera, cube and lamp. To see the contents of a variable, type just its name:
cube
bpy.data.objects['Cube']
camera
bpy.data.objects['Camera']
lamp
bpy.data.objects['Lamp']
Sometimes it's useful to use Python's dir() function to get more information about an object. For example
dir(cube)
will write the names of all functions and properties of the object. Quite a lot. But don't worry, soon you will know how to use all of them. You also may want to find out the type of something, which you can do like this:
type(cube)
In this case, just typing "cube" already displays the type, but from within an actual script, you would use type(). Something else which can be useful is viewing the documentation of Python objects. To do so, use the help() function on a variable or object.
help(bpy.data.objects)
This will print the documentation of the bpy.data.objects function we used. Of course, an easier way to view the documentation is the online HTML help. Click on Help->Python API Reference. Hopefully now your browser opens and displays the online documentation of the Blender Python API. If not, you should find it also here:
http://www.blender.org/documentation/blender_python_api_2_59_2/
In the documentation, click on bpy, then on data and you can see more examples. Using the documentation will get absolutely vital whenever you need to do something in a script not covered in a tutorial. And you will need to do so, else you wouldn't want to learn scripting at all.
Another resource you will need, depending on how far you will go with scripting, is the Python reference:
For this tutorial, maybe read the "Tutorial" section in the python docs, but you will understand everything without doing so.
Now, let's try to find out more about our cube. Type:
cube.type
It will tell us that the cube really is a Mesh object in Blender. Look up "type" in the online docs. Since the variable cube holds an Object, and "type" is an attribute of that Object, click on Object. There you find its "type".
Now that we know that the cube is a mesh, let's find out more about the mesh.
cubedata = bpy.data["Cube"]
'Note: in Blender 2.6.0 the script command actually looks like this, but the above is still valid: (Chronus001)
'Note: in Blender 2.6.5 above is not valid any more
cubedata = bpy.data.meshes['Cube']
Every Blender object has data assigned to it, depending on the type. In the case of a mesh, the data are of type Mesh. In the documentation, go to the top again, and look for the Mesh module. It will contain documentation for the Mesh type. You can also try
dir(cubedata)
to get an idea about the available functions and properties. Try these:
list(cubedata.vertices)
list(cubedata.faces)
The first line will list the 8 vertices of the cube's mesh. The second line will list its 6 faces.
Note: in Blender 2.77 (and maybe for the next releases), the cubedata.faces member has been replaced with cubedata.polygons.
To get the number of faces (or polygons), the following command will get the job done :
print(len(cubedata.faces))
or
print(len(cubedata.polygons))
To get a member out of a list, you specify the index in square brackets, starting with 0. So:
v = cubedata.vertices[0]
This will assign the first vertex of the cube to the variable v. By now, you already know how to use dir() to get a list of possibly interesting things in v, find out about its type with type(), and where to look for the API documentation. It is in the module Blender/Mesh, when you click one "MVert" under "Classes".
v.co
This will display the 3D coordinates of the first vertex. Now, what if we want to know the coordinates of all vertices? We could of course assign them all to a variable, but the real way to do this is using a looping constructs. There are numerous ways to do this, but one simple way looks like this:
for v in cubedata.vertices: print(v.co)
The for variable in list: construct assigns each element of the list to the variable in turn, and then executes the commands after the colon with the variable having the value of one particular list element. In a real script, you will have much more than a single command after the colon - so you would write them in the following lines.
By now, you should know enough to try yourself at a real script in the next section.
Creating a script
You can write scripts either in an external text editor, or in Blender's built in text editor. Move to a panel you wish to change to be the text editor, click the editor select button and choose "text editor" (shortcut) SHIFT+F11. Click the + New button at the bottom. If you want, you can enable line numbers and syntax coloring with the buttons at the bottom. Create a new script with File → New, paste the code below into it, and save it. Or alternatively, paste the code below into a file, and open that file with File → Open in Blender. As name choose something with the extension .py, for example wikibooks.py. Put it into Blender's user scripts path.
For different operating systems this is:
- Linux: ~/.blender/scripts
- Windows XP: C:\Program Files\Blender Foundation\Blender\.blender\scripts
- Windows XP (alt): C:\Documents and Settings\USERNAME\Application Data\Blender Foundation\Blender\.blender\scripts
- Windows Vista: C:\Users\USERNAME\AppData\Roaming\Blender Foundation\Blender\.blender\scripts
- Mac OS X:
- Under Mac OSX the path is actually hidden in the blender.app so to know the path you would have to know that the script folder is actually hidden in the blender.app itself. Assuming that Blender is in the applications directory the path would be "/Applications/blender/blender.app/Contents/MacOS/.blender/scripts" If you try to open the .app contents from the finder you will notice that .blender section of the path is not visible, while blender will still be able to navigate to this folder.
- Right-click (or ctrl-click) the file "blender", and select "Show Package Contents" in the popup-menu. It will display all the hidden files under blender's folder, and select "scripts" folder inside it.
- To see this folder from the OSX terminal use the ls -a command (lists all folders/files even hidden) in the MacOS folder of the listed path. It is probably a good idea to create an alias to the scripts folder in the "/Applications/blender-2.37a-OSX-10.3-powerpc" folder so that scripts can be easily manipulated through the finder. I know that its confusing that Blender should have its script folder buried inside the app but it is necessary to keep the app portable and not require an install.
- A safer approach than the one above consists in keeping your scripts somewhere in your home folder: with this scheme, there is no risk of deleting your scripts when you upgrade your blender application, as they are not contained within its folder. A method that follows this principle is as follows: create a folder that will contain your scripts (or some of them) inside your own home directory; then, instead of putting your files directly in the .../.blender/scripts/ folder discussed above, simply add a link to your script directory in the .../.blender/scripts/ folder (for instance with the "ln -s" Unix command, or by doing "open /Applications/blender-2.37a-OSX-10.3-powerpc/blender.app/Contents/MacOS/.blender/scripts/" [adapted to your version of blender] and then creating a link through the Finder, with File->Make Alias). Blender will now find all the scripts that you put in your home directory: it will follow the link you created in its .../.blender/scripts/ folder and go to the corresponding folder in your own directory, and find all the python scripts you put there.
NOTE: For version 2.78+ this script header is deprecated. More info: [[1]] Blender 2.78 - Addon tutorial
#!BPY

"""
Name: 'Wikibooks'
Blender: 259
Group: 'Export'
Tooltip: 'Wikibooks sample exporter'
"""
import Blender
import bpy

def write(filename):
    out = open(filename, "w")
    sce= bpy.data.scenes.active
    for ob in sce.objects:
        out.write(ob.type + ": " + ob.name + "\n")
    out.close()

Blender.Window.FileSelector(write, "Export")
Now, go back into the scripts window, and in its menu, click Scripts → Update Menus. If you saved it into the right path, from now on there should be an entry "Wikibooks" in the File → Export menu. Try exporting any scene with it. It should open the file chooser dialog, and after you select a file and press the "Export" button, write a list of all objects in the scene into it. There will be one object per line, with the type, followed by a colon and the name.
How does it work? If you look at the script, you probably already know. But just in case, let's look at the script line by line. The first line contains this:
#!BPY
It tells Blender that this is a Blender script, and therefore it will consider it when scanning for scripts. Next simply follows a string, enclosed in triple quotation marks, so it can span multiple lines.
"""
Name: 'Wikibooks'
Blender: 259
Group: 'Export'
Tooltip: 'Wikibooks sample exporter'
"""
It contains four items, which Blender uses to place the script into its menus. The name, group (submenu name), and tooltip, all enclosed in single quotes. And the Blender version this is for. Note the group name must be one of those predefined by Blender (check the submenus in its Scripts menu to see the valid names); if Blender doesn’t recognize the group name, the script will be put into the “Misc” submenu.
import Blender
import bpy
Remember how we said all functions from the bpy module start with "Blender."? In the interactive shell, we could simply use them, but in a python script, all used modules must be declared with an import statement (if you want to directly use functions from the Blender module in a script, you can simply replace the import statement above with "from Blender import *": no "Blender." prefix is necessary any more; however, this slows down the loading of your script). So the above simply allows us to use the functions from the Blender module in our script.
the bpy module is new and will replace Blender for data access.
def write(filename):
This defines a function in Python. The syntax is def name(parameters):. In our case, the name is "write", and we have one parameter, called "filename".
out = open(filename, "w")
Here we open a file for writing (the "w"), with the name passed to the function (filename). The python function "open" will open the file, and return a reference to it, which we store in the variable "out".
   sce= bpy.data.scenes.active
   for ob in sce.objects:
       out.write(ob.type + ": " + ob.name + "\n")
These three lines are our real export script. You already know what the first line does - first we get the current scene, then get a list of all objects in that scene, the for loop is assigning each one in turn to the variable "ob". The second line writes to the file - first the type of the object, then the string ": ", then the name of the object, and finally a newline.
Blender.Window.FileSelector(write, "Export")
This is where execution of the script starts. It is simply a call of a Blender function (look it up in the API docs), which opens the file selector. It will display an "Export" button, and when the user clicks it, our function "write" from above gets called and is passed the selected filename.
This script isn't really very useful yet, but it shows the basics. You should now be able to e.g. also list all the materials in the scene. (Hint: They are just like objects, try to find them in the API docs.)
In the next section, we will learn how to export additional information about objects to our text file.
Exporting a Mesh
Our export script lists the type and name of every object, but that's not very useful yet. If we want to load the exported data in another application, we need more. Let's try to export a mesh object in the OBJ format.
The example below is a cube in the OBJ file format.
v 1.000000 1.000000 -1.000000
v 1.000000 -1.000000 -1.000000
v -1.000000 -1.000000 -1.000000
v -1.000000 1.000000 -1.000000
v 1.000001 1.000000 1.000000
v 0.999999 -1.000000 1.000000
v -1.000000 -1.000000 1.000000
v -1.000000 1.000000 1.000000
f 1 2 3 4
f 5 8 7 6
f 1 5 6 2
f 2 6 7 3
f 3 7 8 4
f 5 1 4 8
Here is a simple obj export script that exports a selected mesh object, used to export the OBJ file above.
import Blender
import bpy

def write_obj(filepath):
	out = file(filepath, 'w')
	sce = bpy.data.scenes.active
	ob = sce.objects.active
	mesh = ob.getData(mesh=1)
	for vert in mesh.verts:
		out.write( 'v %f %f %f\n' % (vert.co.x, vert.co.y, vert.co.z) )

	for face in mesh.faces:
		out.write('f')

		for vert in face.v:
			out.write( ' %i' % (vert.index + 1) )
		out.write('\n')
	out.close()
Blender.Window.FileSelector(write_obj, "Export")
This script will export an OBJ file that can be read by many applications. Let's look at what's going on.
	sce = bpy.data.scenes.active
	ob = sce.objects.active
Here we are getting the object you last selected in the current scene. This will raise an error if there are no selected objects, but its an easy way to test a new exporter.
mesh = ob.getData(mesh=1)
This gets the objects linked datablock. At the moment we don't know its a mesh, another case where error checking would need to be added.
	for vert in mesh.verts:
		out.write( 'v %f %f %f\n' % (vert.co.x, vert.co.y, vert.co.z) )
Here we write a line for every vertex, using string formatting to replace the "%f" on the left, with the 3 values on the right.
	for face in mesh.faces:
		out.write('f')

		for vert in face.v:
			out.write( ' %i' % (vert.index + 1) )
		out.write('\n')
In the OBJ format each face references a number of vertex indices. For every face we have a line starting with "f", then loop through the vertices in the face. Just as mesh.verts are a list of all the vertices in a mesh, face.v is a list of verts in the face limited to 4 vertices maximum. (where mesh and face are arbitrary variable names assigned to Mesh and MFace objects) Every vertex writes its index on that same line with 1 added. This is because with the OBJ file format the first vertex is indexed at 1, whereas with Python and Blender the first item in a list is 0.
A new line is written so the next face will start on a new line. - in python '\n' represents a new line when written to a file.
Import scripts
|
|
Applicable Blender version: 2.49. |
Importing objects into Blender is not that different from exporting. However, there are a few additional things to take care of. Firstly, all references to "export" in the header should be changed to "import". Secondly, instead of simply writing out data that Blender provides to us, we are responsible for giving data to Blender and ensuring that it is properly formatted. Although Blender is flexible, allowing us to ignore things like vertex indices, we do need to be careful that we do things in a sensible order.
Additionally, there is a bit of housekeeping to deal with. We should be in edit mode while modifying the mesh data. We also need to link up our newly created data to the scene, after it has been properly constructed, so that Blender can see it and maintain it. This makes it visible to the user, as well as ensuring that it gets saved along with the scene.
Importing a Mesh
Here is a simple script that can import an OBJ file created by the export script.
import Blender
def import_obj(path):
        Blender.Window.WaitCursor(1)
        name = path.split('\\')[-1].split('/')[-1]
        mesh = Blender.NMesh.New( name ) # create a new mesh
        # parse the file
        file = open(path, 'r')
        for line in file:
                words = line.split()
                if len(words) == 0 or words[0].startswith('#'):
                        pass
                elif words[0] == 'v':
                        x, y, z = float(words[1]), float(words[2]), float(words[3])
                        mesh.verts.append(Blender.NMesh.Vert(x, y, z))
                elif words[0] == 'f':
                        faceVertList = []
                        for faceIdx in words[1:]:
                                faceVert = mesh.verts[int(faceIdx)-1]
                                faceVertList.append(faceVert)
                        newFace = Blender.NMesh.Face(faceVertList)
                        mesh.addFace(newFace)

        # link the mesh to a new object
        ob = Blender.Object.New('Mesh', name) # Mesh must be spelled just this--it is a specific type
        ob.link(mesh) # tell the object to use the mesh we just made
        scn = Blender.Scene.GetCurrent()
        for o in scn.getChildren():
                o.sel = 0

        scn.link(ob) # link the object to the current scene
        ob.sel= 1
        ob.Layers = scn.Layers
        Blender.Window.WaitCursor(0)
        Blender.Window.RedrawAll()

Blender.Window.FileSelector(import_obj, 'Import')
This will load an OBJ file into Blender, creating a new mesh object. Let's take a look at the more interesting portions.
Blender.Window.WaitCursor(1)
Turn on the wait cursor so the user knows the computer is importing.
name = path.split('\\')[-1].split('/')[-1]
mesh = Blender.NMesh.New( name ) # create a new mesh
Here, we create a new mesh datablock. The name is made from the path only with the filename.
ob = Blender.Object.New('Mesh', name)
ob.link(mesh)
Next, we create a new object and link it to the mesh. This instantiates the mesh.
scn = Blender.Scene.GetCurrent()
scn.link(ob) # link the object to the current scene
ob.sel= 1
ob.Layers = scn.Layers
Finally, we attach the new object to the current scene, making it accessible to the user and ensuring that it will be saved along with the scene. We also select the new object so that the user can easily modify it after import. Copying the scenes layers ensures that the object will occupy the scenes current view layers.
Blender.Window.WaitCursor(0)
Blender.Window.RedrawAll()
Now the finishing touches. We turn off the wait cursor. We also redraw the 3D window to ensure that the new object is initially visible. If we didn't do this, the object might not appear until the user changes the viewpoint or forces a redraw in some other way.
Procedural object creation
|
|
Applicable Blender version: 2.49. |
Text Blocks
A Blender document can contain text blocks, which are not the same as text objects in a 3D scene (though the former can be converted to the latter). Besides generating text objects, a text block can serve any purpose you like; for example, use it to pass workflow instructions to a colleague along with the document; display a copyright or help message in the initial layout that a user sees on opening the document; or hold a Python script that can be run by the user to perform some useful action related to the document.
Text blocks are edited in the Text Editor window. The Text Editor also provides commands to load the contents of a text block from an external file, or save it to an external file. And also execute the text as a Python script.
Your First Script
Open a new, default Blender document. Split the 3D View in two vertically. Change the type of one side to a Text Editor window. In the header, you will see a small popup menu showing just a double-headed arrow; click on this, and it should show three items: “Text”, “ADD NEW” and “OPEN NEW”. “ADD NEW” creates a new, empty text block, while “OPEN NEW” creates a new text block by reading its contents from an external file. But “Text” is already the name of a default empty text block, so just use that; as soon as you select it, you should see a red insertion cursor appear at the top left, indicating that you can start typing.
Unlike the Interactive Python Console, nothing is automatically imported for you. So as in any other Python script, you need to mention every module you want to access.
Let us write a script that inserts a new mesh primitive into a Blender document, namely a tetrahedron. First we need to create a new mesh datablock, which we will name “Tetrahedron”:
NewMesh = Blender.Mesh.New("Tetrahedron")
Then we need to define the coordinates of the vertices; for a tetrahedron with edges of length 1 Blender unit, suitable values are , , and . Or in Python:


NewMesh.verts.extend \
  (
    [
        (0, -1 / math.sqrt(3),0),
        (0.5, 1 / (2 * math.sqrt(3)), 0),
        (-0.5, 1 / (2 * math.sqrt(3)), 0),
        (0, 0, math.sqrt(2 / 3)),
    ]
  )
We also need to define the faces of the object; each face is defined by listing a sequence of indexes into the above array of vertices (you don’t need to bother about defining the edges; Blender will deduce them from the faces):
NewMesh.faces.extend \
  (
    [[0, 1, 2], [0, 1, 3], [1, 2, 3], [2, 0, 3]]
  )
That suffices for the mesh, now we create an actual object datablock that will appear in the scene (which we also name “Tetrahedron”):
TheObj = Blender.Object.New("Mesh", "Tetrahedron")
Link it to the mesh we just made:
TheObj.link(NewMesh)
And to make the object appear in the scene, it has to be linked to it:
TheScene = Blender.Scene.GetCurrent()
TheScene.link(TheObj)
And finally, tell Blender that the scene has changed:
TheScene.update()
and to redraw the 3D view to show the updated scene:
Blender.Window.Redraw()
Put It All Together
Your complete script should look like this, including the imports of the referenced math and Blender modules; note also the use of the directive to ensure that the “/” operator always returns a real, not an integer, result; this is good practice with Python 2.x, since it becomes mandatory behaviour beginning with Python 3.0.
from __future__ import division
import math
import Blender

NewMesh = Blender.Mesh.New("Tetrahedron")
NewMesh.verts.extend \
  (
    [
        (0, -1 / math.sqrt(3),0),
        (0.5, 1 / (2 * math.sqrt(3)), 0),
        (-0.5, 1 / (2 * math.sqrt(3)), 0),
        (0, 0, math.sqrt(2 / 3)),
    ]
  )
NewMesh.faces.extend \
  (
    [[0, 1, 2], [0, 1, 3], [1, 2, 3], [2, 0, 3]]
  )
TheObj = Blender.Object.New("Mesh", "Tetrahedron")
TheObj.link(NewMesh)
TheScene = Blender.Scene.GetCurrent()
TheScene.link(TheObj)
TheScene.update()
Blender.Window.Redraw()
In your 3D View, get rid of any default cube to avoid it obscuring things. Now come back to the Text Editor window showing the above script, and press ALT + P to execute it; you should see your new tetrahedron appear in the 3D view!
If You Hit An Error
If there is any error running the script, Blender will display a cryptic message to let you know. For example, the following simple one-line script
raise RuntimeError("Uh-oh")
displays this message:

To get more details you will have to look in Standard Error; on Linux/Unix systems, the message will appear in the terminal session if you invoked Blender from the command line; otherwise it will be appended to your ~/.xsessionerrors file if you launched Blender from a GUI. On Windows the message appears in the console window. By hunting around in the appropriate place, you should be able to find the full Python traceback:
Traceback (most recent call last):
  File "Text.001", line 1, in <module>
RuntimeError: Uh-oh
Scripts for modifying meshes
(To be written.)
See saltshaker a basic but functional Python script for Blender. The page includes details of how it was made.
http://jmsoler.free.fr/didacticiel/blender/tutor/python_script01_en.htm is a good website for learning about mesh creation.
Creating a GUI for your script
|
|
Applicable Blender version: 2.49. |
Often, your script will need to get information from the user, such as parameter settings, before performing its action. You can do this in two different ways: either present a modal popup that the user has to deal with before doing anything else, or alternatively you can take over the entire Scripts Window with a custom display that the user can freely switch to and from while doing other things.
A Modal GUI
The simplest way to add a GUI to your script is to pop up a simple menu with some items to choose from. Let's add an option to our Tetrahedron Maker script to generate the tetrahedron upside-down. Displaying a menu is as simple as calling Blender.Draw.PupMenu and passing it a string containing the menu items separated by “|” characters. Put a “%t” at the end of the item that defines the menu title:
Orient = Blender.Draw.PupMenu("Add Tetrahedron%t|Right Way Up|Upside Down")
The value returned from the call will be the index of the selected menu item (starting from 1, ignoring the menu title), or -1 to indicate that no selection was made.
When you execute the above line, it displays this:

We will use the menu selection to negate a scale factor which will be applied to the Z coordinate of the vertices of the tetrahedron. But only the last vertex has a nonzero Z coordinate, so this is the only one that needs a change in its computation. So the body of our script now looks like this:
Orient = Blender.Draw.PupMenu("Add Tetrahedron%t|Right Way Up|Upside Down")
if Orient > 0 :
    Scale = -1 if Orient > 1 else 1
    NewMesh = Blender.Mesh.New("Tetrahedron")
    NewMesh.verts.extend \
      (
        [
            (0, -1 / math.sqrt(3),0),
            (0.5, 1 / (2 * math.sqrt(3)), 0),
            (-0.5, 1 / (2 * math.sqrt(3)), 0),
            (0, 0, Scale * math.sqrt(2 / 3)),
        ]
      )
    NewMesh.faces.extend \
      (
        [[0, 1, 2], [0, 1, 3], [1, 2, 3], [2, 0, 3]]
      )
    TheObj = Blender.Object.New("Mesh", "Tetrahedron")
    TheObj.link(NewMesh)
    TheScene = Blender.Scene.GetCurrent()
    TheScene.link(TheObj)
    TheScene.update()
    Blender.Window.Redraw()
#end if
A Modeless GUI
It is very easy to create a GUI for your script, and that way make it easy to change aspects of it for everyone.
The command to create a Graphical User Interface (GUI) is:
Blender.Draw.Register(draw,event,button)
This command registers the functions:
- draw - to draw the GUI
- event - to action mouse and key presses
- button - to action GUI button presses
However, this command will NOT work by itself !!!. You first need to define these 3 functions.
First we will import Blender's library of built in functions:
import Blender
Next, we will define the draw function.
def draw():
Inside this function we will draw the GUI. Here is an example of a drawing function we can use. It will clear the current window.
Blender.BGL.glClear(Blender.BGL.GL_COLOR_BUFFER_BIT)
And the next command will draw a button. Note that the first number in the command, '1' identifies the button as button 1. We will refer to this button later.
Blender.Draw.Toggle("Clear origin",1,10,20,100,20,0,"Tooltip")
Next, we will define the event function. The code of a key pressed on the keyboard is passed into the function as the variable evt.
def event(evt,val):
Now we will test to see if the escape key is pressed:
if evt == Blender.Draw.ESCKEY:
If it is pressed, exit the script, and return from the function:
		Blender.Draw.Exit()
		return
Next, we will define the button function. This function will perform an action if the button is pressed.
def button(evt):
Now test the variable evt which holds the button number that we previously identified.
if evt == 1:
If it is pressed, we will move the selected object in the 3d window back to the centre and redraw the screen:
		Blender.Scene.GetCurrent().getActiveObject().loc = (0,0,0)
		Blender.Window.Redraw()
Lastly, we can create the Graphical User Interface by typing the command:
Blender.Draw.Register(draw,event,button)
That's it !!! To enter the script yourself, type the following into the Text Editor window in Blender, and then press alt p to execute the script. Here's the entire script. Everything after the hash # is a comment and can be left out.
import Blender  # This will import the library of blender functions we will use

def draw():     # Define the draw function (which draws your GUI).
	Blender.BGL.glClear(Blender.BGL.GL_COLOR_BUFFER_BIT) # This clears the window
        # Add here drawing commands to draw your GUI, for example:
	Blender.Draw.Toggle("Clear origin",1,10,20,100,20,0,"Tooltip")
	# The line above will draw a toggle button.
	# Note the first number, '1' means this is button number 1

def event(evt,val):  # Define mouse and keyboard press events
	if evt == Blender.Draw.ESCKEY: # Example if esc key pressed
		Blender.Draw.Exit()    # then exit script
		return                 # return from the function

def button(evt):     # Define what to do if a button is pressed, for example:
	if evt == 1: # If button '1' is pressed, set active object to centre:
		Blender.Scene.GetCurrent().getActiveObject().loc = (0,0,0)
		Blender.Window.Redraw() # This will redraw the 3d window.

# You can now run the Graphical User Interface by typing the command:

Blender.Draw.Register(draw,event,button)

# End of script
Noob Note: When I tried to run that script it came up with an error: Attribute Error: 'Scene' object has no attribute 'getActiveObject'. I changed "Blender.Scene.GetCurrent().getActiveObject().loc = (0,0,0)" to "Blender.Scene.GetCurrent().objects.active.loc = (0,0,0)" and it worked.
Advanced Animation
This section will show you the Animation system as it is in Blender 3D. Most of the features will be explained and some tutorials will follow. It is assumed that the user has a good understanding of Blender here.
Index
- Advanced Animation
Introduction
|
|
Applicable Blender version: 2.4x. |
Welcome to the wonderful yet complex world of computer animation! Through these pages I will try to show you everything old and new about the new animation system in Blender 2.4. But, before we get started, there are some basic notions about datablocks you should know. Animation in Blender is based on the fact that you have something moving in a Blender scene. For example, a ball bouncing on a floor plane:
-So you have a scene datablock, which holds some info about the scene itself, as you can see in the Render button window (F10KEY). -You populate this scene with various objects (which in this case refers to containers for data, not the actual mesh data that shapes the object itself). The only goal of an object is to hold the whereabouts of the data you want to see in your scene. It also holds the object instance's properties such as "does it have soft body or particle options, and do we draw its name?". Most of the info on an object can be seen in the Object Window (F7KEY).
An object links to all of the data you can see in a 3D view such as mesh, curves, nurbs, lattices, armatures, metadata, the empty property, text, camera and lamps.
So the ball you just added to the scene is in fact a mesh, linked to an object that is in turn linked to the current scene.
Now there are also data blocks you can't see in 3D view, such as material, texture, Ipo, action and image. Instead, you have a special window in which to edit them. This is the idea behind the Blender interface, wherein each data block has a window for you to edit the data.
So back to this bouncing ball: It's also moving across the plane! So an ""Ipo"" data block is linked to the object, telling it where in space the object will be at each frame of the animation. This Ipo is editable in the Ipo window when selecting the ball in 3D view. In Blender, the work you are performing is always on the currently active (selected) object and data.
Note: In Blender 2.5x and later the OOPS view has been removed.
Looking at the OOPS (object oriented programming system) view (or SHIFT-F9KEY), we can get a good idea of the internal data structure:

Again, you are working in the scene "Scene", with an object "Sphere" linked to the mesh data block "Sphere" and the Ipo datablock "ObIpo". Why is that important? Because from there, you can start playing with the datablocks, linking them all around your projects to reuse old work. For example you can create more than one Ipo, and use the one you want, or tell more than one object to use the same Ipo, or to use the same object in more than one Scene.
Most of the linking job can be done in the Edit button window (F9KEY). Where you can tell an object to use another mesh's data block for Ipo, material, texture or image. There is always a little dropdown menu button for you to select an already-existing data block.
Now, when it comes to animation, you have to understand the way Blender handles data very well, because using Blender is always a matter of plugging data blocks together when working with Ipos, actions and NLA objects.
Guided tour:
Here I'll show you all the stuff you need to know about the interface when animating. Where is it? How does it work? Why use it?
We are going to talk about:
Armature Object
The Armature Object in itself is a tool for the animator to move an object or group of vertices in a reliable way. An armature is made of bones, which can be parented to each other, or connected to each other. It was built with the idea of a skeleton in mind. And in fact, in the 3D world with animation inclusive, its considered to be the skeleton.
You can add it using the SPACEKEY in 3Dview and selecting Armature. You'll then enter into Edit Mode where you can add or move bones to build your default rig. An armature has 3 states. You can switch using the dropdown menu in the header of the 3Dview or use the TABKEY to switch between Editmode <-> [Objectmode|Posemode] and CTRL-TABKEY to switch between Objectmode <-->Posemode:
- Object Mode: Your armature is like any other Object, you can move it around the scene, scale it, rotate it and edit options in the button window.
- Edit Mode: Your armature is in what we call rest position, you can modify the bones it contains.
- Pose Mode: Your armature is ready to be animated, each bone can be moved, scaled or rotated, constraints get applied, you can pose your character and animate the bones' behavior over time.
Take note that Pose mode is now a state of the armature you can switch on/off using CTRL-TABKEY. So when in Pose, you are still in object mode (you can select another object, contrary to the edit-mode)
Note: The following 3 pages of this tutorial contain screenshots and discuss techniques that are only available in Blender 2.40a and later. Refer to the Blender 2.40a release notes on Armature draw types and Armature envelopes.
Armature Object in Object Mode
|
|
Applicable Blender version: 2.4x. |
The Armature Object
Armature Object is like any other object type:
- It has a center, a position, a rotation and a scale factor.
- It can be edited.
- It can be linked to other scenes, and the same armature data can be reused on multiple objects.
- All animation you do in object mode is only working on the object, not the armature's contents like bones.
Try it now: add an armature to your scene: SPACEKEY --> Add --> Armature.

Or you can press the Shift + A keys, and select single bone from the armature menu.

When you add a new armature, you'll enter editmode automatically. To switch between modes, use the TABKEY or the dropdown menu in the Header of the 3Dview window (This might not be the case with blender 2.49b, you won't enter edit mode in that version):

The Edit Panel When in Object Mode
This is how the edit panel looks after you have added a new armature and switched to object mode (TABKEY):

- Link and Materials panel:
- The AR: field let you rename your armature Datablock. The dropdown is a quick way to select which Armature datablock you want to connect to this armature. You can keep more than one version for the same character. Useful when you have a special move to achieve in a shot, you can turn on an armature for a special purpose.
- The F button is an option to assign a Fake user to the Armature. Again if you have more than one armature for your character, it's a good idea to turn the Fake on, because if your armature datablock is not used (linked) it's not going to be saved in your .blend files. You can always do batch Fake-assignment of armatures by opening the Datablock browser (SHIFT-F4KEY), go in Armature datablock, select all the armatures you want to keep, and Press the FKEY.
- The OB: field is just to Rename your armature Object to something more cool and useful than Armature... Armature.001...
- Armature panel:
- Editing Options:
- X-Axis Mirror Edit: Not really useful now, it's more of an editmode option. This feature tells Blender you want to replicate all of your bones on one part of the Armature to the other. It's a clean way to just do half the job ;). The axis of mirroring is X so left<-->right in frontview (NUMPAD_1KEY) and the center is the center of the armature object. We will see this feature in detail in the next page.
- X-Ray: This option will let you see the armature through anything in the scene, solid or not. It's useful to see where your bones are in your character so you can select them.
- Automatic IK is a Posemode option. It lets you pose a chain of bones as if the bone you were holding was an ik target. More info in Posemode page.
- Display Options: These options give you the chance to visualise your bones in various ways. Also note that there is some specific options and features regarding the display mode you're in.
- Octahedron: This is the default view. Nothing exciting except you have a good idea of the rolling of the bones.

- Stick: This display mode is really useful when you have a lot of bones in your view. It lets you "unclutter" the screen a bit. It draws the bones as tiny sticks.

- B-Bones: It's more a feature than a display mode. This is only useful to visualise the effect you get when you activate the B-bones (Bézier-Bones). Each bone acts like a curve handle and lets you get extremely curvy poses. This will be exposed in the following pages.
- Envelope: Again it's more a feature than a display mode. But in this case the visualisation will be useful to tweak your rig later. Envelope lets you easily tell which part of your character this bone will animate and it's visually possible to change the zone of influence exclusively in this display mode. The zone is only visible in Editmode or Posemode though.

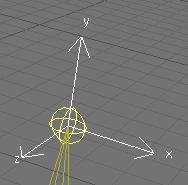
- Draw Axes: To draw the axes on each bone of the armature when you are in Editmode or Posemode. Useful when you want to know where you are and which axis to use in a constraint for example. Mental note: Y is up, Z is depth and X is side, contrary to object for which Z is up, Y is depth and X is side.
- Draw names: This lets you see names of bones whatever the mode you are in. It's useful again to edit your armature, create parent dependencies or add constraints.

- Ghost: This option lets you see a ghost of the armature in frames behind and over the current time. This is only working when you have an action linked to the armature, as we will see later.
- Step: This option lets you choose the frames interval between ghost instances.
- Octahedron: This is the default view. Nothing exciting except you have a good idea of the rolling of the bones.
- Deform options:
- Vertex Groups & Envelope: These two toggles let you choose if you want the armature to deform your character using the Vertex Groups and/or the Envelopes. We will see that later.
- Rest position: This will bring the character back to factory default (item as Editmode), and no actions will be applied to the armature so you can easily edit it in the middle of an animation.
- Delay Deform: This was useful before as the old system was very slow. What it does is when you do a manipulation to the rig, it waits until you finish to update the view. Can still be useful though.
- Editing Options:


Extra Practice
This YouTube tutorial might also help: Link The short tutorial might be a help Link 2
Armature Object in Edit Mode
|
|
Applicable Blender version: 2.4x. |
Now you've got your armature, but it's not much use until you add some more bones to it. Think about your body for a moment -- you've got this thing you call a 'skeleton', which for our purposes corresponds more or less to an armature object. Your skeleton consists of a number of bones (about 206, to be precise), but generally these are not independent from each other. If you move your femur (the bit of your leg between your pelvis and your knee) then conveniently the rest of your leg moves with it. In that example, the tibia/fibula would probably be counted as one bone, with the femur as their 'parent' bone. In this way, you build up a hierarchy of bones, making animation much simpler.
Editing an Armature Object gives you the chance to add, move or connect bones together. Whilst in edit mode, you will see all of the bones within the currently selected Armature.
When you create a new armature in Object mode a single bone will automatically be created for you, centered at the cursor position. Blender will then switch straight to Edit mode to allow you to add further bones. At this point we're just defining the default 'rest' position of the bones and specifying how they connect together -- you'll have to wait until the next chapter to find out how to create specific poses.
Now the basics about bones

Having created and selected an armature in Object mode, you can add and modify the bones in this armature by switching to Edit mode.
- You can add a new bone at cursor position by pressing SPACEKEY in the 3DView --> Add --> Armature.
- A bone has two ends: a root (the lower part) and a tip (the upper part). You can select and move the tip or the root independently with RMB, or you can select the entire bone by clicking on its body.
- You can extrude a new bone from the selection using EKEY. This will create a bone connected to the original one, meaning the Root of the new bone will follow the Tip of the original one. You can also CTRL-LMB to extrude a new bone. It will extrude to where you clicked.
- Alternatively, you can connect two existing bones by selecting them one after the other and pressing CTRL-PKEY. You can then choose either 'Connected' (the child bone - the one you selected first - will automatically be moved so that it touches the parent) or 'Keep offset'.
- You can use SHIFT-DKEY to duplicate a bone
- Using the WKEY menu, You can subdivide your bone or flip the name of the bone between Left-Right (See Naming convention below).
- You can delete the bone with XKEY
- You can select a chain of bones (connected together) using LKEY, when you hover your mouse over a bone.
The edit panel

- Armature Bones Panel
- OB: this field lets you rename your bone.
- "Child of" Dropdown: lets you choose which bone will be the parent of this bone. If a parent is selected, there will be a small button labelled "con", meaning connected. Setting the parent defines the relationship between your bones. When one bone has another as its parent, it will do everything the parent does, such as rotate, move and scale. A dotted line between the parent and child will appear. If you select Connected, the Root of the Children will go stick to the tip of the parent, giving you a chain of bones like the 2 bones in your arm.

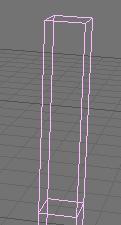
- Segm: If you set this value to something greater than 1, it will cut your bone into several little segments and deform them on a bezier curve - referred to as a 'B-Bone'. You need to create a chain of bones to really show off this feature though. In the example below, the image on the right has 1 segment, and the one on the left has 3 segments each (these are shown in Object mode to show the effect more clearly):

- Dist: This is the area of influence of the bone. It can be visualised using the Envelope display mode. We generally don't touch this field as there is an easier and faster way to change this option. Turn Envelope on and select a bone. Then using ALT-S, you can scale the zone of influence. This has the advantage that you can do it on multiple bones simultaneously, and it works in both editmode and posemode:

- Weight: This specifies how strongly this bone will influence the geometry around it, relative to the other bones. If two bones crossing each other, both with envelope influence, have the same weight (like 1:1) they will influence the surrounding geometry equally. But if you set one to 0.5, the geometry will be affected more significantly by the other one, with weight 1. For example, in this image, 2 bones using envelope influence try to move the same geometry. The 2 on the left have the same weight, you can see the geometry didn't move. On the right, one of the bones has 0.5 so the bone with weight 1 is winning the tug-of-war!:

- Hinge: This tells the bone to remain motionless in a chain. It doesn't copy the rotation and scale of the parent. Useful for mechanical rig I would say, as you can animate the rotation of the hinge bone without having to correct it because the parent rotated:

- Deform: This lets you say if you want the bone to deform the geometry at all. Switching it off is like setting the weight to 0, except it's faster this way. Useful when using a bone as a target or a controller, i.e. a bone you just want to use to control other bones, but not the geometry itself.
- Mult: to deform geometry you can use vertex group and/or Envelope. The ability to mix both of these methods is handy for using one to tweak the other. For example, you might use envelope everywhere but tweak difficult places manually with vertex group. We'll discuss this in more detail later on.
- Hide: This option lets you hide the bone. You can use it to hide the less important bones when you want to see what you're doing or for when you come to animate later on. For example, when you animate you don't need to see the entire chain of the leg, just the controllers. The values you select here apply to both Editmode and Posemode.


Naming convention
In many cases, rigs are symmetrical and can be mirrored in half. In these cases, it is helpful to use a left-right naming convention. This is not only useful for your own sake, but it gives Blender a hint that there is a pair of equivalent bones, and enables the use of some very cool tools that will save you some significant work.
- It's helpful to name your bones with something useful telling you what it's there for, such as leg, arm, finger, back, foot, etc.
- If you get a bone that has a copy on the other side, however, like the arm (you have 2 arms right?), then the convention is to call them arm.Left and arm.Right.
- Other alternatives are also possible, like _L, _LEFT, _left, .L, and .Left. Anyway, when you rig try to keep this left-right thing as accurate as possible; it will pay off later on.
- You can copy a bone named blah.L and flip it over using WKEY --> flip name. So the bone will be blah.L.001 after you copy it, and flipping the name will give you blah.R. Blender handily detects if the .001 version already exists, and increments the number for you.
This is an example of naming in a simple rig:

Mirror Editing
Now we come to the X-Axis Mirror Edit feature. This handy little number allows you to define only half of your character and tell Blender to automatically repeat the same actions on the other side. It's cool, it's simple and it saves a whole lot of time.
We will create a little guy out of sticks for the occasion -- don't worry about the geometry yet.
- Create a new, empty scene. Since the mirror editing feature mirrors along the X Axis, make sure you've got the front view selected (NUMPAD_1KEY) so that the X Axis runs from left to right. Add a new armature to the scene (SPACE, Add|Armature). Enable 'Draw names' from the 'Display options' section of the Editbutton panel, so we can see what we're doing.
- Now enable mirror editing by pressing F9 on the buttons window and clicking the X-Axis Mirror button in the Armature panel under Editing options. You'll also need to use the center of the armature (indicated by a purple dot) as the center of your rig, otherwise the symmetry will go wrong when we come to create the mirror image.
- Name the first bone you have "Back". You can scale it to make the entire back of the guy.
- Select the tip of this and extrude a new bone from it to do the Head. Name it Head.
- Select the tip of Back again and do SHIFT-EKEY to tell Blender you're starting a mirrored chain of bones. Blender will automatically extrude another bone and will create an exact mirror of whatever you do. Take note that the name of both bones are Back_L and Back_R. Blender also tries to keep to the naming convention. Unfortunately, since we extruded from the Back bone, the names aren't quite right anymore.
- To change the names: Start by editing one of the names as Arm. Add the suffix to it (_L or _R). Then hover your mouse over the name field and do CTRL-CKEY. You just copied the name of the bone! Select the other bone, hover you mouse over the name field and do CTRL-VKEY. This will paste the name as-is. But as there is already a bone with the same name, Blender will add .001 after it. No problem; just go into 3Dview and do WKEY --> Flip name. There you have it -- a working mirror again.
- Mirror editing works using names. If you move a bone named blah_L and there is a bone named blah_R in the same armature, Blender will mirror the move you do to it, so make sure you follow name convention correctly.
- Then we can continue: extrude an other bone to make the lower part of the arm using EKEY or CTRL-LMB. The new set of bones should be arm_L.001 arm_R.001.
- Then we will add the legs. Up till now we have always worked from the tips of the bone. This is easy as Blender understands you want to create children of the selected bone, but to make the legs you need to extrude from the root of "Back". So go ahead, select the root of "Back" and do SHIFT-EKEY to start a pair of chains. Rename them to "leg"+suffix.
- Now take note that doing so will not parent or connect the new bones to anything. We don't want it to be connected to the tip of "Back", it would look silly. But we want it to follow the body!
- The way to go is to parent the two legs we just created to the "Back" bone. The old way (pre 2.40) was to select all bone and select the parent manually in the drop down. In the new version, editmode and posemode have an active bone. The active bone is the last bone you selected. In this case we can't work with more than 2 bones selected. Select the child (a leg) then select the parent (Back) and Do CTRL-PKEY. A menu will popup asking Connected or Keep offset. For now use Keep offset. Do this for the other leg as well.
- it's also possible to remove parent easily. Select any bone you want to remove parent relation from and do ALT-PKEY. A menu will popup asking if you want to clear all or just to unconnect. Of course you don't need to select the parent and/or the child for this to work since any parent relationship will be cleared. So if you do that on a bone which is parent of 5 bones, then immediately all the children will be parentless.
- Extrude one more time to get a leg with 2 bones.
- Turn on the Stick display mode and enjoy your guy made of sticks!

- Now you can go into Posemode and pose your guy as you want.
- You can move the entire guy just by moving the "Back" bone, since this is how we built him. This bone is the highest in the bone hierarchy, "The daddy of all bones", you could say!
FASTER WAY TO NAME YOUR BONES 1) Create one side of the armature complete with correct bone names like the way this tutorial describes. 2) Copy the side of the armature you just created and paste it on the opposite side to form a complete armature. 3) On the side that you just duplicated, your names would have numbers added to them. Now select each bone on 3D View and hit "W" then select "FLIP NAME". MAKE SURE YOUR PARENTING IS THE SAME AS THIS TUTORIAL DESCRIBES!
Armature Object in Pose mode
|
|
Applicable Blender version: 2.4x. |
Posemode is a very versatile place where you Animate your character, create and manage constraints and apply your rig to your character.
Contrary to Editmode, Pose mode isn't an obligatory mode where you can't do anything else. It's now part of the UI like any other object. A good example of it is you can be in posemode and still select another object.
So What Can You Do?
When you are done building your armature, you can go into Posemode to add constraints and start creating actions. There are also some new tools accessible in Posemode that you may want to look at. You can easily get into "pose" mode by selecting the mode from IPO type list box in the left portion of the lower screen.
The panel has changed a bit too:

- What's new in the panels?:
- You can use the Automatic IK feature in the Editbutton(F9) to pose a chain of bones like it was an ik chain. It's usefulness is very limited though. It works well only if there is no other ik solver in the chain, and if your chain is isolated from the rest of the rig.
- Ghost: in the armature panel the ghost option lets you see the action linked to the armature over time. Also called onion skinning.

- There are two number fields to better tweak the effect of B-Bones. The in/out is used to tell the scale of the virtual handle of the bezier curve. In is the Root of the bone, and Out is the Tip. The bigger the value, the bigger the effect of rotation.

- There is now a Constraint panel where you can add a constraint to a bone, like any other object in the scene. This will be shown later.


- You can pose your rig using GKEY, SKEY and RKEY. Note that if the bone is part of a chain it can't be moved (except if it's the first of the chain, moving all the chain as they are all children), so you rotate the bone instead.
- You can do ALT-SKEY on one or more bones while in Envelope display mode to tweak the envelope size in real time while animating. Useful when for example you move the hand and some part of the character isn't in the influence zone; the result will be that some vertices will stay behind.
- You can do CTRL-CKEY to copy stuff from a bone to bones. The options are location, rotation, scale and constraint. Constraint is very handy when you wan to copy a constraint to other bone. The way it works is easy.
- The W-KEY menu gets some neat options too:
- Select constraint target: Will select the target of the bone's constraint currently selected.
- Flip name: Yep, you can flip name in Posemode too.
- Calculate/Clear path: This is a visual way to see the action linked to your armature. You can select just some bones and ask Blender to show you the paths of the bones.

- You can pose your character and select all bones you want to see included in the action and press I-KEY. You can insert a key just for loc, rot or size. Avail will add a key to all available channels in IPO window (all channels you previously added something).
- When you insert key for your armature, a new action is created and linked to the armature if there was no action before. You can also see the curves of each selected bone of the armature in the IPO window. We will see action window and IPO window later.
- You can parent a bone to an external object by selecting this object then selecting the bone in question so it's active (The armature is in Posemode so you can select a bone). Do CTRL-PKEY. Then when you move the bone the object will follow. This kind of Hard relationship doesn't include any bending at all. It's useful when doing robot rigs as you are just moving objects around.

Mesh Object
This section will explain how to deform your mesh using the armature.
There are two ways to tell Blender which vertex will go with which bone: Vertex group, and Envelope.
There is also a tool useful when animating which is part of the mesh object: the Shape key, to create a preset deformation. For example: deform the face to look like a smile.
Connection between Armature and Mesh
|
|
Applicable Blender version: 2.4x. |
How to tell Blender: "use this armature to deform this mesh"
The Armature Modifier
Blender now has a Modifier stack (Editbutton, F9KEY). As such, we should use it over existing methods to pair mesh and armature, as the modifier stack is optimised and simple to use. Note: You don't need to parent the mesh to the Armature anymore. The only case you could need to do this would be animating the Armature object itself. Then the mesh should also follow the armature. In this case select mesh, then armature, and do CTRL-PKEY --> Object.

The clean way to do so is to go in the Editbutton window (F9KEY) and press "Add modifier" in the Modifier panel, then select "armature" in the dropdown menu. Then you'll get a new modifier "Armature" like the previous picture. Change the OB: field to the name of the armature object that should control the mesh. This step is very important! Without the armature object being defined, Blender won't know how to modify the mesh since there may be multiple armatures within your world. To limit the effect of the modifier, you can enter the name of a vertex group in the VGroup: field. This will minimize unwanted distortions in very dense meshes. There are also fields to enable/disable the modifier when rendering, enable/disable when working to only move the armature (could get handy with massive character), and when editing (that's very handy, you can edit the topology while it's deformed). There are also two toggles to tell Blender what it should use to deform: Vertex Groups and/or Envelopes. You may have noticed these options are repeated also in the Editbutton --> Armature panel, but as the tooltip says: these two are used when you use virtual modifier (the old way) to keep compatibility with old files.
Parenting the mesh to the "armature" will create an old-way link, still visible in the modifier stack, but not very useful. The first entry with the "make real" button is what appends if you do a CTRL-PKEY to "armature". You should not use that kind of connection when you see that. Press "make real" to get a working modifier.
The Old Way
This way is not recommended but can still be useful. When doing CTRL-PKEY to "armature", you will get a menu like this:

- Don't Create Groups will just create a virtual modifier so you can deform the mesh (the "make real" button)
- Name Groups is almost useless now as blender will create a group for you when you do weight painting.
- Create From Closest Bones is a function to remember when you want to bake all your envelopes to vertex groups.
Tip: Bake envelope to vertex groups
The workflow is very simple. When you are done with the envelope's tweaking and you have gotten the best out of it, delete the Armature modifier and parent the mesh to the armature. To parent it, go to object mode, first select the mesh and then the armature, then press CTRL-PKEY. Select Create From Closest Bones.
Do ALT-PKEY and redo the Armature modifier. Now all the envelope influence are converted to Vertex Groups. This way you can further tweak influence zone using Weight paint. More info in the following pages.
Envelope
|
|
Applicable Blender version: 2.4x. |
What is Envelope
Envelope is a new visual tool to help you rig your characters faster and easier. It can often save you a lot of time. Each bone has a special area around it, allowing you to tell Blender what part of the geometry will follow each bone. This zone is customizable so you can move, scale and blend them together.

Edit Envelope
You can edit this white zone in Editmode or posemode by going in Envelope display mode (Buttons Window → Armature → Display Options → Envelope), selecting bones and using SKEY or CTRL-ALT-SKEY.
In Editmode: you can select the Tip, the Body or the Root and scale using SKEY. This area in the middle will assign a weight of 1 to all vertices contained in here. All vertices with a weight of 1 will completely follow this bone. The white transparent area around the center is a zone of influence which loses power as you go away from the center. This area is scaled when selecting the body of a bone and doing CTRL-ALT-SKEY. In Posemode: You can only scale the zone of influence with ALT-SKEY when in Envelope display mode. It's real time, and lets you tweak the influence while you animate. So if you notice there is a vertex not following in the new pose you just did: Just select the bone it should follow, and scale the zone a bit until the vertex goes back with his friends. Example:


Envelope Options
It's possible to enable/disable the use of Envelope in the Modifier stack using the "Envelope" toggle.
There are also two important buttons in the Armature Bones panel: Deform and Mult.
Enabling the Deform button will tell Blender to deform geometry with this bone. It's useful because in a more complex rig not all the bones are there to deform, some bones are just there to move other bones.
The Mult option will tell Blender to multiply the weight it gets from envelope (let's say 0.7) with the weight you painted in weight paint (let's say 0.5). The result will be 0.5*0.7=0.35 so in fact you just tweaked the envelope influence to 0.3 when it was at 0.7. If you don't want vertices to be part of the zone, you can always paint it with 0, as 0*(something) will always give 0. This way you can give custom shape to your envelope. More on weight paint on next page.

In this example of a formerly flat surface you can see that all the selected vertices are not following the bone when it is moved upwards. This is because I painted a weight of 0 on them. In weight paint you'll see nothing. But just the fact that they are part of the group with a weight of 0 will make that possible. If Mult is off and you have both a vertex group and envelope, Blender will add value.
Vertex Groups & Weight Paint
|
|
Applicable Blender version: 2.4x. |
What Are Vertex Groups?
Vertex groups are very useful. You can use a vertex group to:
- Group vertices together while you model (keep a selection and come back to it later).
- Define which vertices softbody simulation affects.
- Define which vertices emit particles.
- Define which part of a mesh will follow a specific bone.
Vertex groups are specific to the Mesh object and can be modified in Editmode.
If you have vertices assigned to multiple groups (for example, in a character you may have some vertices in the "upper arm" vertex group that are also in the "lower arm" vertex group), you can assign weights to those vertices to specify how much relative influence the different groups have. A weight can range from 0 to 1 and is assigned when you create the group. Let's take a peek at the GUI of vertex groups in the Editbutton(F9KEY):

From top down:
- The dropdown menu lets you select an existing vertex group or rename the current one.
- The weight numfield lets you choose the weight value assigned when you add vertices.
- You can add a new group or delete the current one.
- Assign or remove selected vertices to/from current group.
- Select/deselect all vertices in current group.
Weight Paint
As mentioned above, you may often find that you have some vertices that are assigned to more than one vertex group. By assigning weights, you can specify the relative influence each of the vertex groups have. You have two options to assign weights: 1) manually selecting each vertex and typing in a weight value, or 2) use weight painting to - you guessed it - paint weights.
Weight painting lets you paint weight values on the mesh like you were painting on a wall with a can of spray paint. It is a Mode of the 3Dview and is accessible in the 3Dview's header in the dropdown menu with Objectmode, Editmode and such. A hotkey is also available: CTRL-TABKEY.
In Weightpaint Mode, the first thing you'll notice is the blue color of the mesh. Blender provides an easy way to quickly visualise the weight value of each vertex. This is the color spectrum used:

When you are in Weightpaint mode you can paint all over the mesh as if it was a solid object on your desk. The paint only works on vertices so don't try to paint in the middle of an edge or a face, it will never work. To help you in your task there is a new panel in Editbutton:

- The weight slider is just the same thing as the weight numfield we saw earlier in the vertex groups button. It's just easier to work with. It's simply the weight you want to apply to the vertices. In painting terms, think of this as the color.
- The buttons from 0 to 1 are shortcuts for weight value, to speed up the workflow.
- The opacity slider (and shortcuts) tell Blender what is the percent of the weight value you want to apply in one shot. If you set opacity and weight to 1 the vertex will turn red instantly. In painting terms, think of this as the pressure.
- "All faces" tells Blender if you want to paint on all faces in the mesh or just the visible one.
- "Vertex Dist" tells blender to use vertex distance instead of faces. When active, the painting will only check if the vertex is in the brush, then apply a weight value. If it's off, all vertices part of the faces in the brush will receive weight value. Turning on Vertex Dist can give good results when you have a lot of polys in your mesh.
- "Normals" will apply vertex normals before painting. This means Blender will take consideration of the direction the vertex is pointing when painting: the more it's facing away from view, the less it will receive value.
- "Spray" really makes it like spraying paint. Without it, a single click will only paint one value. With Spray on, each time you move the mouse a paint shot will be added. To get a good effect, use a small opacity value so the weight will increase slowly.
- "X-mirror" will tell Blender to apply the weight paint on the other group if there is one. Like Hand.L --> Hand.R. If you paint the group hand.L and there is a hand.R the paint will be copied over. For this to work your groups must be created, the name of the groups have to follow name's convention (left right) and both side of the mesh need to be identical.
- "Wire toggle" toggles the visibility of wire while painting. Useful to find where the vertices are (activate the edit mode option "Draw all edges" to see even better).
- "Mix"/"Add"/"Sub"/"Mul"/"Filter" is how you want to apply the paint based on what is already there. Mixing will do a mean from brute weight value and current weight value, "Add"/"Sub" will directly add or subtract value, "Mul" will multiply (exponential painting) and "Filter" will paint based on alpha value.
Vertex Groups and Armatures
So what use are vertex groups in rigging? You can specify what vertices will move when a bone moves. When you want to paint a mesh for an armature, do the following:
- Make sure the Mesh has an Armature modifier.
- Select the armature and enable Armature Posemode (CTRL-TABKEY).
- Select the mesh and enter Weightpaint mode (CTRL-TABKEY). (Question: if we're in Pose Mode for the Armature, how are we supposed to select the mesh? Ans: right click on it.)
- Select the bone you want to paint for with RMB.
- Paint the parts you want that bone to affect.
You'll notice that, if there is no group created when you first paint, Blender will create a group for you, and give it the same name as the selected bone. This is important, because when the "Vert. Groups" toggle is on in the Armature modifier, Blender will try to match bones with Vertex Groups based on the same names.
What happens when we try to blend groups together? See this simple example of 2 bones trying to bend a tube:

The Groups are painted so the body of each bone is in red and the zone between the two bones are gradually going from 1 to 0. This will bend nicely. If, for a special reason, you want a side to react differently, you can always move the bone while painting and try the new modification you just did. By the way, having Subsurf on while painting can be very cpu expensive. It's a good idea to turn it off.
Using Weight Painting with Armatures
Armatures are used for many purposes, but one common use is to deform a mesh with an armature. This example will demonstrate how weight painting can improve armature-deformed meshes.
In this example, we have two objects; each has an armature modifier applied. The one on the left is going to be the "before" and the one on the right will be the "after".

For the object on the left, take a look at the vertex groups as initially assigned (from left to right: Bone1, Bone2, Bone3, and Bone4). These same vertex groups were assigned for the object on the right:

Important: A bone in an armature will only act upon those vertices that are in a vertex group with exactly the same name as the bone.
- In Blender 2.37 and previous, this was the ONLY way to get a bone to deform a mesh.
- In Blender 2.40 and on, selecting the "Envelope" button in the armature modifier will allow bones to deform even if you haven't assigned any vertex groups yet.
If you enter Weight Paint mode (CTRL-TAB with object selected) right after assigning the vertex groups, you can see that the vertex groups as assigned all have a weight of 1.0:

OK: both objects have vertex groups assigned and they have armature modifiers. Let's grab a bone (select the Armature, CTRL-TAB to enter Pose Mode, select Bone4, GKEY to grab, and move) to deform the mesh. We haven't made the objects different from each other, so after moving their armatures in the same way . . there's still no difference. That's good.

Shape Keys
|
|
Applicable Blender version: 2.4x. |
Shape Key?
Shape keys are modifications of the original mesh that you can animate and mix with each other. Previously called Relative Vertex Keys (RVK), one of their major uses is to create facial expressions.

The idea behind Shape keys is simple. The basic, undeformed mesh you start with is the "Basis" shape. You can add a variety of different versions of this shape and store each one as a Shape Key for use in an animation (other software sometimes refers to these as "morph targets"). You can't add or delete vertices as Shape Keys only store the positions of vertices and not the creation/deletion of them.
Ok, to start out, take a plane. I'll add a new shape to it and move a vertex away:

When I play with the influence, this key has over the basic shape, the result will be as follows (0.5 in this example):

If I play with the slider from 0 to 1, Blender will gradually apply the Key 1 shape with a constantly varying amount of deformation. So from 0 to 1, it will slide from the basis shape to the Key 1 shape. The movement of the vertices is linear from start position to end position and you can even set an influence greater than 1 or lower than 0 and Blender will extrapolate the movements of the vertices relative to the basis shape (marked as a dotted line above). This feature allows you to set general shapes such as a smile and then exaggerate the shape without needing to remake it.
The GUI

Shape Keys step-by-step
Here's a hand-held walk-through of how shape keys are used.
Start with the default cube or a more interesting mesh of your choice.
1: Select your object in Object mode. Go to F9 Editing window. Find and select the "Shapes" panel. Press the "Add Shape key" button. This adds a key called "Basis" and this stores the "basic" mesh in its undeformed state. Make sure the "Relative" button is pressed (should be default).
2: Press the "Add Shape key" button again. It now says "Key 1" and you have a slider and some other settings. Go into Edit Mode, grab a vertex and move it. Exit Edit Mode. The mesh returns to normal but you've just added a real Shape key and Blender has stored it.
3: Repeat step 2 for as many different shapes as you like. You can rename the keys to whatever you want. Normally you create each new shape by first selecting the "Basis" key but if you select an existing key from the list and immediately press "Add Shape Key" then enter Edit Mode, the mesh will already be deformed. This is useful for making similar but unique keys.
Using Shape Keys
1: Starting on frame 1, select each key one by one from the pop-up list (or go to the Action Window, press the sliders button and select the Keys from the list there) and click on the slider and move the slider forward then back to zero. Sometimes just clicking on the slider at the zero point is enough to set the key.
2: Move forward ten frames, select Key 1 from the list and move the slider to 1.00. You'll see your object deform. Move more frames and slide another key. And so on and so on. You can move them forwards and/or backwards as you move through the frames and they'll just add together if they have to. Each time you move the slider, you set a keyframe for that Shape Key.

Setting Shape Keys
IMPORTANT NOTE:
You should add shape keys to a finished mesh. Don't work on a mirrored mesh or a partially finished model. Adding geometry (vertices, faces, loops, joining etc...) can result in the loss of the shape keys or to unpredicatable results. Not always, but probably when you least expect it. There are scripts available to make some of these things possible.
That's the basics. Note that shapes will constantly transform between keys so if you set a key at frame 1 to zero and at frame 10 you set the slider to 1 then at frame 5 the slider will be at 0.5 - which you may or may not want. If you want it to hold shape for a while before changing (e.g. staying at zero until frame 7), you'll need to set a key at the beginning and end of the time frame you want it to stay the same (So you would set it a zero at the start, then zero again at frame 7 then to one at frame 10). You can also edit the IPO curves (use Shapes pop-up) to really mess with the transformations.
Lip-Sync with Shape Keys
|
|
Applicable Blender version: 2.4x. |
Lip-Sync with Shape Keys
Here I will attempt to explain my recent dealings with using Blender Shape Keys to produce convincing lip-sync (Lip-synchronisation, i.e.: "speech") for simple, humanoid characters.
This is aimed at people with an understanding of Blender fundamentals like vertex loops, face loops, sequencer and of course, Blender's new Shape Key system. If these terms mean nothing to you, then you may well struggle to keep up. If you're familiar with them then I hope this tutorial will prove to be a breeze and your characters will be speaking so fluently you'll have trouble shutting them up!
Other Lip-sync tutorials, if you can find them, recommend using other software like Magpie, Papagayo and others, but while I've no doubt they provide a valuable service and maybe make syncing easier, I will be using only Blender for this tutorial. I haven't tried using lip-sync software yet so I can't really say if it's easier or not.
You will find links to interesting audio files you can use for testing animation and lip-sync near the bottom of the page.
The hard work first
Setting up for Lip-Sync
First, set up your Blender screen so you have everything you need for this project. You'll need a front 3D Window, an Action Window, the Buttons Window (showing Editing - F9 - panels) and a Timeline Window. If you've got the room, a Side-view 3D Window would be handy too.
The basic sound units are called phonemes and the mouth shapes we use to represent these phonemes for lip-sync are called visemes (or sometimes, phoneme shapes) and there are many references for these around the web. Legendary animator Preston Blair created one of the most popular viseme sets, which is great for cartoon-style characters. Other visemes are aimed at more-realist, humanoid characters. The shapes you choose depend on the style of your model. (I'll try to provide some useful links later)

Sample viseme shapes.
The first and most difficult step in good lip-sync is making the shape keys for these visemes. How well these are made ultimately determines the success of the animation and it is worth spending time getting them right, although they can be modified and tweaked later. So choose your favourite set of visemes (or even look in a mirror and use your own face as a reference) and start setting your keys. A model with good topology - especially well formed edge loops around the mouth area - will be a big help here!
What on Earth are topology and edge loops?!?!
Topology refers to the way your 3D mesh defines the object, in this case your character's head. Edge loops refers to the flow of consecutive edges around the character's major features. Typically, good edge loops flow around the eyes and around the mouth in a somewhat deformed, "circular" manner. Selecting and deforming a single loop of edges and vertices surrounding a facial feature is much quicker than having to individually select a lot of edges that don't flow naturally around that feature. Similarly, deforming a single loop or collection of related, nested loops is much easier and quicker than trying to deform a seemingly random set of edges. You can easily see these loops in the character screenshots above. The series of edges surrounding the mouth simply stretch from wide ellipses to almost circular to create a useful variety of mouth shapes. The faces defined by paired edge loops are referred to as face loops. The close-up image below shows selected face loops.
There are many tutorials on the web about these topics so if you need more information before proceeding then a quick search is probably a good idea.
Setting the basic viseme shape keys
First, select your undeformed mesh and create your basis key. Go to Editing (F9) window and go to the "Shapes" panel. Press the "Add Shape Key" button. Enter and exit edit mode to set the basis key. Then create your first key Key 1 and name it "M". Enter edit mode and if your character's mouth isn't already closed (some people make them that way) then close it by carefully selecting the faces and loops around the mouth. You will usually use Size-Z plus a bit of grabbing and shifting to achieve this. Don't forget to include the faces on the inside of the lips or the deformation will be unpleasant. When you're happy with the shape, exit Edit mode and there you have it. Your character can now say "Mmmmmm" whenever you like. Test it by moving the Shape Key slider back and forth but make sure to leave it at zero before making more keys. (If you made your character with a closed mouth then you can just add the new "M" key then enter and exit edit mode to set it.)

Selecting face loops
For most new keys, you will select the basis key first then press "Add Shape Key" then make the required shape from scratch in edit mode. However, some mouth shapes are very similar, like "OH and OOO" or "EE and SS" and it would be easier if you could start with something close to what you want rather than shifting everything from scratch every time. Luckily, Blender allows you to do just this. Once you've made your "EE" key, for example, you can select it and immediately press "Add Shape Key" then enter edit mode and the mouth will already be deformed and you only need to make subtle changes to it to make your "S" shape.
Remember that the keys you make are for sounds, not letters.
In general, you'll need shape keys for the following sounds
- M, B, P
- EEE (long "E" sound as in "Sheep")
- Err (As in "Earth", "Fur", Long-er" - also covers phonemes like "H" in "Hello")
- Eye, Ay (As in "Fly" and "Stay")
- i (Short "I" as in "it", "Fit")
- Oh (As in "Slow")
- OOO, W (As in "Moo" and "Went")
- Y, Ch, J ("You, Chew, Jalopy")
- F, V
These can often be used in combination with each other and with jaw bone rotations and tongue actions to also produce other sounds like "S", "R", "T", "Th" and a short "O" as in "Hot" - or these can also be specifically made with their own shapes. This decision depends largely on your character. Start with the essentials and make others if you need them.
NOTE: I use one jawbone in my current character and this is also used to control the mouth shapes. It doesn't drive the shapes but it moves the bottom teeth and tongue (which can also be controlled separately) and the faces that make up the chin part of the character mesh. For some visemes, I move the jawbone into a logical position before adding the shape key. For example. I open the jaw for the "OH" key and close it for the "M" key. Later, when animating, the jawbone is animated along with the Shapes for a very convincing result.

Using jawbone with shapes
Load the audio
Once all your viseme shapes are set the time comes to get your character to speak. (Normally you would animate the body first and leave the lip-sync till near the end).
If you haven't already done so, load your audio file into a Blender Video Sequencer Window and position it where you want it. Currently, Blender only supports 16 bit wav format audio files so you may need some editing or conversion software to process the file if it isn't in this format. "Audacity" is a good, open-source (free) editor that will suit this purpose and much more.

Blender Video Sequence Editor Window showing loaded Audio Strip
Go to the Scene Window (F10) and press the "Sound block buttons" button --(in the three buttons near the frame counter. It looks like an audio wave)--. Press the "Sync" and "Scrub" buttons. The "Sync" button makes the playback in the 3D window closely match the audio when you press Alt-A (it does this by dropping image frames if necessary and it generally provides only a rough guide of how things match-up). The "Scrub" button is important for lip-sync as it means that whenever you change frames, Blender plays the audio at that point (Currently in some Blender builds you have to press Alt-A at least once to get this feature to start working).

Blender Soundblock Panel
Select your character and your Shape Keys should be listed in the Action Window, in the order in which you made them (I don't think they can be shuffled). You will see a small triangle button labelled "Sliders" at the top of the list - press it to show the sliders for each shape. If you drag the mouse back and forth in this window, you should hear the audio play as you cross frames. This is how you will identify the main viseme/phoneme key frames.

Shape Key Sliders
Getting down and dirty
Before you begin your lip-sync, you obviously need to know what your character says. It might be worthwhile writing it down and even speaking it over and over, in time with the audio, to get a feeling for the sounds you'll be dealing with. Some sounds are what I'll call "key sounds" and others are almost dead, non-descript "in-between" sounds that fill in the gaps between the key sounds. Obvious key sounds are those where the lips close and those where they are tightly pursed or wide and round, other key sounds can differ with every piece of audio. Don't make assumptions about the shapes you'll use based on the words you know are there. What you are animating are the actual sounds - not letters or words (Keith Lango has much to say about this on his website and I recommend reading it)
The Timeline Window
Go to the Timeline Window. This window seems to have been largely overlooked in previous documentation yet it provides the basics for timed animation plus a few other goodies to make your animation life a little easier. Here you can turn auto-keying on and off at will (you'd normally go to the hidden User Preferences window which is a pain and easy to forget), navigate frames, play and pause the animation in the 3D window, turn Audio Sync on and off, set the start and end frames for the animation and set frame markers. This last feature is the key to our project.
In recent Blender releases,the audio "Scrub" feature works in most windows. As you scrub through the audio, listen for where the key sounds occur. As you hit a key sound, scrub back and forth to find where that sound commences. In the Timeline Window, press "M" to set a frame marker at this frame. The marker can be labelled by pressing CTRL-M in the Timeline Window while the marker is selected (yellow). Enter a sensible name for the marker that indicates what the marker is for (like the phoneme sound and/or which word it starts or ends). Markers are selectable and moveable and can be deleted just like other Blender items.
NOTE: Depending on the speed of your system, you may find you get more pleasing audio scrubbing and better 3D window playback if you turn off subsurf for your model and hide any unimportant parts of the scene on different layers. The fewer things Blender has to calculate as you scrub or play-back, the faster it can draw the frames to maintain sync with the audio.

Turn off these buttons to disable subsurf setting in 3D window

Blender Timeline Window
Scrub through the whole audio - or sections of it in a long piece - marking and labelling all the key sounds.
Setting the keys
Now you have everything you need for your first lip-sync pass. Start at the first frame and click once on all your Shape Key sliders in the Action Window to set them all to zero. Move through the frames from start to finish setting shape keys where you marked the key sounds in the Timeline Window. If your character has a jaw bone and tongue bone(s), you will need to set these where required as you go.
Trouble in paradise? A quick lesson in handling Shape Keys
If you haven't set shape keys before you might notice one interesting dilemma - they have great memories! Once you set a slider to any value, it stays at that value until you set another value somewhere. The shapes change in a linear fashion between keys. At first, this appears to be a problem if you want to key "MOO" because after you set the "M" key slider to 1 (one), it will stay there, making it impossible to get your character to say "OO" while his lips are trying to stay shut. So, you have to set the "M" slider on the "M" sound, then as the audio goes into the "OO" sound, you must set the "M" slider back to zero and then set the "OO" slider to its full value.
This introduces another problem. After you set the "OO" key, your "M" sound is messed up because the mouth is now also being affected by the "OO" shape that follows it. So, you must make sure the "OO" sound is set to zero when you want the lips closed in the "M" position.
In general, you'll find yourself setting each shape 3 times
- once to determine where you want the mouth to begin moving to this shape (slider set to zero)
- once to set the slider at the desired level for this phoneme
- and once more to end this shape and move into the next one (slider set to zero)
The same principle applies to the jaw bone and tongue - 3 keys to each move.
Setting multiple shape keys
As you get more comfortable with this procedure, you'll find you can leave some shapes set longer or adjust them to different levels as they can provide some interesting mouth shapes when combined with other shapes.
Setting the in-between sounds
Once the key sounds are properly set, you should be able to scrub slowly through the Action Window and watch your character speak in time with the audio. It won't be perfect but it's a start. To fix his speech impediment, you now have to fill in the sounds between the key sounds. Mostly these will be dull vowel sounds ("err, uh, ah") and silence. These shapes are set in exactly the same way but here you'll have to really watch the 3D view as you set the sliders. Try combinations of sliders like "EE" and "OH" to get the perfect shape for each individual sound. You have to be guided by your character. Does he look like he's saying the sound you're hearing? (Remember that exactly what's being said is not important - it's only the sound that matters). Test each sound as you set it by scrubbing a few frames over and over and watching your character mouth the sounds.
All that's left, hopefully, is some polishing and tweaking. If it's not perfect then don't despair. Like other areas of animation, it can take a while to get a feeling for lip-sync and as the tools and workflow become more familiar you can pay more attention to the important work.
Putting it all together
When you're reasonably happy, it's time to combine the audio and video and watch the result. Since Blender can't do muxing (combined audio/video) you'll need to composite it with the editing software of your choice (OSX users can use recent versions of iMovie, virtualDub is often recommended for Windows users and Avidemux2 is often recommended for Linux users.).
What Blender can do is provide a fully synced version of the audio file the same length as the animation - even adding silence at the start and end if need be to maintain the synchronisation. To make this synced audio file, go back to the "Sound block buttons" panel and press "MIXDOWN". This saves a .wav file using the filename and location you entered in your output box (you did didn't you?) plus a frame count (something like 'speech.avi0001_0400.wav'). Then save your animation by pressing the "ANIM" button.
Combine the audio and video in your video editor and export a muxed file. You may find when you play it back that the mouth seems to be just slightly out of sync. This may be for two reasons: You're syncing per frame, the sound doesn't start exactly at a frame. The second reason is the way the brain processes faces and expressions and mixes it with sounds heard to comprehend speech. This comprehension phenomenon is barely understood and is a common challenge in animation, and some physiologists think our brains read lips and facial expression as a way of setting up to understand the context of sounds received and comprehending the meaning behind language. To solve it, you can go back into Blender, select the audio in the Sequencer Window and move it one or two frames later, then press "MIXDOWN" again to create a new .wav file with a split second of silence at the start. Remix this with your video and watch the results.
From here on its all a matter of testing and tweaking until you're happy!
Using Blender to render Audio AND Video TOGETHER.
Ever since Blender 2.3, it has been possible to render video with the audio attached. Once you have your animation done, and are ready to render: In the buttons window, click scene (F10). In the format tab, choose FFMpeg. There will now be three tabs. Click on Audio. Click Multiplex, and choose your audio codec. Click Video. Choose your video codec (including AVI). Now, in another section of the window, there will be an Anim tab. Click Do Sequence. And click ANIM. When you watch the video, you'll notice that it has sound.
Note: The mac version of blender doesn't have the FFMpeg codec in blender by default.
Audio Files
You can find some interesting audio files selected for animators at [2]animationmeat. These files come complete with a pre-marked phoneme sheet.
Note
One final note. Watch how the pros do this. When actors are doing voice overs for major releases their actions are recorded and even integrated into the final animation. If you have a digital camera, you may also try recording your own mouth performing your dialogue and approximating its positions to your animation. This can give you a great visual reference, possibly frames for frames if your frame rates match, and save you time.
Constraints
|
|
Applicable Blender version: 2.4x. |
The Constraint
A constraint is what makes everything easier, magic, automatic, customised (add more words here) in a rig. It tells a bone or an object to do something special based on the position of another object, and the position of the constrained object itself. There are many constraint types for you to play with. Most will work everywhere but, the IK solver will only be available in the Armature Editmode or Posemode.
There are no strict rules to follow when using constraints. As long as they save you time and make everything work by itself. A constraint should never be "time-consuming" or difficult to use. Think about the animator who is going to work with this rig (it could be you!). So, do everything in a smart way.
It's possible to copy constraints from one object/bone to a bunch of objects/bones. A useful thing to know when doing a repetitive task like rigging all the fingers of a hand. Just select all bones/objects that you want to give a copy of the constraint, and then select the bone/object containing the constraints. Press SHIFT + CTRL-CKEY in 3DView, and select Object Constraints from the popup menu. The idea behind this is to copy the constraints of the active object to the selection.
When working on an armature in Posemode, the bones will change color if they contain a constraint. Green for almost all, except for the IK constraint, which turns the bone Yellow.
The Constraint Panel
You can add a Constraint to an object or a bone by going in Object button window(F7) for objects and bones. Look for a Constraint panel like this (note, it's usually empty):

The panel also appears in Editbutton(F9) when you are in Armature Editmode or Posemode. So what you get:
- A button to add a new Constraint. The choice you have is listed down this page.
- When you add a new Constraint, A block gets added in the stack. The UI is almost the same as the Modifier Stack. Each block represents an entry. You can delete it with "X", move it up or down in the stack, close or open it.
- Constraints are evaluated from first to last. So if you have two Constraints working on the same channel, let say Location, The last one will most probably win the chance to move the object. But...
- Most of the constraints have an influence slider to determine how much it will influence the stack. If the last constraint has an influence of 0.5 it will mix the result with the one before.
- You can animate the influence of the Constraint by moving the time, changing the Influence slider and adding a key with the Key button.
- The Show button will display the influence IPO curve in an IPO window for editing. (The IPO window must be opened before pressing the 'show' button).
- You can change the name of the Constraint by clicking on the name when the constraint is open.
- By Clicking on the white jacket of the Constraint you select which one is active for edition, same as "show" button.
- If most of the Constraint you can enter the name of the Object you want to work with as a target or reference. For a bone, you need to enter in which Armature object it is, then an other field for the bone name will appear. When filling those fields, remember you can use autocompletion using TAB.
The Constraint Index
Copy Location
|
|
Applicable Blender version: 2.4x. |
Copy Location

The Copy Location constraint does as the name states: it will copy the location of the target to the source (constrained object). Less Influence will drag the constrained object less and less to the target.
If it's an armature, a new field will appear to let you tell which bone will be the target. Don't forget TABKEY completion while writing the name of your object/bone!
You can tell Blender to work only on the selected axis. Many uses are possible :)
The Constraint Panel

- The Target field will let you select which Object the constraint holder will follow.
Where To Use It
Most of the time this little constraint is useful to stick objects to one another. By playing with the Influence you can tell when it will work, when it will remain motionless.
A good use of it is to ask a character to pick up something. By having a bone or empty for each side of the relationship (hand <-> glass), as the hand approaches the glass, you can align the two empties and fire the constraint up (1.00) to stick them together. You add another child-bone in the middle of the hand to tell where the glass will be. Thus moving the hand will move the glass. On the side of the glass just add an empty and make it parent of the glass. Add a copy location to the empty pointing to the bone in the hand we just did. There you go. Of course when the hand rotates the glass will not. For that you will need to add a Copy Rotation Constraint.
Before Blender 2.40, the above method was a good way of faking parent relationship without rotation. But now we have the hinge option which does the same.
Create this kind of tracking device using the X Y Z toggle button

Copy Rotation
|
|
Applicable Blender version: 2.4x. |
Copy Rotation

This constraint copies the rotation of the target. As simple as that. It can be an object or a bone. As you can see in the example, only the rotation gets copied.
The Constraint Panel

- You have 3 buttons to select which axis get copied over.
Where To Use It
Can be used with Copy Location to fake parent relationship. As you can key the influence you can make a character pick something up and hold it in his hands.
You can also use this to align a plane with a 2D effect on it to the camera at all times. This works better than pointing it at the camera in some cases, such as a ring of atmospheric halo around a planet, where you don't want it disappear behind the planet.
Track-To
|
|
Applicable Blender version: 2.4x. |
Track-To

The Track-To constraint lets you influence the Rotation of the constrained object by making it track a target with one of the constrained object's axis.
The Constraint Panel

- You can enter the name of the target you want to track.
- You can select which axis is going to track the target.
- You can select which axis is going to stay up.
Where To Use It

A good example of use is the make a camera track an object. The setting to use on a camera is track: -Z and up: Y. You can turn Axis drawing in objectbutton window to help you choose the good axis.
Another example with armature would be the eyes of a character:

Floor
|
|
Applicable Blender version: 2.7x/2.8x. |
Using the floor constraint will keep a bone from passing through an object from a given direction. It is useful when making floors of course but also when making walls and other items which are obstacles for the armature.
There is also an offset value which is very useful when say for example you have a foot where the mesh stretches down below the actual tip of the armature you can then use the offset to make the bone stop before it actually reaches the obstacle object.
Locked Track Blender 3D: Noob to Pro/Locked Track
Follow Path
|
|
Applicable Blender version: 2.77. |
Follow path
Follow path is a constraint which creates an animation in which the Object follows a Curve. You of course have to constraint it to a curve of some kind.

The Constraint Panel

When you added a curve you've to click the "Animate Path" button, otherwise nothing will happen.
The "Follow Curve" checkbox is there to make the objects Forward Axis, here "Y", point in the direction of movement. Of course here you'll find the Forward axis choices and Up choice, weird they still got different layouts, but don't bother. Finally, the "Influence" slider.
Where To Use It
It can be very handy when you animate a roller-coaster or something that has to follow something else perfectly.
Here's an animation of a follow path
Stretch-To
|
|
Applicable Blender version: 2.4x. |
Stretch-To
Stretch To causes the affected object to scale the Y axis towards a target object. It also has volumetric features, so the affected object can squash down as the target moves closer, or thin out as the target moves farther away. Or you can choose not to make use of this volumetric squash-'n'-stretch feature, by pressing the NONE button. This constraint assumes that the Y axis will be the axis that does the stretching, and doesn't give you the option of using a different one because it would require too many buttons to do so.
This constraint affects object orientation in the same way that Track To does, except this constraint bases the orientation of its poles on the original orientation of the bone! See the page on Tracking for more info. Locked Track also works with this constraint. Options
R
Pressing the R button calculates the rest length as the distance from the centers of the constrained object and its target
Rest Length
Rest Length determines the size of the object in the rest position
Volume Variation
Volume Variation controls the magnitude of the effect
Vol
The Vol: buttons control along what axes the volume is preserved (if at all)
Plane
The Plane buttons define which local orientation should be maintained while tracking the target

IK Solver
|
|
Applicable Blender version: 2.4x. |
The IK solver

The IK solver constraint is a wonderful tool for all animators. IK stands for "Inverse Kinematic" and is the opposite of FK (Forward Kinematic).
- FK: You have a dependency to the root of the chain. In Blender, a FK chain is a chain of bones connected together. You have to animate the bones rotation one by one to get it animated. It takes longer, but gives you entire control over the rig.
- IK: Both ends are roots. All bones in the chain are trying to rotate to keep both ends on targets. Now this Constraint got most of the attention during Animation refactoring, hopefully we have a lot of toys to play with now.
The IK solver has a special shortcut in Posemode to be added easily to a bone. If you select a bone and press 'CTRL-IKEY', You get a little menu asking for more info on the new constraint, the target: to a new empty object or without target. It's now possible to work without target. Though you have less freedom (no rot feature, difficult parent relationship).
You can also select the target and then the IK constraint holder and press CTRL-IKEY. With this way of selecting ensure that your target is selected, but the bone you want to apply the constraint to is active (the last one selected). The menu will then let you add a constraint to the current bone with a target. If the target would itself be part of the IK chain, you get an error message - so make sure the target bone is not connected to the bone you want to add the constraint to.
It's also possible to remove all IK constraints from selected objects or bones with 'ALT-IKEY'.
Q: 'CTRL-IKEY' doesn't seem to do anything
A: Either the 3D Window is out of focus (R-click in empty space to solve) or you're not in Pose Mode ('CTRL-TAB', selected bone will be magenta in color)
A: In the 2.48 version of Blender, the shortcut is 'SHIFT-I'
The Constraint Panel

- You can rename the constraint.
- You can select which Object or bone will be the target. Don't forget Tab completion.
- The Rot button let you tell Blender to use the rotation of the target to influence the rest of the chain:

- The Tip button lets you tell Blender which part of the bone is the target, the Tip or the Root. It's interesting to use tip, because this way the Bone holding the IK constraint can be used to deform geometry.

- Len lets you tell Blender the length of the chain the IK solver will try to rotate. If set to 0, the entire chain will enter in the constraint. If for example the len is 4, only the 4 last bones of the chain will try to touch the target.

- Also If you set len to 0 and your chain's root is a child of another bone, The IK solver will reach and rotate all the bones until it gets to the end of the parent relationship. If all the bones are linked up to a master root, then all other sub-branches will be affected. If there is another IK target in other sub-branchs of the rig, Blender will try to mix them. This concept of multiple IK targets in a rig is called Tree IK and can be used to get completely automated animations. For example like a doll: if you pull one hand, all the body will follow. In the 3D-view you'll see a yellow line from the IK solver to the root of the chain it covers. This line appears when you select the bone containing the IK solver.

- PosW and RotW let you tell Blender if this IK solver will influence the final result more of less in the case of a Tree IK setup. With these options it's possible to use an IK solver just for location and an other one just for rotation.
- Tolerance and iterations are performance and precision options. IK solving is done in more than one pass, the more passes you calculate, the more accurate results you get. The tolerance is the distance from the IK solver to the target you can accept. If Blender manages to place the target near enough, it will stop doing iterations. The Iterations value is a hard limit you set to limit the time blender can reach on each IK solver per frame. Try to set it to a very low value to know why Blender needs more than one pass ;).
- You can set the general influence this constraint will have over bones, and it's animatable.
Where To Use It

In any chain of bones you don't want to animate by hand but you want both ends to be at precise location. The best example is a leg: The leg is connected to the body and to the foot. You don't need to animate the 2 bones in the legs, just place the body and the foot, the leg will follow automagically.
Degree Of Freedom

In DOF it is now possible to set it for bones in an IK chain. This way you can set what will block where. This is very useful when doing a mechanical rig as you can limit the move or better, lock completely an axis.

- There you can set a limit on each axis, or completely Lock it.
- No limit gives it complete freedom (which is the same as [min:0 max:360] or [min:0 max:0]).
- The stiffness lets you tell Blender if an axis is more difficult to rotate than the rest. If all bones have a stiffness of 1 on X and you try to curve that chain in a way that all bones need to turn on X to follow the target, the Solving will find really weird poses to find a way to touch the target without rotating on X.
Action Blender 3D: Noob to Pro/Action
Timeline Window
|
|
Applicable Blender version: 2.7x/2.8x. |
Timeline Window
The Timeline window is below the 3D view in every standard project. You can see where keyframes are for the selected object and scroll through the timeline
IPO Window
|
|
Applicable Blender version: 2.7x/2.8x. |
Graph Editor
The Graph Editor is meant to work with curves, which mostly represent key-frame transitions or drivers.
Data Type
|
|
Applicable Blender version: 2.7x/2.8x. |
Dope Sheet
The Dope Sheet is a window in which you can move, very easy, keyframes from one frame to the other. They are visualised with clear diamonds.
Channel Blender 3D: Noob to Pro/Channel
Curve Edition Blender 3D: Noob to Pro/Curve Edition
Driven IPO Blender 3D: Noob to Pro/Driven IPO
Action Window Blender 3D: Noob to Pro/Action Window
Introduction To Action Data Block Blender 3D: Noob to Pro/Introduction To Action Data Block
Key Edition Blender 3D: Noob to Pro/Key Edition
NLA Window
|
|
Applicable Blender version: 2.4x. |
The NLA Window
It's quite easy and maybe that's why there's no specific tutorial. Let's say you want to make two actions, AC:Hit and AC:Kick. Start with posing Hit and an Action will automatically be created in the Action Editor consisting of all the Bones that use Action IPO's. That's done so return to Frame 1 which will be your default Stance of AC:Hit.
Now, in the Action Editor, click the X (delete) next to AC:Hit and the datablock menu will disappear. (If you Add New instead of deleting then it will copy selected bones to the new action and you don't always want that). If you want a new default pose for AC:Kick, then Pose it or the same stance will be used as was the default in AC:Hit. Pose and Keyframe your Kick action and name it.
Over in the NLA Editor you can now use Shift-A to add NLA-Strips of your Actions, Grab and Scale them and use the Transform Properties tab to input how they Blend.
If you select an Action with the dropdown menu, at first its name will appear in the NLA window along with its keys. To make this Action into an NLA strip, point at the Action's name in the NLA and press CKEY.
Close any open Actions by clicking the scary X in the Action Editor. If you don't do this, only this action will play. Now in the NLA editor, play the animation.
If you see any keys (diamonds) in the NLA window, instead of strips (rectangles), you're still editing an action. It's so much easier if you have both the Action and NLA windows open so you can see whether an Action is open or not.
Walkthrough
With no Actions selected, both the Action Editor and the NLA Editor appear empty. Here, the NLA Editor window does list one Object called -Empty because that object is not an armature but it has some IPO curves attached.

Select an Action you've already made. Here, an Armature named Yui has bones involved in a one-frame action called -AtEase.


Convert the listed Action to an NLA Strip in the NLA Editor by pressing the CKEY with the mouse hovering over the Action to be converted. No change in the Action Editor; it is still available as an Action.


Once converted, note the changes in the NLA Editor. The Action icon appears next to the Armature's name: ![]() . This is actually a button though it does not look like it, and you can toggle it between the Action and NLA Strips icon by clicking on it:
. This is actually a button though it does not look like it, and you can toggle it between the Action and NLA Strips icon by clicking on it: ![]() .
.
Introduction To NLA Editor
|
|
Applicable Blender version: 2.4x. |
NLA (Non-Linear Animation)
WARNING-This page assumes the reader to understand the IPO window and the Action Editor window, as well as rigging a character with an armature object. This tutorial will make little sense without this previous knowledge.
Imagine this--yourself, sitting at your computer late at night, beating away at a huge blender animation. You didn't think it would take as long as it did, but you lost your composure staring into the jungle of colorful IPO lines, little white and yellow Action diamonds, and that annoying green current frame line. You know that the NLA window would help you make sense of it all, but you are afraid of opening that Pandora's Box because of the problems that will follow it. Never fear, for this tutorial will clean up all those problems and revolutionize the way you blend for the rest of your life.
Setting up the Scene
It will be easier for you if you start with a small demo file than if you go straight for the big prize. Give a character or other armature-rigged object a few SEPARATE actions (remember to name them something distinct, like "Walk" or "Run" as you always should with everything).
For your own sanity, you will want to have a path or an IPO that correlates with the actions in question. All of the blender screenshots I will be using come from a file with a very basic stick person, rigged with an armature skeleton. He has two actions; a normal walk cycle, and then another, hunched over one, as if to pass beneath a low ceiling. If you use this idea in your own test file (and I thoroughly recommend it) do yourself a favor and give them both the same stride length! Give this guy an IPO or a path to follow that keeps his feet from slipping, and make sure that it has a linear interpolation mode.
The rest of the scene consists of a floor-plane and an arch too small for him to walk under (hence the crouching walk). Place this arch exactly one walkcycle away for now, we will move it around later.

Complete the scene before going on to the next step.
Adding Action Strips
Now, he moves forwards as you scroll through the frames, but how do we get him to walk forward, duck, and walk under the arch, too? First of all, you need to select the armature object and create a link to the normal walk. By pressing the up or right arrows, or pressing "alt+a", you should be able to see him walk up to the arch, stop walking, but keep sliding through, with his head sticking out the top. As ridiculous as this seems, right now, however, you are on the right track. Split your window now and open the NLA window with ![]() .
.
At first glance, this window looks almost identical to the action window we all know and love. This is not totally off of the mark. The NLA window is, in essence, an abbreviated version of the action and IPO windows.

This is what you should see in the NLA window.
You see a space with the name of your armature (named "Armature" in my demo) and in that row you see a few key diamonds. These show the ipo you have put on the person. I made it so the IPO extended on forever, using the first ten frames as a guide. In a subset beneath the armature object, you see the name of an action. The bullet next to it means that the armature is currently linked to that object. In that row, you see key diamonds, and those correlate with the keys you put into the action in question. If you switch actions in the action window, you see that the NLA window also changes. But how do you get it to keep the first and play the second later?
Go to the first frame you want him to walk in (most likely number one) and place your cursor in the NLA window. Press "shift+a" to see a dropdown menu. Pick the name of the first walk cycle. You should see a new subset space appear, with the name of the first walk in it. This space should be occupied by an action strip. Two colors of action strips are yellow and pink, yellow meaning selected and pink meaning deselected, just like IPO vertices. This strip takes up the amount of frames the walk did. The NLA window has now saved your first action. Now to toggle to the next action, move the frame line to the end of the first strip, then press "shift+a" again, this time clicking the other action on the dropdown menu.

The result.
Getting the Strips to Play
Now, as cool as this seems so far, if you press "alt+a", you will be disappointed and confused. The animation will only play one of the actions. This is a simple problem to fix. If you look carefully, you will see that the armature is still linked to the action it played. This data is overriding any other data from the NLA window. Press the "X" in the action window right next to the name of the action. Press "alt+a" again. It works!
This is, however, a jerky and instantaneous switch from one action to the other. Making it less weird is easy. Press the "N" key with your cursor in the NLA window. You will see a small box with a bunch of functions in it (this will be explained in detail on later pages).

The Properties window.
This little box is the lifeblood of the NLA in blender. It contains all the tools you will need to be able to run this feature smoothly. I will illustrate a few of them right know, but most others will be shown in the section on this window.
Make sure you have highlighted the second action strip, and look at the space where it says "Blendin". The number there is the number of frames blender will use to smooth the transitions in to the highlighted action. Depending on how fast your character is walking, you may need to change the number a bit, but I set my "blendin" for seven. Whatever number you used, however, move the second strip back that same amount of frames. The wedge on the end of the action strip should end as the other strip ends.

The NLA solution.
Conclusion
You now have the necessary skills to complete much more involved and complex animations. You can, however, increase this even more by continuing to read the other NLA tutorials in this wikibook.
Good Luck!
Key Editor In the NLA Blender 3D: Noob to Pro/Key Editor In the NLA
Strip Edition Blender 3D: Noob to Pro/Strip Edition
Strip's Properties (NKEY) Blender 3D: Noob to Pro/Strip's Properties (NKEY)
The Stride feature
At the moment, one of the best documentation for Blender Stride features can be found here: Blender Stride Tutorial, which takes on where the Official Blender Stride Page takes off. Good luck! A simpler and shorter, but still very good tutorial can be found here: Blender wiki: NLA Editor and Stride Path.
Working example: Bob
|
|
Applicable Blender version: 2.7x/2.8x. |
In this tutorial, we are going to be constructing a fully functional, humanoid character, with a complete rig, and we are going to animate him performing a walk cycle.
Getting Started

Build The Rig
|
|
Applicable Blender version: 2.7x/2.8x. |
If you think you already know what a rig is, then you probably need to read the definition of "rig" and "rigging" before we get started. It's important to note that an armature is not a rig, but a rig can be an armature. Assigning a mesh to be deformed by an armature is not rigging.
A rig should always be designed for the types of animations your character is going to be performing. Only make your rig as complex as it needs to be to allow for the types of actions you need.
To make everything with the armature easy to deal with, we're going to make our character in the crucifix pose. If he's not, you will have headaches trying to deal with bone roll angles. Once Blender can easily allow the user to roll the bone to align with a roll target, then I'll edit this tutorial for that. But in the meantime, we will use vertical legs and horizontal arms. We will build the legs from the side view and arms from the top view.

Center the cursor (shift+c) and add an armature. In Object Mode, press alt+r to clear the rotation. You have to have a bone for the hip, and it needs to stick out of his front or his back, so take your pick, because they both look bad. Don't point the bone upward at some odd angle, we need to be able to roll the hips easily, and to that end, we will place the bone horizontally.
In front view, place the cursor and add a bone. IMAGE
In side view, move points and extrude them until your chain looks like this. Note the slight bend in the knee. This is very important! IMAGE
Snap your cursor to the root of this chain (shift+s) and add a bone. Now select the points at the hip joint and the ankle joint, and snap the cursor to the selection. IMAGE
Select the tip of the newest bone and snap it to the cursor. IMAGE
Now give these bones some names. It's a good idea to use the same names I do to avoid confusion, since I will refer to the bones by name. Select upperleg.l and then shift+select leg.l, and press ctrl+p to make upperleg.l the child of leg.l. Do this again, but make leg.l the child of hip. IMAGE
In front view, center your cursor and select
Deform The Mesh Blender 3D: Noob to Pro/Deform The Mesh
Create A Walk Cycle Blender 3D: Noob to Pro/Create A Walk Cycle
Working example: Piston, Rod and Crank {{:Blender 3D: Noob to Pro/Advanced_Animation/example/_Piston%2C_Rod_and_Crank}}
GNU Free Documentation License
As of July 15, 2009 Wikibooks has moved to a dual-licensing system that supersedes the previous GFDL only licensing. In short, this means that text licensed under the GFDL only can no longer be imported to Wikibooks, retroactive to 1 November 2008. Additionally, Wikibooks text might or might not now be exportable under the GFDL depending on whether or not any content was added and not removed since July 15. |
Version 1.3, 3 November 2008 Copyright (C) 2000, 2001, 2002, 2007, 2008 Free Software Foundation, Inc. <http://fsf.org/>
Everyone is permitted to copy and distribute verbatim copies of this license document, but changing it is not allowed.
0. PREAMBLE
The purpose of this License is to make a manual, textbook, or other functional and useful document "free" in the sense of freedom: to assure everyone the effective freedom to copy and redistribute it, with or without modifying it, either commercially or noncommercially. Secondarily, this License preserves for the author and publisher a way to get credit for their work, while not being considered responsible for modifications made by others.
This License is a kind of "copyleft", which means that derivative works of the document must themselves be free in the same sense. It complements the GNU General Public License, which is a copyleft license designed for free software.
We have designed this License in order to use it for manuals for free software, because free software needs free documentation: a free program should come with manuals providing the same freedoms that the software does. But this License is not limited to software manuals; it can be used for any textual work, regardless of subject matter or whether it is published as a printed book. We recommend this License principally for works whose purpose is instruction or reference.
1. APPLICABILITY AND DEFINITIONS
This License applies to any manual or other work, in any medium, that contains a notice placed by the copyright holder saying it can be distributed under the terms of this License. Such a notice grants a world-wide, royalty-free license, unlimited in duration, to use that work under the conditions stated herein. The "Document", below, refers to any such manual or work. Any member of the public is a licensee, and is addressed as "you". You accept the license if you copy, modify or distribute the work in a way requiring permission under copyright law.
A "Modified Version" of the Document means any work containing the Document or a portion of it, either copied verbatim, or with modifications and/or translated into another language.
A "Secondary Section" is a named appendix or a front-matter section of the Document that deals exclusively with the relationship of the publishers or authors of the Document to the Document's overall subject (or to related matters) and contains nothing that could fall directly within that overall subject. (Thus, if the Document is in part a textbook of mathematics, a Secondary Section may not explain any mathematics.) The relationship could be a matter of historical connection with the subject or with related matters, or of legal, commercial, philosophical, ethical or political position regarding them.
The "Invariant Sections" are certain Secondary Sections whose titles are designated, as being those of Invariant Sections, in the notice that says that the Document is released under this License. If a section does not fit the above definition of Secondary then it is not allowed to be designated as Invariant. The Document may contain zero Invariant Sections. If the Document does not identify any Invariant Sections then there are none.
The "Cover Texts" are certain short passages of text that are listed, as Front-Cover Texts or Back-Cover Texts, in the notice that says that the Document is released under this License. A Front-Cover Text may be at most 5 words, and a Back-Cover Text may be at most 25 words.
A "Transparent" copy of the Document means a machine-readable copy, represented in a format whose specification is available to the general public, that is suitable for revising the document straightforwardly with generic text editors or (for images composed of pixels) generic paint programs or (for drawings) some widely available drawing editor, and that is suitable for input to text formatters or for automatic translation to a variety of formats suitable for input to text formatters. A copy made in an otherwise Transparent file format whose markup, or absence of markup, has been arranged to thwart or discourage subsequent modification by readers is not Transparent. An image format is not Transparent if used for any substantial amount of text. A copy that is not "Transparent" is called "Opaque".
Examples of suitable formats for Transparent copies include plain ASCII without markup, Texinfo input format, LaTeX input format, SGML or XML using a publicly available DTD, and standard-conforming simple HTML, PostScript or PDF designed for human modification. Examples of transparent image formats include PNG, XCF and JPG. Opaque formats include proprietary formats that can be read and edited only by proprietary word processors, SGML or XML for which the DTD and/or processing tools are not generally available, and the machine-generated HTML, PostScript or PDF produced by some word processors for output purposes only.
The "Title Page" means, for a printed book, the title page itself, plus such following pages as are needed to hold, legibly, the material this License requires to appear in the title page. For works in formats which do not have any title page as such, "Title Page" means the text near the most prominent appearance of the work's title, preceding the beginning of the body of the text.
The "publisher" means any person or entity that distributes copies of the Document to the public.
A section "Entitled XYZ" means a named subunit of the Document whose title either is precisely XYZ or contains XYZ in parentheses following text that translates XYZ in another language. (Here XYZ stands for a specific section name mentioned below, such as "Acknowledgements", "Dedications", "Endorsements", or "History".) To "Preserve the Title" of such a section when you modify the Document means that it remains a section "Entitled XYZ" according to this definition.
The Document may include Warranty Disclaimers next to the notice which states that this License applies to the Document. These Warranty Disclaimers are considered to be included by reference in this License, but only as regards disclaiming warranties: any other implication that these Warranty Disclaimers may have is void and has no effect on the meaning of this License.
2. VERBATIM COPYING
You may copy and distribute the Document in any medium, either commercially or noncommercially, provided that this License, the copyright notices, and the license notice saying this License applies to the Document are reproduced in all copies, and that you add no other conditions whatsoever to those of this License. You may not use technical measures to obstruct or control the reading or further copying of the copies you make or distribute. However, you may accept compensation in exchange for copies. If you distribute a large enough number of copies you must also follow the conditions in section 3.
You may also lend copies, under the same conditions stated above, and you may publicly display copies.
3. COPYING IN QUANTITY
If you publish printed copies (or copies in media that commonly have printed covers) of the Document, numbering more than 100, and the Document's license notice requires Cover Texts, you must enclose the copies in covers that carry, clearly and legibly, all these Cover Texts: Front-Cover Texts on the front cover, and Back-Cover Texts on the back cover. Both covers must also clearly and legibly identify you as the publisher of these copies. The front cover must present the full title with all words of the title equally prominent and visible. You may add other material on the covers in addition. Copying with changes limited to the covers, as long as they preserve the title of the Document and satisfy these conditions, can be treated as verbatim copying in other respects.
If the required texts for either cover are too voluminous to fit legibly, you should put the first ones listed (as many as fit reasonably) on the actual cover, and continue the rest onto adjacent pages.
If you publish or distribute Opaque copies of the Document numbering more than 100, you must either include a machine-readable Transparent copy along with each Opaque copy, or state in or with each Opaque copy a computer-network location from which the general network-using public has access to download using public-standard network protocols a complete Transparent copy of the Document, free of added material. If you use the latter option, you must take reasonably prudent steps, when you begin distribution of Opaque copies in quantity, to ensure that this Transparent copy will remain thus accessible at the stated location until at least one year after the last time you distribute an Opaque copy (directly or through your agents or retailers) of that edition to the public.
It is requested, but not required, that you contact the authors of the Document well before redistributing any large number of copies, to give them a chance to provide you with an updated version of the Document.
4. MODIFICATIONS
You may copy and distribute a Modified Version of the Document under the conditions of sections 2 and 3 above, provided that you release the Modified Version under precisely this License, with the Modified Version filling the role of the Document, thus licensing distribution and modification of the Modified Version to whoever possesses a copy of it. In addition, you must do these things in the Modified Version:
- Use in the Title Page (and on the covers, if any) a title distinct from that of the Document, and from those of previous versions (which should, if there were any, be listed in the History section of the Document). You may use the same title as a previous version if the original publisher of that version gives permission.
- List on the Title Page, as authors, one or more persons or entities responsible for authorship of the modifications in the Modified Version, together with at least five of the principal authors of the Document (all of its principal authors, if it has fewer than five), unless they release you from this requirement.
- State on the Title page the name of the publisher of the Modified Version, as the publisher.
- Preserve all the copyright notices of the Document.
- Add an appropriate copyright notice for your modifications adjacent to the other copyright notices.
- Include, immediately after the copyright notices, a license notice giving the public permission to use the Modified Version under the terms of this License, in the form shown in the Addendum below.
- Preserve in that license notice the full lists of Invariant Sections and required Cover Texts given in the Document's license notice.
- Include an unaltered copy of this License.
- Preserve the section Entitled "History", Preserve its Title, and add to it an item stating at least the title, year, new authors, and publisher of the Modified Version as given on the Title Page. If there is no section Entitled "History" in the Document, create one stating the title, year, authors, and publisher of the Document as given on its Title Page, then add an item describing the Modified Version as stated in the previous sentence.
- Preserve the network location, if any, given in the Document for public access to a Transparent copy of the Document, and likewise the network locations given in the Document for previous versions it was based on. These may be placed in the "History" section. You may omit a network location for a work that was published at least four years before the Document itself, or if the original publisher of the version it refers to gives permission.
- For any section Entitled "Acknowledgements" or "Dedications", Preserve the Title of the section, and preserve in the section all the substance and tone of each of the contributor acknowledgements and/or dedications given therein.
- Preserve all the Invariant Sections of the Document, unaltered in their text and in their titles. Section numbers or the equivalent are not considered part of the section titles.
- Delete any section Entitled "Endorsements". Such a section may not be included in the Modified version.
- Do not retitle any existing section to be Entitled "Endorsements" or to conflict in title with any Invariant Section.
- Preserve any Warranty Disclaimers.
If the Modified Version includes new front-matter sections or appendices that qualify as Secondary Sections and contain no material copied from the Document, you may at your option designate some or all of these sections as invariant. To do this, add their titles to the list of Invariant Sections in the Modified Version's license notice. These titles must be distinct from any other section titles.
You may add a section Entitled "Endorsements", provided it contains nothing but endorsements of your Modified Version by various parties—for example, statements of peer review or that the text has been approved by an organization as the authoritative definition of a standard.
You may add a passage of up to five words as a Front-Cover Text, and a passage of up to 25 words as a Back-Cover Text, to the end of the list of Cover Texts in the Modified Version. Only one passage of Front-Cover Text and one of Back-Cover Text may be added by (or through arrangements made by) any one entity. If the Document already includes a cover text for the same cover, previously added by you or by arrangement made by the same entity you are acting on behalf of, you may not add another; but you may replace the old one, on explicit permission from the previous publisher that added the old one.
The author(s) and publisher(s) of the Document do not by this License give permission to use their names for publicity for or to assert or imply endorsement of any Modified Version.
5. COMBINING DOCUMENTS
You may combine the Document with other documents released under this License, under the terms defined in section 4 above for modified versions, provided that you include in the combination all of the Invariant Sections of all of the original documents, unmodified, and list them all as Invariant Sections of your combined work in its license notice, and that you preserve all their Warranty Disclaimers.
The combined work need only contain one copy of this License, and multiple identical Invariant Sections may be replaced with a single copy. If there are multiple Invariant Sections with the same name but different contents, make the title of each such section unique by adding at the end of it, in parentheses, the name of the original author or publisher of that section if known, or else a unique number. Make the same adjustment to the section titles in the list of Invariant Sections in the license notice of the combined work.
In the combination, you must combine any sections Entitled "History" in the various original documents, forming one section Entitled "History"; likewise combine any sections Entitled "Acknowledgements", and any sections Entitled "Dedications". You must delete all sections Entitled "Endorsements".
6. COLLECTIONS OF DOCUMENTS
You may make a collection consisting of the Document and other documents released under this License, and replace the individual copies of this License in the various documents with a single copy that is included in the collection, provided that you follow the rules of this License for verbatim copying of each of the documents in all other respects.
You may extract a single document from such a collection, and distribute it individually under this License, provided you insert a copy of this License into the extracted document, and follow this License in all other respects regarding verbatim copying of that document.
7. AGGREGATION WITH INDEPENDENT WORKS
A compilation of the Document or its derivatives with other separate and independent documents or works, in or on a volume of a storage or distribution medium, is called an "aggregate" if the copyright resulting from the compilation is not used to limit the legal rights of the compilation's users beyond what the individual works permit. When the Document is included in an aggregate, this License does not apply to the other works in the aggregate which are not themselves derivative works of the Document.
If the Cover Text requirement of section 3 is applicable to these copies of the Document, then if the Document is less than one half of the entire aggregate, the Document's Cover Texts may be placed on covers that bracket the Document within the aggregate, or the electronic equivalent of covers if the Document is in electronic form. Otherwise they must appear on printed covers that bracket the whole aggregate.
8. TRANSLATION
Translation is considered a kind of modification, so you may distribute translations of the Document under the terms of section 4. Replacing Invariant Sections with translations requires special permission from their copyright holders, but you may include translations of some or all Invariant Sections in addition to the original versions of these Invariant Sections. You may include a translation of this License, and all the license notices in the Document, and any Warranty Disclaimers, provided that you also include the original English version of this License and the original versions of those notices and disclaimers. In case of a disagreement between the translation and the original version of this License or a notice or disclaimer, the original version will prevail.
If a section in the Document is Entitled "Acknowledgements", "Dedications", or "History", the requirement (section 4) to Preserve its Title (section 1) will typically require changing the actual title.
9. TERMINATION
You may not copy, modify, sublicense, or distribute the Document except as expressly provided under this License. Any attempt otherwise to copy, modify, sublicense, or distribute it is void, and will automatically terminate your rights under this License.
However, if you cease all violation of this License, then your license from a particular copyright holder is reinstated (a) provisionally, unless and until the copyright holder explicitly and finally terminates your license, and (b) permanently, if the copyright holder fails to notify you of the violation by some reasonable means prior to 60 days after the cessation.
Moreover, your license from a particular copyright holder is reinstated permanently if the copyright holder notifies you of the violation by some reasonable means, this is the first time you have received notice of violation of this License (for any work) from that copyright holder, and you cure the violation prior to 30 days after your receipt of the notice.
Termination of your rights under this section does not terminate the licenses of parties who have received copies or rights from you under this License. If your rights have been terminated and not permanently reinstated, receipt of a copy of some or all of the same material does not give you any rights to use it.
10. FUTURE REVISIONS OF THIS LICENSE
The Free Software Foundation may publish new, revised versions of the GNU Free Documentation License from time to time. Such new versions will be similar in spirit to the present version, but may differ in detail to address new problems or concerns. See http://www.gnu.org/copyleft/.
Each version of the License is given a distinguishing version number. If the Document specifies that a particular numbered version of this License "or any later version" applies to it, you have the option of following the terms and conditions either of that specified version or of any later version that has been published (not as a draft) by the Free Software Foundation. If the Document does not specify a version number of this License, you may choose any version ever published (not as a draft) by the Free Software Foundation. If the Document specifies that a proxy can decide which future versions of this License can be used, that proxy's public statement of acceptance of a version permanently authorizes you to choose that version for the Document.
11. RELICENSING
"Massive Multiauthor Collaboration Site" (or "MMC Site") means any World Wide Web server that publishes copyrightable works and also provides prominent facilities for anybody to edit those works. A public wiki that anybody can edit is an example of such a server. A "Massive Multiauthor Collaboration" (or "MMC") contained in the site means any set of copyrightable works thus published on the MMC site.
"CC-BY-SA" means the Creative Commons Attribution-Share Alike 3.0 license published by Creative Commons Corporation, a not-for-profit corporation with a principal place of business in San Francisco, California, as well as future copyleft versions of that license published by that same organization.
"Incorporate" means to publish or republish a Document, in whole or in part, as part of another Document.
An MMC is "eligible for relicensing" if it is licensed under this License, and if all works that were first published under this License somewhere other than this MMC, and subsequently incorporated in whole or in part into the MMC, (1) had no cover texts or invariant sections, and (2) were thus incorporated prior to November 1, 2008.
The operator of an MMC Site may republish an MMC contained in the site under CC-BY-SA on the same site at any time before August 1, 2009, provided the MMC is eligible for relicensing.
How to use this License for your documents
To use this License in a document you have written, include a copy of the License in the document and put the following copyright and license notices just after the title page:
- Copyright (c) YEAR YOUR NAME.
- Permission is granted to copy, distribute and/or modify this document
- under the terms of the GNU Free Documentation License, Version 1.3
- or any later version published by the Free Software Foundation;
- with no Invariant Sections, no Front-Cover Texts, and no Back-Cover Texts.
- A copy of the license is included in the section entitled "GNU
- Free Documentation License".
If you have Invariant Sections, Front-Cover Texts and Back-Cover Texts, replace the "with...Texts." line with this:
- with the Invariant Sections being LIST THEIR TITLES, with the
- Front-Cover Texts being LIST, and with the Back-Cover Texts being LIST.
If you have Invariant Sections without Cover Texts, or some other combination of the three, merge those two alternatives to suit the situation.
If your document contains nontrivial examples of program code, we recommend releasing these examples in parallel under your choice of free software license, such as the GNU General Public License, to permit their use in free software.