American Revolution/Printable version
| This is the print version of American Revolution You won't see this message or any elements not part of the book's content when you print or preview this page. |
The current, editable version of this book is available in Wikibooks, the open-content textbooks collection, at
https://en.wikibooks.org/wiki/American_Revolution
Introduction
Hello and welcome to the Wikibook on the American Revolution! This book was created on June 30, 2008. The goal of this book is to give a detailed outline of the major events during the Revolution as well as provide information on the reasons and the people behind the Revolution.
Lexington and Concord
Before the Battles
[edit | edit source]The Battles of Lexington and Concord are generally considered the start of the American Revolution. British General Thomas Gage, the military governor and commander-in-chief, received instructions, on April 14, 1775, from Secretary of State William Legge, the Earl of Dartmouth to disarm the rebels, who had supposedly hidden weapons in Concord, and to imprison the rebellion's leaders.
On the morning of April 16, Gage ordered a mounted patrol of about 50 men under the command of Major Mitchell of the 5th Regiment into the surrounding country to intercept messengers who might be out on horseback. This patrol behaved differently from patrols sent out from Boston in the past, staying out after dark and asking travelers about the location of Samuel Adams and John Hancock. This had the unintended effect of alarming many residents and increasing their preparedness. The Lexington Militia in particular began to muster early that evening, hours before receiving any word from Boston.
Lieutenant Colonel Francis Smith received orders from Gage on the afternoon of April 18 with instructions that he was not to read them until his troops were underway. They were to proceed from Boston "with utmost expedition and secrecy to Concord, where you will seize and destroy… all Military stores… But you will take care that the soldiers do not plunder the inhabitants or hurt private property."
The rebellion's ringleaders – with the exception of Paul Revere and Joseph Warren – had all left Boston by April 8. They had received word of Dartmouth's secret instructions to General Gage from sources in London long before they had reached Gage himself. Samuel Adams and John Hancock had fled Boston to the Hancock-Clarke House, home of one of Hancock's relatives in Lexington where they thought they would be safe.
The Massachusetts Militia had indeed been gathering a stock of weapons, powder, and supplies at Concord, as well as an even greater amount much further west in Worcester, but word reached the Colonists that British officers had been observed examining the roads to Concord. On April 8, they instructed people of the town to remove the stores and distribute them among other towns nearby.
Warning the Colonists
[edit | edit source]Between 9:00 and 10:00 p.m on the night of April 18, 1775, Joseph Warren told William Dawes and Paul Revere that the King's troops were about to embark in boats from Boston bound for Cambridge and the road to Lexington and Concord. Warren's intelligence suggested that the most likely objectives of the British Army's movements later that night would be the capture of Samuel Adams and John Hancock. They worried less about the possibility of regulars marching to Concord. The supplies at Concord were safe, after all, but they thought their leaders in Lexington were unaware of the potential danger that night. Revere and Dawes were sent out to warn them and alert Colonists in nearby towns.
Dawes covered the southern land route by horseback across Boston Neck and over the Great Bridge to Lexington. Revere first gave instructions to send a signal to Charlestown and then he traveled the northern water route. He crossed the Charles River by rowboat, slipping past the British warship HMS Somerset at anchor. Crossings were banned at that hour, but Revere safely landed in Charlestown and rode to Lexington, avoiding the British patrol and later warning almost every house along the route. The warned men and the Charlestown colonists dispatched additional riders to the north.

After they arrived in Lexington, Revere, Dawes, Hancock, and Adams discussed the situation with the militia assembling there. They believed that the forces leaving the city were too large for the sole task of arresting two men and that Concord was the main target. The Lexington men dispatched riders in all directions (except south), and Revere and Dawes continued along the road to Concord. They met Samuel Prescott at about 1:00 a.m. In Lincoln, these three ran into a British patrol led by Major Mitchell of the 5th Regiment and only Prescott managed to warn Concord. Additional riders were sent out from Concord.
Revere and Dawes, as well as many other alarm riders, triggered a flexible system of "alarm and muster" that had been carefully developed months before, in reaction to the British colonists' impotent response to the Powder Alarm. "Alarm and muster" was an improved version of an old network of widespread notification and fast deployment of local militia forces in times of emergency.
Around dusk, General Gage called a meeting of all of the senior officers of his army at the Province House. He informed them that orders from Lord Dartmouth had arrived, ordering him to take action against the colonials. He also told them that the senior colonel of his regiments, Lieutenant Colonel Smith, would command, with Major John Pitcairn as his executive officer.
Lexington
[edit | edit source]The British began to awaken their troops at 9 p.m. on the night of April 18 and assembled them on the water's edge on the western end of Boston common by 10 p.m.
As the British Army's advance guard under Pitcairn entered Lexington at sunrise on April 19, 1775, 77 Lexington militiamen, led by Captain John Parker, emerged from Buckman Tavern and stood in ranks on the village common watching them, and spectators watched from along the side of the road. Parker was later supposed to have made a statement that is now engraved in stone at the site of the battle: "Stand your ground; don't fire unless fired upon, but if they mean to have a war, let it begin here."
Rather than turn left towards Concord, Marine Lieutenant Jesse Adair, at the head of the advance guard of light infantry companies from the 4th, 5th and 10th Regiments of Foot, decided on his own to protect the flank of his troops by first turning right and then leading the companies down the common itself in a confused effort to surround and disarm the militia. These men ran towards the Lexington militia loudly crying "Huzzah!" to rouse themselves and to confuse the militia. Major Pitcairn arrived from the rear of the advance force and led his three companies to the left and halted them. The remaining companies lay behind the village meeting house on the road back towards Boston.

Pitcairn then apparently rode forward, waving his sword, and yelled "Disperse, you rebels; damn you, throw down your arms and disperse!" Captain Parker told his men instead to disperse and go home, but, because of the confusion, the yelling all around, and due to the raspiness of Parker's tubercular voice, some did not hear him, some left very slowly, and none laid down arms. Both Parker and Pitcairn ordered their men to hold fire, but suddenly a shot was fired from a still unknown source.
Some witnesses among the regulars reported the first shot was fired by a colonial onlooker from behind a hedge or around the corner of a tavern. Some observers reported a mounted British officer firing first. Both sides generally agreed that the initial shot did not come from the men on the ground immediately facing each other.
Witnesses at the scene described several intermittent shots fired from both sides before the lines of regulars began to fire volleys without receiving orders to do so. A few of the militiamen believed at first that the regulars were only firing powder with no ball, but then they realized the truth, and few, if any, in the militia managed to load and return fire. The rest ran for their lives.
The light infantry companies under Pitcairn at the common got beyond their officers' control. They were firing in different directions and preparing to enter private homes. Upon hearing the sounds of muskets, Colonel Smith rode forward from the grenadier column. He quickly found a drummer and ordered him to beat assembly. The grenadiers arrived shortly thereafter, and, once they were rounded up, the light infantry were then permitted to fire a victory volley, after which the column was reformed and marched towards Concord. At Lexington, the British had suffered one killed, while the colonists had suffered 8 killed.
Concord
[edit | edit source]The militiamen of Concord, uncertain of what had actually transpired at Lexington, were not sure whether to wait until they could be reinforced by troops from towns nearby, or to stay and defend the town, or to move east and greet the British Army from superior terrain. As the regulars began to approach, they did all of these. The Minutemen watched from a hill as Smith deployed light infantry against them. They began a series of marching retreats into the town. Some had occupied a hill in the town and now argued about what to do next, while others approached with the regulars behind them. The Lincoln militia arrived and joined in the debate. Caution prevailed, and Colonel James Barrett surrendered the town of Concord and led the men across the North Bridge to a hill about a mile north of town, where they could continue to watch the troop movements of the British.
Using the detailed information provided by Loyalist spies, the grenadier companies searched the small town for military supplies. When the grenadiers arrived at Ephraim Jones's tavern, by the jail on the South Bridge road, they found the door barred shut, and Jones refused them entry. According to reports provided by local Tories, Pitcairn knew cannon had been buried on the property, so, holding the tavern keeper at gunpoint, he ordered him to show him where the guns were buried. These turned out to be three massive pieces, firing 24-pound shot, much too heavy to use defensively, but very effective against fortifications, and capable of bombarding the island city of Boston from the mainland.

Colonel Barrett's troops, upon seeing smoke rising from the village square and seeing only a few companies directly below them, agreed to march back towards town from their vantage point on Punkatasset Hill to a lower, closer flat hilltop about 300 yards (300 m) from the North Bridge over the Concord River. This land belonged to Major John Buttrick, who led the Minuteman units under Barrett. It was also their muster (training) field. Two British companies from the 4th and 10th held this position, but they marched in retreat down towards the bridge and yielded the hill to Barrett's men.
Five full companies of Minutemen and five of militia from Acton, Concord, Bedford and Lincoln occupied this hill along with groups of other men streaming in, totaling at least 400 against the light infantry companies from the 4th, 10th, and 43rd Regiments of Foot under Captain Laurie, a force totaling about 90–95 men. Barrett ordered the Massachusetts men to form one long line two deep on the highway leading down to the bridge, and then he called for another consultation. While overlooking North Bridge from the top of the hill (which would after 1793 have a road built on it called Liberty Street), Barrett and the other Captains discussed possible courses of action.
At this moment, they first saw the smoke from the burning gun carriages and barrels rising over Concord, and many thought the regulars had set the town alight. Barrett ordered the men to load their weapons but not to fire unless fired upon. Then he ordered them to advance. Both British companies used as guards were ordered to retreat back across the North Bridge, and one officer then tried to pull up the loose planks of the bridge to impede the colonial advance. Major Buttrick began to yell at the regulars to stop harming the bridge. The Minutemen and militia advanced in column formation on the light infantry, keeping to the highway only, since the highway was surrounded by the spring floodwaters of the Concord River.
The inexperienced Captain Walter Laurie of the 43rd Regiment of Foot, in nominal command of this little detachment, then made a poor tactical maneuver. When he found his summons for help to the grenadiers downtown produced no results, he ordered his men to form positions for "street firing" behind the bridge in a column running perpendicular to the river. This formation was appropriate for sending a large volume of fire into a narrow alley between the buildings of a city, but not for an open path behind a bridge. Confusion reigned as regulars retreating over the bridge tried to form up in the street-firing position of the other troops. Lieutenant William Sutherland, who was in the rear of the formation, saw Laurie's mistake and ordered flankers to be sent out. But he was from a company different from the men under his command, and only four soldiers obeyed him. The remainder tried as best they could in the confusion to follow the orders of the superior officer.
Shots soon rang out and the battle began. The few front rows of colonists, bound by the road, and blocked from forming a line of fire, managed to fire over each others' heads and shoulders at the regulars. The musket balls plunged down out of the sky down into the mass of regular troops. Four of the eight British officers and sergeants at the bridge, leading from the front of their troops as officers did in this era, were wounded by the volley of musketry coming from the British colonists.
The regulars found themselves trapped in a situation where they were both outnumbered and outmaneuvered. Leaderless, terrified at the superior numbers of the enemy, their spirit broken, never having experienced combat before, they abandoned their wounded, and fled to the safety of the approaching grenadier companies coming from the town center.
Continued Fighting
[edit | edit source]The colonists were stunned by their success. No one had actually believed each side would shoot and kill each other. Some advanced; many more retreated; and some went home to see to the safety of their homes and families. Colonel Barrett eventually began to recover control and chose to divide his forces. He moved the militia back to the hilltop 300 yards (270 m) away and sent Major Buttrick with the Minutemen across the bridge to a defensive position on a hill behind a stone wall.
Smith, leader of the British expedition, heard the exchange of fire from his position in the town moments after he had received a request for reinforcements from Laurie. Smith assembled two companies of grenadiers to lead towards the North Bridge himself. As these troops marched, they met the shattered remnants of the three light infantry companies running towards them. Smith was concerned about the four companies which had been at Barrett's. Their route to return safely was now gone. Then he saw the Minutemen in the distance behind their wall, and he halted his two companies and moved forward with only his officers to take a closer look.
These men, unaware of what had happened, marched back from their fruitless search of Barrett's farm. They passed unharmed by Barrett's militia on the muster field and through the tiny battlefield, saw dead and wounded comrades lying on the bridge, including one who looked to them as if he had been scalped, which angered and shocked the British soldiers. They then passed sullenly over the bridge, unharmed by Buttrick's Minutemen. The regulars all returned to the town by 10:30 a.m. Even after a small skirmish, and with superior numbers, the British colonists still did not fire yet unless fired upon, and this time the regulars did nothing to provoke them. The British Army continued to destroy colonial military supplies in the town, ate lunch, reassembled for marching, then left Concord after noon.
As the day wore one, there were more conflicts between the regulars and the colonists. Three British companies were ambushed by the colonists, and the remaining officer even considered surrendering, until a full brigade with artillery of about 1,000 men under the command of Hugh, Earl Percy arrived to rescue them.
The fighting grew more intense as Percy's forces crossed from Lexington into Menotomy. Fresh militia poured gunfire into the British ranks from a distance, and individual homeowners began to fight from their own property. Some homes were also used as sniper positions. It now turned into a soldier's nightmare: house-to-house fighting.
Percy lost control of his men, and British soldiers began to commit atrocities to repay for the purported scalping at the North Bridge and for their own casualties at the hands of a distant, often unseen enemy. Based on the word of Pitcairn and other wounded officers from Smith's command, Percy learned that the Minutemen were using stone walls, trees and buildings in these more thickly settled towns closer to Boston to hide behind and shoot at the column. Percy proceeded to give orders to the flank companies to clear these colonial militiamen out of such places.
Many of the junior officers in the flank parties had difficulty stopping their exhausted, enraged men from killing everyone they found inside these buildings. The British troops crossed the border into Cambridge, and the fight grew more intense. Fresh militia arrived in close array instead of in a scattered formation, and Percy used his two artillery pieces and flankers at a crossroads called Watson's Corner to inflict heavy damage on them.
A large militia force arrived from Salem and Marblehead. They might have cut off Percy's route to Charlestown, but these men halted on nearby Winter Hill and allowed the British to escape. Some accused the commander of this force, Colonel Timothy Pickering, of permitting the troops to pass because he still hoped to avoid war by preventing a total defeat for the regulars.
Aftermath
[edit | edit source]In the morning, Gage awoke to find Boston besieged by a huge militia army, numbering 20,000, which had marched from throughout New England. This time, unlike during the Powder Alarm, the rumors of spilled blood were true, and the Revolutionary War had begun. The militia army continued to grow as surrounding colonies sent men and supplies. The Continental Congress would adopt and sponsor these men into the beginnings of the Continental Army. Even now, after open warfare had started, Gage still refused to impose martial law in Boston. He persuaded the town's selectmen to surrender all private weapons in return for promising that any inhabitant could leave town.
Ticonderoga and Bunker Hill
Capture of Fort Ticonderoga
[edit | edit source]Concerns
[edit | edit source]Even before shooting in the American Revolutionary War started, American Revolutionaries were concerned about Fort Ticonderoga. The fort was a valuable asset for several reasons. First of all, within its walls were a number of cannons and massive artillery, something the Americans had in short supply. Secondly, the fort was situated in the strategically important Lake Champlain valley, the route between the rebellious Thirteen Colonies and the British-controlled Canadian provinces. After the war began at the Battle of Lexington and Concord on April 19, 1775, the Americans decided to seize the fort before it could be reinforced by the British, who might then use the fort to stage attacks on the American rear. It is unclear who first proposed capturing the fort: the idea has been credited to John Brown, Benedict Arnold, and Ethan Allen, among others.
The Capture
[edit | edit source]Two independent expeditions to capture Ticonderoga—one out of Massachusetts and the other from Connecticut—were organized. At Cambridge, Massachusetts, Benedict Arnold told the Massachusetts Committee of Safety about the cannon and other military stores at the lightly defended fort. On May 3, 1775, the Committee gave Arnold a colonel's commission and authorized him to command a secret mission to capture the fort.

Meanwhile, in Hartford, Connecticut, Silas Deane and others had organized an expedition of their own. Ethan Allen assembled over 100 of his Green Mountain Boys, about 50 men were raised by James Easton at Pittsfield, Massachusetts, and an additional 20 men from Connecticut volunteered. This force of about 170 gathered on May 7 at Castleton, Vermont. Ethan Allen was elected colonel, with Easton and Seth Warner as his lieutenants. Samuel Herrick was sent to Skenesboro and Asa Douglas to Panton with detachments to secure boats. Meanwhile, Captain Noah Phelps reconnoitered the fort disguised as a peddler. He saw that the fort walls were in a dilapidated condition and learned from the garrison commander that the British soldiers' gunpowder was wet. He returned and reported these facts to Ethan Allen.
On May 9, Benedict Arnold arrived in Castleton and insisted that he was taking command of the operation, based on his orders and commission from the Massachusetts Committee of Safety. Many of the Green Mountain Boys objected, insisting that they would go home rather than serve under anyone but Ethan Allen. Arnold and Allen worked out an agreement, but no documented evidence exists about what the terms of the agreement were. According to Arnold, he was given joint command of the operation.
One guard tried to stop the invaders by firing a shot, but the musket flashed in the pan. The only injury was to one American, who was slightly injured by a sentry with a bayonet.
Crown Point and Fort St. Johns
[edit | edit source]Seth Warner marched a detachment up the lake shore and captured nearby Fort Crown Point, garrisoned by only nine men. On May 12, Allen sent the prisoners to Connecticut's Governor Jonathan Trumbull noting that "I make you a present of a Major, a Captain, and two Lieutenants of the regular Establishment of George the Third."
Arnold took a small schooner and several bateaux from Skenesboro north with 50 volunteers. On May 18, they seized another garrison at Fort St. Johns along with the Enterprise, a seventy ton sloop. Aware that several companies were stationed twelve miles (19 km) down river at Chambly, they loaded the more valuable captured supplies and cannon, burned the boats they could not take and returned to Crown Point.

Ethan Allen and his men returned home. Benedict Arnold remained with some Connecticut replacements in command at Ticonderoga. At first the Continental Congress wanted the men and forts returned to the British, but on May 31 they bowed to pressure from Massachusetts and Connecticut and agreed to keep them. Connecticut sent a regiment under Colonel Benjamin Hinman to hold Ticonderoga. When Arnold learned that he was second to Hinman, he resigned his Connecticut commission and went home.
Aftermath
[edit | edit source]Although Fort Ticonderoga was no longer an important military post, its capture had several important results. Because rebel control of the area meant that overland communications and supply lines between British forces in Quebec and Boston were severed, British war planners in London made an adjustment to their command structure. Command of British forces in North America, previously under a single commander, was divided into two commands. Sir Guy Carleton was given independent command of forces in Quebec, while General William Howe was appointed Commander-in-Chief of forces along the Atlantic coast, an arrangement that had worked well between Generals Wolfe and Amherst in the Seven Years' War. In this war, however, cooperation between the two forces would prove to be problematic and would play a role in the failure of the Saratoga campaign in 1777.
Bunker Hill
[edit | edit source]British Strategy
[edit | edit source]Boston, being on a peninsula, was largely protected from close approach by the expanses of water surrounding it, dominated by British warships. With the troops in the city able to be resupplied and reinforced by sea, a simple "strangulation" siege could be very protracted, and might be ultimately unsuccessful. Were the besieging Continentals able to bombard the city, on the other hand, the progress of the ongoing siege could be greatly hastened. If a position could be taken (and fortified) close to the city, an artillery bombardment could be begun.
The Charlestown Peninsula started from a short, narrow isthmus at its northwest, extending about one mile (1,600 meters) southeastward into Boston Harbor. Bunker Hill is an elevation (110 feet or 34 meters) at the north of the peninsula and Breed's Hill, at a height of 62 feet (19 meters), is more southerly and nearer to Boston. The town of Charlestown occupied the flats at the southern end of the peninsula. At its closest approach, less than 1,000 feet (300 meters) separated Charlestown Peninsula from the Boston Peninsula, specifically an area occupied by Copp's Hill at about the same height as Breed's Hill. Both sides seem to have realized Charlestown's importance at about the same time.
American Defenses
[edit | edit source]On the night of June 16–17, Colonial Colonel William Prescott led 1,500 men onto the peninsula in order to set up positions from which artillery fire could be directed into Boston as part of the siege of that city. At first, Putnam, Prescott, and their engineering officer, Captain Richard Gridley, disagreed as to where they should locate their defense. Initial work was performed on Bunker Hill, but Breed's Hill was closer to Boston and viewed as being more defensible, and they decided to build their primary redoubt there. Prescott and his men, using Gridley's outline, began digging a fortification 160 feet (50 m) long and 80 feet (25 m) wide with ditches and earthen walls. They added ditch and dike extensions toward the Charles River on their right and began reinforcing a fence running to their left.

The Battle
[edit | edit source]In the early predawn, around 4 a.m., a sentry on board HMS Lively spotted the new fortification. Lively opened fire, temporarily halting the Colonists' work. Aboard his flagship HMS Somerset, Admiral Samuel Graves awoke irritated by the gunfire which he had not ordered. He stopped it, only to reverse his decision when he got on deck and saw the works. He ordered all 128 guns in the harbor to fire on the Colonists' position, but the broadsides proved largely ineffective since the guns could not be elevated enough to reach the fortifications.
It took almost six hours to organize an infantry force and to gather up and inspect the men on parade. General Howe was to lead the major assault, drive around the Colonist's left flank, and take them from the rear. Brigadier General Robert Pigot on the British left flank would lead the direct assault on the redoubt. Major John Pitcairn led the flank or reserve force. It took several trips in longboats to transport Howe's forces to the eastern corner of the peninsula, known as Moulton's Hill. On a warm day, with wool tunics and full field packs of about 60 pounds (27 kg), the British were finally ready by about 2 p.m.

The Colonists, seeing this activity, had also called for reinforcements. Troops reinforcing the forward positions included the 1st and 3rd New Hampshire regiments of 200 men, under Colonels John Stark and James Reed (both later became generals). Stark's men took positions along the fence on the north end of the Colonist's position. When low tide opened a gap along the Mystic River along the northeast of the peninsula, they quickly extended the fence with a short stone wall to the north ending at the water's edge on a small beach. Gridley or Stark placed a stake about 100 feet (30 m) in front of the fence and ordered that no one fire until the regulars passed it. Private (later Major) John Simpson, however, disobeyed and fired as soon as he had a clear shot, thus starting the battle. The battle of Bunker Hill, had begun.
General Howe detached both the light infantry companies and grenadiers of all the regiments available. Along the narrow beach, the far right flank of the Colonist position, Howe set his light infantry. They lined up four across and several hundred deep, led by officers in scarlet red jackets. Behind the crude stone wall stood Stark's men. In the middle of the British lines, to attack the rail fence between the beach and redoubt stood Reed's men and the remainder of Stark's New Hampshire regiment. To oppose them, Howe assembled all the flank companies of grenadiers in the first line, supported by the 5th and 52nd Regiments' line companies. The attack on the redoubt itself was led by Brigadier General Robert Pigot, commanding the 38th and 43rd line companies, along with the Marines.
Prescott had been steadily losing men. He lost very few to the bombardment but assigned ten volunteers to carry the wounded to the rear. Others took advantage of the confusion to join the withdrawal. Two generals did join Prescott's force, but both declined command and simply fought as individuals. By the time the battle had started, 1,400 defenders faced 2,600 regulars.

The first assaults on the fence line and the redoubt were met with massed fire at close range and repulsed, with heavy British losses. The reserve, gathering just north of the town, was also taking casualties from rifle fire in the town. Howe's men reformed on the field and made a second unsuccessful attack at the wall.
In the third British assault the reserves were included and both flanks concentrated on the redoubt. This attack was successful. The defenders had run out of ammunition, reducing the battle to close combat. The British had the advantage here as their troops were equipped with bayonets on their muskets but most of the Colonists did not have them.
The British advance, and the Colonists' withdrawal, swept through the entire peninsula, including Bunker Hill as well as Breed's Hill. However, under Putnam, the Colonists were quickly in new positions on the mainland. Coupled with the exhaustion of Howe's troops, there was little chance of advancing on Cambridge and breaking the siege.
Aftermath
[edit | edit source]The British had taken the ground but at a great loss; 1,054 were shot (226 dead and 828 wounded), and a disproportionate number of these were officers. The Colonial losses were only about 450, of whom 140 were killed (including Joseph Warren), and 30 captured (20 of whom died later as POWs). Most Colonial losses came during the withdrawal. Major Andrew McClary was the highest ranking Colonial officer to die in the battle (also reportedly the last casualty).
Afterwards, British General Henry Clinton remarked in his diary that "A few more such victories would have shortly put an end to British dominion in America."
The Invasion of Canada
The Plan
[edit | edit source]As the conflict around Boston was in a stalemate, American Continental Congress sought a way to seize the initiative elsewhere. Congress had previously invited French-Canadians to join the American Revolution as the fourteenth colony, but this was rejected. Therefore, a plan was devised to drive the British Empire from the primarily francophone colony of Quebec. Two expeditions were undertaken.

Congress authorized General Philip Schuyler, commander of the Northern Department, to mount an invasion to drive British forces from Canada. He sent General Richard Montgomery north with an invasion force. General George Washington, who had recently been appointed General and Commander-In-Chief, also sent Benedict Arnold towards Quebec City with a supporting force.
Mongomery's Expedition
[edit | edit source]Philip Schuyler was to have led the invasion. On September 12, 1775, he led an expeditionary force to Fort St. John (Saint-Jean-sur-Richelieu), where he addressed the populace with a proclamation promising the respect of "their persons, property, religion, and liberties." But Schuyler fell ill and was replaced by Brigadier General Richard Montgomery. On September 16, 1775, Montgomery marched north from Fort Ticonderoga with about 1,700 militiamen.
They arrived on September 19 and, after a forty-five day siege, they defeated the British at the Battle of Fort St. Jean on November 3. Montgomery's troops continued north and occupied Saint Paul's Island on November 11, crossing to Pointe-Saint-Charles on the following day.
Montreal fell without any fighting on November 13, as Major-General Guy Carleton, the governor of Quebec, had escaped to Québec City with his troops.
Montgomery then moved towards Quebec City with the bulk of his troops on November 28, leaving Montreal under the command of General David Wooster. The historic Château Ramezay served as Continental Army HQ in Montreal.
Arnold's Expedition
[edit | edit source]Preperations
[edit | edit source]The second expedition was led by Benedict Arnold. In 1775, the Continental Congress generally adopted Arnold's plan for the invasion of Canada, but Arnold was not included in the command structure for the effort. Thus rebuffed, Arnold returned to Cambridge, Massachusetts, and approached George Washington with the idea of a supporting eastern invasion force aimed at Quebec City. Because there had been little direct action at Boston after the Battle of Bunker Hill in June, many units were bored with garrison life and eager for action. Washington agreed with Arnold's proposal. He appointed Arnold a colonel, and together they visited each line unit to ask for volunteers.
Arnold eventually selected a force of 750 men. Washington added Daniel Morgan's company and some other riflemen. The frontiersmen, from the Virginia and Pennsylvania wilderness, were better suited to wilderness combat than to a siege.

The Expedition
[edit | edit source]The plan called for the men to cover the 180 miles (290 km) from the Kennebec River to Quebec in 20 days. They expected to find relatively light defenses since British Commander Carleton would be busy handling Schuyler's forces at Montreal. Arnold sent ahead to Fort Western (in the Province of Maine) to have supplies and bateaux readied for his force. The expedition moved by sea and spent five days at Fort Western organizing supplies and preparing the boats.
The men expected to go up the Kennebec River and then descend the Chaudière River to Quebec. After staying for three days at Colburn's Shipyard in Gardinerston, where Reuben Colburn built the bateaux at Washington's request in just 15 days, they set out from Fort Western on September 25. Their troubles began almost immediately.
The bateaux were built from green, split pine planks because of a lack of dried lumber at that time of year and were basically flat bottom rafts that could not be rowed but had to be poled against the stream. Colburn traveled with the army, repairing the bateaux as they went, but in hauling them upstream and lowering them down the Chaudiere, many supplies and some men were lost. Rain and violent storms ruined more. Lieutenant Colonel Roger Enos turned back with his division, taking 300 men and some of the supplies with him.
The maps the expedition had started with were faulty, since the British frequently allowed publication of incorrect maps to deceive future enemies. The journey turned out to be 350 miles (560 km), not 180. After the expedition ran out of supplies, the men began to eat anything, including their dogs, their shoes, cartridge boxes, leather, moss, and tree bark. On November 6, the expedition reached the south shore of the St. Lawrence River; Arnold had 600 of his original 1,100 men.
However, Arnold thought they could still take the city. The defenders were only about 100 British regulars under Lieutenant Colonel Allen Maclean, supported by several hundred poorly organized local militia. If the Americans could scatter the militia with accurate fire, they could overwhelm the outnumbered regulars. When they finally reached the Plains of Abraham on November 14, Arnold sent a negotiator with a white flag to demand their surrender, but to no avail. The Americans, with no cannons, faced a fortified city. When the frigate Lizard moved into the river to cut off their rear, they were forced to withdraw to Pointe aux Trembles.
Finally, on December 2, Montgomery came down river from Montreal with 300 troops and bringing captured British supplies and winter clothing. The two forces united, and plans were made for an attack on the city.
The Battle of Quebec
[edit | edit source]The attack began at 4:00 a.m. on December 31, 1775, with Montgomery launching signal rockets. The British were prepared for the Continental assault, as deserters from the Continental Army were straggling into Quebec.

The two brigades were supposed to meet at the tip of the St. Lawrence river and move into the walled city itself. However, the fortifications proved to be too strong to be taken by force. Montgomery's brigade advanced along the river coastline under the Cape Diamond Bastion, where they came to a blockhouse barricade at Près-de-Ville manned by about 30 French-speaking militia. Montgomery advanced his brigade towards it at a walk, and the militia responded with a volley that cut down Montgomery and the brigade's two other highest ranking officers. The next highest ranking officer ordered a retreat, while the militia continued to snipe at them.
Benedict Arnold was unaware of Montgomery's death and his attack's failure, and he advanced with his main body towards the northern barricades. They were fired upon by British and local militia manning the wall of the city. Upon reaching a street barricade at a street called Sault au Matelot, Arnold was wounded in the left ankle by a musket ball and was taken to the rear. With Arnold out of action, his second-in-command, Daniel Morgan, took command and captured the first street barricade. But while awaiting further orders, the colonists were attacked from the street and surrounding row houses by hundreds of militia. A British counterattack reoccupied the first barricade, trapping Morgan and his men within the narrow streets of the city. With no way of retreat and under heavy fire, all of Morgan's men surrendered. By 10:00, the battle was over, with Morgan surrendering himself and the last pocket of Continental resistance in the city.

Arnold refused to give up and—despite being outnumbered three to one, the sub-freezing temperature of the winter and the mass desertions of his men after their enlistments expired on December 31, 1775—laid siege to Quebec. This siege had little effect on the city.
Arnold (now a Brigadier General) was reinforced with Wooster's brigade in March 1776, bringing their strength to 2,000 men.
The British Counter-Attack
[edit | edit source]On May 6, 1776, a small squadron of British ships under Captain Charles Douglas arrived to relieve Quebec with supplies and troops, forcing the Americans to immediately retreat. A few weeks later, British forces in Quebec were strengthened by even more troops under General John Burgoyne and Hessian mercenaries. Another attempt was made by the Revolutionaries to push back towards Quebec, but it failed at Trois-Rivières on June 8, 1776. The new American commander, General Thomas, died of smallpox.
Carleton then launched his own invasion and defeated Arnold in the Battle of Valcour Island in October. Arnold fell back to Fort Ticonderoga, where the invasion of Canada had begun. The invasion of Canada ended as a disaster for the Americans, but Arnold's improvised navy on Lake Champlain had the effect of delaying a full-scale British counter thrust until the Saratoga campaign of 1777. Carleton was heavily criticized in London for not pursuing the American retreat from Quebec more aggressively, and so command of the 1777 offensive was given to General Burgoyne instead.
Evacuation of Boston
Fortification of Dorchester Heights
[edit | edit source]On July 3, George Washington arrived to take charge of the new Continental Army. Forces and supplies came in from as far away as Maryland. Trenches were built at the Dorchester Neck, and they were extended toward Boston. Washington reoccupied Bunker Hill and Breeds Hill without opposition. However, these activities had little effect on the British occupation.

Subsequently, in the winter of 1775–76, Henry Knox and his engineers used sledges to retrieve 60 tons of heavy artillery that had been captured at Fort Ticonderoga. Bringing them across the frozen Connecticut River, they arrived back at Cambridge on January 24, 1776. Weeks later, in an amazing feat of deception and mobility, Washington moved artillery and several thousand men overnight to occupy Dorchester Heights, overlooking Boston.
Since it was the middle of winter and the continental army was unable to dig into the frozen ground on Dorchester Heights, rather than entrenching themselves, Washington's men used logs, branches and anything else available to fortify the position overnight. General Gage observed that it would have taken his army weeks to build Washington's earth fort. The British fleet ceased to be an asset, because it was anchored in a shallow harbor with limited maneuverability, and the American guns on Dorchester Heights were aimed at the fleet.
Washington had hoped General William Howe and his troops would either flee or try to take the hill. At early morning on March 5, Washington rallied the troops by reminding them that it was the sixth anniversary of the Boston Massacre. Initially, Howe ordered an attack on the hill that would have probably been reminiscent of Bunker Hill. However, a snow storm quickly rolled in and halted any chance of a battle. By the time the storm had subsided, Howe's aides had convinced him of the folly of an outright attack.
He sent word to the colonists that the city would not be burned to the ground if they were allowed to leave unmolested. Finally, on March 17, the British forces departed Boston and headed to Halifax, Nova Scotia, taking many loyalists with them.
The Declaration of Independence
Troubles
[edit | edit source]As relations between Great Britain and its American colonies became increasingly strained, the Americans set up a shadow government in each colony, with a Continental Congress and Committees of Correspondence linking these shadow governments. As soon as fighting broke out in April 1775, these shadow governments took control of each colony and ousted all the royal officials. Sentiment for outright independence grew rapidly in response to British actions; the options were clarified by Thomas Paine's pamphlet Common Sense, released in January 1776.
,_by_John_Trumbull.jpg)
Draft
[edit | edit source]The "Lee Resolution" presented by Richard Henry Lee of Virginia on June 7, 1776, read (in part): '"Resolved: That these united Colonies are, and of right ought to be, free and independent States, that they are absolved from all allegiance to the British Crown, and that all political connection between them and the State of Great Britain is, and ought to be, totally dissolved."' The Second Continental Congress formed a committee, consisting of John Adams of Massachusetts, Benjamin Franklin of Pennsylvania, Thomas Jefferson of Virginia, Robert R. Livingston of New York, and Roger Sherman of Connecticut (the "Committee of Five"), to draft a suitable declaration to frame this resolution. The committee decided that Jefferson would write the draft, which he showed to Franklin and Adams. Prior to deciding on Jefferson, both Adams and Franklin turned down the offer, citing that if they wrote it people would read it with a biased eye. Franklin himself made at least 48 corrections, including changing the slogan "Life, Liberty and Property" to "Life, Liberty, and the pursuit of Happiness." Jefferson then produced another copy incorporating these changes, and the committee presented this copy to the Continental Congress on June 28, 1776.
On July 2 the Congress voted for independence by approving the Lee Resolution, twelve delegations voting in favor while the New York delegation abstained. (New York did not cast its vote for the Lee Resolution until July 9.)
The full Declaration was reworked somewhat in general session of the Continental Congress. Congress, meeting in Independence Hall in Philadelphia, finished revising Jefferson's draft statement on July 4, approved it, and sent it to a printer. At the signing, Benjamin Franklin is quoted as having replied to a comment by Hancock that they must all hang together: "Yes, we must, indeed, all hang together, or most assuredly we shall all hang separately," a play on words indicating that failure to stay united and succeed would lead to being tried and executed, individually, for treason.

The News Arrives
[edit | edit source]After its adoption by Congress on July 4, a handwritten draft signed by the President of Congress John Hancock and the Secretary Charles Thomson was then sent a few blocks away to the printing shop of John Dunlap. Through the night between 150 and 200 copies were made, now known as "Dunlap broadsides". The first public reading of the document was by John Nixon in the yard of Independence Hall on July 8. One was sent to George Washington on July 6, who had it read to his troops in New York on July 9. A copy reached London on August 10. The 25 Dunlap broadsides still known to exist are the oldest surviving copies of the document. The original handwritten copy has not survived.
On July 19, Congress ordered a copy be "engrossed" (hand written in fair script on parchment by an expert penman) for the delegates to sign. This engrossed copy was produced by Timothy Matlack, assistant to the secretary of Congress. Most of the delegates signed it on August 2, 1776, in geographic order of their colonies from north to south, though some delegates were not present and had to sign later. Late signers were Elbridge Gerry, Oliver Wolcott, Lewis Morris, Thomas McKean, and Matthew Thornton (who, because of a lack of space, was unable to place his signature on the top right of the signing area with the other New Hampshire delegates, William Whipple and Josiah Bartlett, and had to place his signature on the lower right). As new delegates joined the congress, they were also allowed to sign. A total of 56 delegates eventually signed.
Three delegates never signed. Robert R. Livingston, a member of the original drafting committee, was present for the vote on July 2 but returned to New York before the August 2 signing. John Dickinson, a member of the Continental Congress from Pennsylvania, refused to sign. He was against separation from Great Britain and labored to change the language of the Declaration of Independence to leave open the possibility of a reconciliation. Thomas Lynch voted for the Declaration but could not sign it because of illness.
The British Attack New York
Washington moves to New York
[edit | edit source]When Washington heard that the British were going to attack New York, he took the Army, and stationed it in present day New York City.
The British Mass Troops
[edit | edit source]General Sir William Howe, with the services of his brother, Admiral Lord Howe, began amassing troops on Staten Island in July 1776. General Washington, with a smaller army of about 19,000 men, was uncertain where the Howes intended to strike. He unwittingly violated a cardinal rule of warfare and divided his troops about equally in the face of a stronger opponent. The Continental Army was split between Long Island and Manhattan, thus allowing the stronger British forces to engage only one half of the smaller Continental Army at a time. In late August, the British transported another 22,000 men (including 9,000 "Hessians") to Long Island.
The Battle of Long Island
[edit | edit source]On August 22, 1776, Colonel Edward Hand sent word to Lieutenant General George Washington that the British were preparing to cross The Narrows to Brooklyn from Staten Island.
Under the overall command of Howe, and the operational command of Major Generals Charles Cornwallis and Sir Henry Clinton, the British force numbered over 30,000. The British commenced their landing in Gravesend Bay, where, after having strengthened his forces for over seven weeks on Staten Island, Admiral Richard Howe moved 88 frigates. The British landed a total of 34,000 men south of Brooklyn.

About half of Washington's army, led by Major General Israel Putnam, was deployed to defend the village of Flatbush near Brooklyn while the rest held Manhattan. In a night march suggested and led by Clinton, the British forces used the lightly defended Jamaica Pass to turn Putnam's left flank. The following morning, American troops were attacked and fell back. Men under General William Alexander numbering about 400 fought a delaying action at the Old Stone House near the Gowanus Creek, attacking and counter-attacking a British artillery position there and sustaining over 50% casualties. This significantly aided the withdrawal of most of Washington's army to fortifications on Brooklyn Heights.
American Evacuation
[edit | edit source]Later in the day, the British paused. This was not unusual in combat of the time, as horrendous casualties could result from point-blank musket fire and hand-to-hand combat; even the winner of such a battle could find himself unable to proceed. It was not uncommon for a commander, certain of the numerical and tactical superiority of his force, to offer a cornered enemy the option to surrender and thus avoid further bloodshed with the ultimate outcome of the battle certain. If formal surrender terms were not offered, the commander in a hopeless situation could at least be afforded an opportunity to consider his situation and, presumably, decide to surrender. It appears that this happened here; the British commanders surely remembered the Battle of Bunker Hill and the casualties they suffered in that pyrrhic victory.
During the night of August 29-August 30, 1776, having lost the battle, the Americans evacuated Long Island for Manhattan. Not wanting to have anymore casualties, the Americans devised a plan. This evacuation of more than 9,000 troops required stealth and luck and the skill of Colonel John Glover and his 14th Continental Regiment from Marblehead, Massachusetts. It was not completed by sunrise as scheduled, and had a heavy fog not beset Long Island in the morning, the army may have been trapped between the British and the East River. However, the maneuver took the British by complete surprise. Even having lost the battle, Washington's withdrawal earned him praise from both the Americans and the British.
Kip's Bay and Harlem Heights
[edit | edit source]Kip's Bay
[edit | edit source]On September 15, the British landed a few thousand troops at the lightly defended Kip's Bay, Manhattan. Washington had left his main force up at the then small village of Harlem where he believed the main British assault would come. The American defender at Kip's Bay were bombared by the British ships, then, attacked by landing British troops. After Washington had heard of the landing, he came down and attempted to rally his men, but they continued their disorganized retreat. Washington became so frustrated that he threw his hat to the ground and shouted, "Are these the men with which I am to defend America?" When some fleeing men refused to turn and engage a party of advancing Hessians, Washington is said to have flogged some of their officers with his riding crop. After this, he is to have said to have been so depressed he just sat on his horse while the enemy advanced on him, a mere 80 yards away, until an aide came to him.
As more and more British soldiers came ashore, including light infantry, grenadiers, and Hessian Jägers, they spread out, advancing in several directions. By late afternoon, another 9000 British troops had landed at Kip's Bay and sent a brigade down to abandoned New York, officially taking possession. While most of the Americans managed to escape to the north, not all got away.
Harlem Heights
[edit | edit source]Knowlton's Rangers, a group of scouts, moved out before dawn on September 16. At sunrise the party encountered the British pickets by a farmhouse. As the party approached the farmhouse they were spotted by the British from the picketline. As brief skirmish broke out, but when the British began to turn on the American flank, Knowlton ordered an organized retreat.
The American rangers were followed through the woods and field of Harlem by British Light troops. The British troops began to sing and sounded their bugle horns to signal that it was a fox-chase. Upon hearing this, an officer went to Washington and asked for reinforcements. Washington was reluctant but he devised a plan to entrap the British troops. The plan was to make a feint in front of a hill, and then draw the British troops into a hollow while waiting for the flanking part to entrap them. The plan worked, and the British troops were drawn into the hollow.

The flanking party arrived an hour later. It consisted of Knowlton's Rangers, which had been reinforced by three companies of riflemen, in total about 200 men. As they approached, an officer accidently mislead the men and firing broke out, causing the flanking movement to fail. The British troops, realizing their position, retreated to a field, in which there was a fence. The Americans soon pursued, and during the attack Knowlton was killed. Despite his death, the American troops pushed on, driving the British troops beyond the fence to the top of a hill. For two hours, the British troops held their ground at the top of the hill. However, the Americans, once again, overwhelmed the British troops and forced them to retreat into a Buckwheat field.
Washington had originally been reluctant to pursue the British troops, but after seeing that his men were fighting with fine spirit and dash, sent in reinforcements and permitted the troops to engage in a direct attack. By the time all of the reinforcements arrived, nearly 1,800 Americans were engaged in the Buckwheat Field. To direct the battle, members of Washington's staff such as Nathanael Greene were sent in. During this time, the British troops were also reinforced.
Despite being outnumbered, the British troops held their positions against the American assault. For nearly two hours the battle continued in the field and in the surrounding hills. Finally, the British troops were compelled to withdraw, but the Americans kept up close pursuit. The chase continued until it was heard that the British reserves were coming, and Washington ordered a withdrawal.
American Retreat through New York and New Jersey
In October, General Howe moved to encircle the American Army stationed on northern Manhattan. In response, Washington had the Army retreat off the island, into the Bronx. Howe continued to give chase to the American Army, but Washington responded by halting his army and chose a position near White Plains that he fortified.
Battle of White Plains
[edit | edit source]Although the British outnumbered the Americans, Howe did not think it was wise to launch an attack on the main American position until they had taken Chatterton Hill, a strategic hill in the area of White Plains Howe decided to send Alexander Leslie and his brigade, along with 3 regiments of Hessians to take the hill. In total, the force numbered about 4,000 men. The British forded the Bronx, and were fired upon by American guns on the other side of the river.

The first attempt to take the American positions failed, as they offered stiff resistance. Another attempt was made to take hill, with a Hessian regiment going around the back of the hill to attack the American Flank. As the main assault began to push the Americans back, the Hessian Regiment came in from behind and the Americans retreated, taking their cannon with them.
While the battle was a victory for the British, Howe refused to interfere with the American withdrawal, letting slip yet another opportunity to capture Washington and much of the Continental army and in the process suffering heavier casualties than the Americans.
Fort Washington
[edit | edit source]Instead of continuing to follow Washington north, Howe turned his army south and decided to launch an attack on the key American Fort, Fort Washington. It was the last American stronghold on the island of Manhattan.
On the morning of November 16, 1776, around 8,000 British and German troops, under the command of Howe, attacked Fort Washington. Although the American garrison put up a fierce struggle, they were forced to surrender when the British and Hessian forces managed to breach their walls with cannon fire. The fall of Fort Washington was a great loss of men and supplies for the American forces. The garrison lost around 53 men killed in action, 96 more wounded, and the rest (totaling 2,818 men) became prisoners of war. Knyphausen reported his casualties at 78 dead and 374 wounded during the storming of the fort.
Four days later, the isolated Fort Lee(located across the river from Fort Washington) was evacuated, leaving behind most of the fort's women, gunpowder and other arms to fall into British hands. With the collapse of both forts, the Hudson River was open from then on to British shipping, leaving the merchant ships and warships to move freely without serious harassment from the Americans.
Retreat Across New Jersey
[edit | edit source]Washington's Command in Jeopardy
[edit | edit source]Washington had grouped his army, and turned his Army south and retreated hoping to make a stand in front on Philadelphia. General Charles Lee was in charge of the other group.
.jpg)
Toward the end of 1776, Lee's animosity for Washington began to show. During the retreat from Forts Washington and Lee, he dawdled with his army, and intensified a letter campaign to convince various Congress members that he should replace Washington as Commander-in-Chief. Around this time, Washington was accidentally given and opened a letter from Lee to a Colonel Reed, in which Lee condemned Washington's leadership and abilities, and blamed Washington entirely for the dire straits of the Army. Though he was the victim of the letter, Washington wasn't angry. He was suspicious and disappointed at both Lee and himself, for he (Washington) was a man that took too much responsibility and not enough credit for himself. He sent the letters to Reed and wrote an accompanying letter apologizing for the mistake. Although his army was supposed to join that of Washington's in Pennsylvania, Lee set a very slow pace. On the night of December 12, Lee and a dozen of his guard inexplicably stopped for the night at White's Tavern in Basking Ridge, New Jersey, some three miles from his main army. The next morning, a British patrol of two dozen mounted soldiers found Lee writing letters in his dressing gown, and they captured him. Among the members of the British patrol was Banastre Tarleton. Lee's Army then turned south to regroup with Washington. Lee was eventually recouped by the colonial forces in an exchange for General Richard Prescott.
Retreat
[edit | edit source]Howe sent General Lord Cornwallis to chase Washington's army through New Jersey. Cornwallis continued to chase the Americans until they withdrew across the Delaware River into Pennsylvania in early December. With the campaign at an apparent conclusion for the season, the British entered winter quarters. Although Howe had missed several opportunities to crush the diminishing rebel army, he had killed or captured over 5,000 Americans. He controlled much of New York and New Jersey and was in a good position to resume operations in the spring, with the rebel capital of Philadelphia in striking distance. And the British were Hoisted by their own Petard: Washington Picked up Kentucky Long Rifles in Pennsylvania, and his men were better armed with these new rifles. These rifles were hand made by the Pennsylvania Dutch, who were actually German craftsmen.
The Battles of Trenton and Princeton
Battle of Trenton
[edit | edit source]Prior to Christmas, moral of the Continental Army was at an all time low. Most soldiers contracts would be up by the end of the year, and it seemed that the Revolution was lost. Washington knew he needed a quick victory in order to inspire new recruits and get old ones to stay. He decided that they would attack the British at Trenton.
The American Plan
[edit | edit source]The American plan relied on launching coordinated attacks from three different directions. General John Cadwalder would launch a diversionary attack against the British garrison at Bordentown, in order to block off any reinforcements. General James Ewing would take 700 militia across the river at Trenton Ferry, seize the bridge over the Assunpink Creek and prevent any enemy troops from escaping. The main assault force of 2,400 men would cross the river nine miles north of Trenton, and then split into two groups, one under Greene and one under Sullivan, in order to launch a pre-dawn attack. Depending on the success of the operation, the Americans might possibly follow up with separate attacks on Princeton and New Brunswick.
During the week prior to Christmas, American advance parties had begun to ambush enemy cavalry patrols, capturing dispatch riders, and attacking Hessian pickets. This became so effective, that the Hessian commander had to send 100 infantry and an artillery detachment to protect his letter to the British commander at Princeton.
Hessian Moves
[edit | edit source]Trenton had two main streets, King (now Warren) Street and Queen (now Broad) Street. Rall had been ordered to build a redoubt at the head of these two streets (where the battle monument stands today) by his superior, Count Carl von Donop, whose own brigade was stationed in Bordentown. Donop himself had marched south to Mount Holly on December 22 to deal with the South Jersey Rising, and clashed with the New Jersey militia there on December 23.
Rall was a 36-year professional soldier with a great deal of battle experience who had requested reinforcements and been turned down by British commander General James Grant. Grant regarded the Americans with great disdain and sent no reinforcements. Rall's subordinates were convinced that the Americans were going to attack, but Rall himself was not worried, he believed that one bayonet charge would send the Americans fleeing with panic, as bayonet charges had done before.
The Crossing
[edit | edit source]
Before Washington and his troops left, Benjamin Rush had come in an attempt to cheer up the General. While he was there he saw a note Washington had written which said "Victory or Death". Those words would be the watchword for the surprise attack. The terrible weather conditions delayed the landing in New Jersey, which were supposed to be completed by 12:00 am until 3:00 am, and Washington realized it would be impossible to launch a pre-dawn attack. Another setback also occurred for the Americans. Both General Cadwalder and Ewing were unable to join in the attack due to the weather conditions.
For the next four and a half hours, the American troops marched to Trenton. It was a miserable trip. Many did not have boots, so they were forced to wear rags around their feet. Many men's feet bled, turning the snow to a dark red. Two men even laid down in the snow, only never to get back up.
The Battle
[edit | edit source]A small guard post was set up by the Hessians in Pennington about nine miles (14 km) north of Trenton, east of Washington's route to the city. When the squad guarding this post saw the large American force on the march, Lieutenant von Wiederholdt, in command of this Pennington picket, made an organized retreat. Once in Trenton the picket began to receive support from other Hessian guard companies on the outskirts of the town. Another guard company nearer to the Delaware River rushed east to their aid, leaving open the River Road into Trenton. General John Sullivan, leading the southern American column entered Trenton by this route and made hard for the only crossing over the Assunpink Creek, which was the only way out of Trenton to the south, in hopes of cutting off the Hessian escape.

When the 35 Hessian Jägers under the command of Lieutenant Grothausen who were stationed at the barracks on the northern edge of the town saw the vanguard of Sullivan's forces charging into Trenton, they ran over the Assunpink bridge and left Trenton. Slowly, various companies of the three defending regiments formed and entered the battle. Lieutenant Biel, Rall's brigade adjutant, finally awoke his commander, who found that the rebels had taken the "V" of the major streets of the town where earlier that month Pauli would have constructed the redoubt. The northern American column quickly took this position. The Americans stationed two cannon on a rise that guarded the two main routes out of the town. The Hessians tried to bring four guns into action, but American fire kept them silent, and denied the Hessians a chance to form in the streets. The remaining men in the column, along with the other American column near the river, moved to surround the Hessians.
The Knyphausen regiment of Hessians was separated from the other two regiments and driven back through the southern end of Trenton by John Sullivan's column. The other two Hessian regiments, Lossberg and Rall, retreated into an open field and attempted a counterattack that was quickly driven back. Rall ordered his force to retreat southeast into an apple orchard just outside Trenton. The Hessians in the orchard attempted to reorganize, and make one last attempt to retake the town so they could escape to Princeton.
The Americans, by this time, occupied the majority of the buildings and, from cover, fired into the ranks of the Rall regiment as the Hessians advanced. As the Hessians fought back into the streets of Trenton, they came under fire from cannons, and even some civilians who had joined the battle. Their formations were broken up by cannon fire. At this point, Rall was mortally wounded. The Hessians then retreated back to the Orchard, where they were then surrounded and forced to surrender.
The remains of the Knyphausen Regiment were attempting to escape to Bordentown, but they were slowed when they tried to haul their cannon through boggy ground. They were cut off from the bridge, surrounded by Sullivan's men, and forced to surrender. The regiment surrendered just minutes before the rest of the brigade.
Casualties and Effects
[edit | edit source]The American forces had suffered only a handful of wounded, although two men died of hypothermia on the march and more the next night, while the Hessians suffered 115 casualties with at least 25 dead, as well as 920 captured. The captured Hessians were sent to Philadelphia, and later Lancaster only to be moved once again in 1777, this time to Virginia.

Rall was mortally wounded and died later that day at his headquarters. All four Hessian colonels in Trenton were killed in the battle. The Lossberg regiment was effectively removed from the British forces. Parts of the Knyphausen regiment escaped to the south, but Sullivan captured some 200 men along with the regiment's cannons and supplies. Also captured were about 1,000 arms and some much-needed ammunition.
Only four Americans were wounded, two during the rush to capture Hessian artillery before they could be used in the battle. These wounded were officers: Captain William Washington (the general's cousin), who was badly wounded in both hands, and young Lieutenant James Monroe, the future President of the United States. Monroe was carried from the field bleeding badly after he was struck in the left shoulder by a musket ball, which severed an artery. Doctor John Riker clamped the artery, keeping him from bleeding to death.
Battle of the Assunpink Creek
[edit | edit source]Lieutenant General Charles Cornwallis had left 1,400 British troops under the command of Lieutenant Colonel Charles Mawhood in Princeton, New Jersey. Following the victory at the Battle of Trenton early in the morning of December 26, 1776, General George Washington of the Continental Army and his council of war expected a strong British counter-attack. Washington and his council decided to meet this attack in Trenton.
The Battle
[edit | edit source]On December 30, he crossed the Delaware River back into New Jersey and, over the next few days, massed his troops on higher ground south of Trenton, across a stream running through downtown called Assunpink Creek. On January 2, 1777, the day-long march ended when the larger British army led by General Cornwallis encountered Washington's own army. The Americans slowly withdrew, splitting into smaller units in order to harrass the British. The small groups of American soldiers had succeeded in slowing Cornwallis' march from Princeton to Trenton, and inflicting heavy casualties, but the British force arrived en masse in the late afternoon.
The armies were facing each other from 200 yards (200 m) apart with only the creek and the bridge in between. Cornwallis ordered the assault. Cannon and rifle fire erupted from Washington's side leaving heavy British casualties after fierce fighting. Two more attempts were made by the British to take the bridge, but each time they were repulsed. The bridge held, darkness fell, and Cornwallis withdrew. Hundreds of British soldiers were recovered from the bridge ending the battle. Cornwallis commented "Rest for now. We'll bag the fox in the morning."
Escape
[edit | edit source]That night, Washington's army built up their campfires before silently slipping away after midnight while an unsuspecting Cornwallis slept. Cornwallis had failed to post adequate scouts to detect movements by Washington's army. Washington and his staff decided to sneak away in the night, marching around the British forces and attacking their rear in Princeton. The Americans left a token force to build fortifications as though they were planning to defend at the creek and to disguise the sound of their march. British forces perceived the movement, but Cornwallis believed this to be Americans planning a night attack and ordered British troops into defensive positions, allowing Americans to successfully march their army around Cornwallis
Battle of Princeton
[edit | edit source]Throughout the night, the army marched over a back road toward Princeton and reached the Quaker Bridge over Stony Brook, about a mile south of town. The Quaker Bridge was not strong enough to support the army’s cannon and ammunition carts, so another bridge had to be built quickly. While the bridge was being constructed, Washington reformed his army, and then split it into two parts—the smaller left wing under General Nathanael Greene and the larger right wing under General John Sullivan. Washington had intended to attack Princeton before dawn, but the sun was rising.
Greene’s assignment was to advance to the Princeton-Trenton highway to stop its traffic and destroy its bridge over Stony Brook. Sullivan’s division, the main attack force, moved toward the rear of the College of New Jersey (now Princeton University). The British were known to have outposts on the roads to the north, east and west, but an abandoned road went into town from the west, which Sullivan took.
Before Greene’s wing (with 3,400 men) reached the highway, the leading brigade, 1,200 men under General Hugh Mercer of Virginia, encountered 800 men who were elements of the British 4th Brigade, accompanied by 2 light guns, under the overall command of Lieutenant Colonel Charles Mawhood. The British group was marching from Princeton to Trenton to reinforce General Leslie's 2nd Brigade. The last unit of the 4th Brigade was left to hold Princeton with another 400 men.
The Battle
[edit | edit source]Upon seeing the American force, Mawhood formed up his men across the edge of an orchard which Mercer's troops were passing through. A violent firefight developed, and Mawhood launched an assault which largely cleared the orchard of Mercer's troops, who began to retreat in confusion. General Mercer was wounded but refused to surrender. When he tried to attack the enemy with his sword, he was bayoneted until presumed dead; he died nine days later. Colonel John Haslet of Delaware replaced General Mercer and was killed by a shot to the head.
During this confusion, General Washington rode up to rally Mercer's men, while a fresh brigade of 2,100 troops under General John Cadwalader arrived with an artillery battery. Washington then rode straight into the British fire, personally leading the attack. As Washington charged towards the British lines, he was heard yelling "Parade with me my brave fellows, we will have them soon!"
With these reinforcements, and Washington having successfully rallied Mercer's men, the larger American force was able, by pressure of numbers, to retake most of the orchard, until fire from Mawhood's guns halted the American advance.

A second British assault cleared the orchard, and seemed about to win the day until Sullivan led up another 1,300 troops. Now outnumbered nearly 6 to 1, Mawhood led a final charge to break through American lines. A number of the British soldiers broke through the Americans in a desperate bayonet charge, continuing down the road to Trenton. Washington led some of his force in pursuit of Mawhood, but they abandoned this and turned back when some of Leslie's troops came into sight. The remainder of the British fell back into Princeton, which, along with the men already there, they defended against Sullivan's force for a while, before retreating to New Brunswick. A number of troops were left behind in Princeton. Facing overwhelming numbers and artillery fire, they surrendered. The British casualty list stated 86 killed and wounded and 200 captured. The Americans suffered 40 killed and wounded.
In Trenton, Cornwallis and his men awoke to the sounds of cannon fire coming from behind their position. Cornwallis and his army began to race to Princeton. However, Washington's rear guard had managed to damage the bridge over the Stony Brook, and American snipers further delayed Cornwallis' Army. The exhausted American Army slipped away, marching to Somerset County Courthouse (now Millstone), where they spent the night. When the main British force finally reached Princeton late in the day, they did not remain but continued in haste toward New Brunswick, New Jersey.
Aftermath
[edit | edit source]After the battle, Cornwallis abandoned many of his posts in New Jersey, and ordered his army to retreat to New Brunswick. The battle at Princeton cost the British some 100 men killed, 70 wounded 280 captured and greatly boosted the morale of the Continental troops, leading 8,000 new recruits to join the Continental Army.
American historians often consider it a great victory on par with the battle of Trenton, due to the subsequent loss of control of most of New Jersey by the Crown forces as well as the important political implications of the battle across the Atlantic in France and Spain, both of which would expand their military aid to the Continental forces after the battle. Fredrick the Great is to have pronounced Washington's achievements in those few weeks, the most brilliant in military history.
Brandywine and Germantown
Introduction
[edit | edit source]The Battles of Brandywine and Germantown were part of the Philadelphia Campaign of the American Revolution (1775-1783).
The Battle of the Brandywine was fought on September 11, 1777, at Chad’s Ford, Pennsylvania. The Battle of Germantown was fought on October 4, 1777, near Philadelphia. The American Continental Army was led by General George Washington. The British forces were led by General William Howe. Although the Americans lost both battles to the British, they remained in good spirits. Their bravery and determination impressed the leaders of France. The American spirit of independence led to an alliance with France in February 1778. This alliance helped the Americans ultimately win the Revolutionary War against the British.
New Jersey
General George Washington was Commander-in-Chief of the American Continental Army. He crossed the Delaware River on Christmas night, 1776. His aim was to make a surprise attack on the British camp at Trenton, New Jersey. He was successful. The victory gave the Americans a huge confidence boost. Both armies were now in New Jersey. General Washington wanted to know what the British were planning to do next. Would they go north to New York, or try to capture the American capital of Philadelphia?
Maryland
A group of 265 British naval vessels (flotilla) were preparing to sail. It was the largest fleet of warships ever assembled in America. The ships would travel south from Sandy Hook, New Jersey, down the Atlantic Coast. They would go around the tip of the peninsula and sail north up the Chesapeake Bay. On August 27, 1777, they would land at the Head of the Elk River in Elkton, Maryland. The troops would leave the ship (disembark) then cross Delaware on their way to capture Philadelphia.
Going up the Delaware River would have been faster, but it was blocked. The Americans had placed spike-covered barricades (chevaux-de-frise) at the bottom of the river. Any enemy ships trying to sail the Delaware would be destroyed.
The British flotilla took six weeks to complete the trip to the Head of the Elk River in Maryland. The ships had brought 17,000 soldiers, many weapons, supplies, and animals. There were 500 head of cattle, 1000 sheep, and 100 horses. The voyage had been very stressful. Many soldiers were seasick. Many horses had died along the way. The loss of horses would affect the British in the field. Much time had been lost sailing the longer route.
The ships were unloaded and the British prepared to move north. Their goal would be to capture the American capital of Philadelphia. They wanted to move out right away and travel light, so they did not make a permanent camp in Elkton.
Prelude to Brandywine – End of August
[edit | edit source]Red Clay Creek
The Americans also traveled light. They made camp about ten miles north of Elkton. Washington was worried about their position and ordered his troops to fall back toward Red Clay Creek.
The troops prepared for battle. Delaware militiamen were sent out to harass Howe’s troops. Redoubts (fortifications) were built. Entrenchments (ditches) were dug. Cannons were placed on high ground. Brigadier General Sullivan and Major General Greene were on the northern flank (side). General Alexander (Lord Sterling), Major General Stephen, and Major General Wayne were on the southern side, closest to the enemy. The placement of these divisions gave Washington flexibility. Troops could easily be moved as needed.
There was disagreement about the best place for the defensive line. Greene believed nearby Christiana Creek would be best. There were roads, open country, and woods for camouflage. Washington thought Red Clay Creek would be best. To compromise, Washington sent Maxwell’s unit with militiamen to Cooch's Bridge at Christiana Creek. Maxwell made his headquarters at the Cooch home. The skirmish took place on September 3, 1777. It was called the Battle of Cooch’s Bridge. Also, known as the Battle of Iron Hill, it was the only Revolutionary War battle to take place in Delaware.
There were 800 American light infantry and militia under Maxwell. There were 1700 British and Hessian soldiers under Howe, Cornwallis, and von Wurmb. The British had artillery; the Americans had only rifles. The fighting began when the Americans ambushed the British about 2 miles south of Cooch’s Bridge. The Americans had made a series of small camps in the marshes, creek beds, and small ravines on either side of the road. They hid in the thick woods on either side of the road. Ambushing the enemy from behind trees and rocks was a tactic learned from Native Americans. The plan was to shoot and retreat until ordered to make a stand. After firing, the Americans would fall back, reload, and fire again.
Unfortunately, the Americans eventually ran out of ammunition. The British continued the battle with swords and bayonets. They were well trained with such weapons, so they had the advantage. The American soldiers were not trained in bayonet fighting. Their rifles did not usually have bayonets. They were outnumbered by the British. After 7 hours of fighting, Maxwell’s men retreated. The British army was victorious. Cornwallis took the Cooch house as his headquarters. American casualties were 30 killed or wounded, 140 missing or captured. British casualties were 30 killed or wounded and 35 captured. The engagement at Cooch’s Bridge was not a major battle. It had no effect on the outcome of the Philadelphia Campaign or the Revolutionary War. It did, however, raise Washington’s confidence in the ability of his men’s ability to perform in battle.
Washington gains valuable time
The next day, the British fleet left the Head of the Elk to sail back down Chesapeake Bay. The ships carried sick and wounded soldiers, tents, and unneeded baggage. On September 8th, British land-troops moved north, out of Delaware into Pennsylvania. Some ships remained.
The British advanced slowly toward the Brandywine. The delay allowed Washington to move his troops out of harm’s way. On the morning of September 9, they moved on to Chad’s Ford, on Brandywine Creek about 20 miles away. Chad’s Ford was the last natural defense before Philadelphia.
Washington set up headquarters at a Quaker farm and mill owned by Benjamin Ring. The Americans camped about a half mile from Chad’s Ford. Washington held a council-of-war with his generals to plan his strategy.
The British army would need to cross the Brandywine to get to Philadelphia. Washington began building defenses at shallow places (fords) along the river. Some fords would remain unprotected due to manpower shortages. Others were deep and impassable, so did not need additional protection. By the night of September 10, American troops were extended along a six-mile line covering the east side of the Brandywine Creek.
Congress sent deputies to inspect Washington’s placement of troops. They approved. The Americans seemed well-positioned and well-prepared to meet the British. Washington did not believe Howe would use a flanking (side) attack. He thought Howe would make a direct attack, relying on his greater number of troops and superior artillery. The Americans spent an anxious night about their campfires. It is said that Reverend Joab Trout gathered the troops together and prayed for a good outcome for the Americans and a future peaceful land.
British at Kennett Square
British General Knyphausen arrived at Kennett Square, Pennsylvania. He made camp east of town. General Cornwallis was delayed due to a late start and being unfamiliar with the area. Heavy artillery had to be hauled over muddy roads by horses weakened by the long sea journey. General James Grant camped at Hockessin Meeting a few miles from Kennett Square.
Fifteen-thousand British troops spent the night in Kennett Square. This was their first major stop since landing at the Head of the Elk at the end of August. Knyphausen would attack the Americans at Chad’s Ford. Cornwallis would move north, cross the Brandywine, and flank Washington's right. After an uneventful spring, several weeks at sea, and 16 days of marching, the Battle of the Brandywine was at hand. It would be the first major battle of the Philadelphia Campaign of 1777.
Battle of the Brandywine September 11, 1777
[edit | edit source]Before dawn, the British troops moved out from Kennett Square toward Chad’s Ford. At the front were "pioneers” clearing the road of obstructions. The army was headed to Jeffries’ Ford six miles away. Once across the river, they would flank and trap Washington’s army.
The British vanguard (front troops) consisted of 496 men: the Queen's Rangers, Ferguson's riflemen, and a squad from the 16th Light Dragoons. Behind them were the 1st and 2nd British Brigades. The artillery, supply wagons, and livestock stolen from surrounding farms followed the troops. The formidable 71st regiment served as the rear guard.
People say a chance meeting started the Battle of the Brandywine. A mounted party of scouts had stopped at Welch’s Tavern in Kennett Square. They were surprised by the arrival of some British soldiers. The Americans fired at them from the tavern, and ran out the back door, leaving their horses behind.
Conflicting Reports
Washington believed the entire British force would attack at Chad’s Ford. Then he received a report that Howe had split his army, moving some toward Reading depot and some toward Chad’s Ford.
Washington responded by sending some of his troops farther north. Then he received a message saying there was no British troop movement to the north. He did not believe this message. He mistakenly thought it was a trick. He removed his defense against a flanking movement. Howe now had extra time to march south and flank the Americans.
Howe Crosses the Brandywine
Eight-thousand British troops crossed the Brandywine about eight miles north of the Americans. A local man named Squire Cheyney discovered the British nearby. He rode seven miles to the Ring House to warn Washington. Cheyney's message along with several others convinced Washington that Howe had maneuvered around him.
Americans Stirling, Stephen, and Sullivan moved north. Wayne and Maxwell stayed to fight Knyphausen. They would be supported by Proctor's artillery. Greene's troops remained in reserve. They were in position to fight either Knyphausen or Cornwallis.
Tea Time for Howe
The British made slow progress. Heavy artillery had to be pulled over rough terrain. Artillery had to be placed on a hilltop to be effective. Once everything was in place, they took a half-hour break for lunch and tea. They had marched for 11 hours and felt safe for the moment. This break was a missed opportunity for Howe to rout the Americans. Instead, he gave them time to form defensive lines a mile to the south.
After resting, the British organized an attack. They would either outflank or overrun the American line. The Americans failed to form a solid defensive line. Sullivan’s troops had moved too far away, leaving an opening. The British launched a fierce attack. Parts of the American defensive line broke down. The Americans fought valiantly but were overwhelmed. They fell back, losing several artillery pieces to the British.
Sullivan sent frantic messages to Washington about the events to the north. They went unheeded. Washington still believed only a few British troops were there. Then, he heard the sounds of cannon fire from the north. The quiet on the west side of the creek finally convinced him Sullivan’s reports were true: the main British force was indeed to the north.
British
To clear a path for the British, Knyphausen launched a frontal attack. He bombarded the Americans with heavy artillery. He had crossed the Brandywine at several places. His main column fought through the American resistance at Chad’s Ford. A smaller British force crossed at Gibson's Ford to the south. They threatened the American militia posted at Pyle's Ford. The Americans fought hard despite being outnumbered. They seemed to be holding their ground, but soon British reinforcements arrived. The Americans were defeated.
The American defeat at Brandywine was due to many factors. Washington had no sound information about the fords. Poor scouting left the Americans unaware of Howe’s column. Too late, American troops were sent to block Howe’s flanking force. Washington had let Howe flank his army and drive them from the field.
American Retreat

Lafayette tried to stop the American retreat. In the melee, he was wounded in the leg. Despite this, he was able to organize an orderly retreat. Green’s division held off Howe’s column long enough for the Americans to escape. He opened his lines to let the retreating men pass and re-formed the lines after them. Polish Brigadier General Pulaski’s men defended the rear.
The Americans retreated toward Chester, abandoning guns and artillery. Edward Hector, a black soldier, valiantly saved a few wagonloads of ammunition and arms, but most of the equipment was left behind. The baggage had been removed to Chester the day before, so it was safe. A small brigade armed with four cannon was posted at Painter's Crossroads to cover the retreating troops.
The Battle of the Brandywine was the largest single-day battle of the American Revolution. There were 15,000 Americans and 16,000 British altogether. The battle lasted for 11 hours. It covered 10 square miles. An estimated 1100 American troops and 600 British troops were killed, wounded, or captured.
After the Battle
After his decisive victory, General Howe kept his army on or near the battlefield to rest. The dead were buried, and the wounded were tended to. Wounded men were sent to Dilworth Hospital and Wilmington Hospital. There were not enough wagons or healthy horses to do this all at once. It took 5 days to complete the task.
Wilmington was the base of operations for the Royal Navy. Several British ships would be available to receive the wounded. Howe created a protected area (bridgehead) so troops and wagons could safely cross the river to reach the ships.
Instead of pursuing Washington, Howe allowed him to withdraw and reorganize. The Americans counted their dead, wounded, and missing. Wounded were sent to various places including Philadelphia, Trenton, and Reading. General Lafayette was taken by barge from Chester to Philadelphia. There he rested at the Indian Queen Tavern before being taken to Bethlehem, Pennsylvania to recover.
Washington assembled his troops and ordered them to get ready to march. Ammunition and necessities were given out. The American army went back on the road. They needed to find new defensive ground to meet Howe’s army and save Philadelphia.
Some believe Howe’s army may have been more badly damaged than was known at the time.
This may be the reason he stayed so long after the battle ended. However, he had a record of not following through after successful battles. Some historians point out that Howe could have easily pursued Washington’s beaten army. He could have forced more fighting or further scattered the Americans. Lastly, he could have cut off Washington’s troops from the Reading depot so they could not get supplies and ammunition.
To Philadelphia
By midday on September 12th, the Americans reached the Schuylkill River. Then, a few miles from Philadelphia, they turned and marched to the Falls of the Schuylkill near Germantown. They had marched 17 hours after fighting the Battle of the Brandywine. According to an American officer’s diary entry, the army was in good spirits despite their tiredness.
To save Philadelphia from the British, all of the fords along the Schuylkill River would have to be defended. Militia men constructed temporary fortifications (redoubts) above the fords. The soldiers reorganized their ranks and practiced drills to get ready for battle.
Once it became clear that Philadelphia might fall to the British, panic gripped the city. Rumors were rampant. American patriots moved out; businesses closed down. The British were taking bells from churches and buildings to melt down and make bullets. The patriots smuggled the Liberty Bell out of the city, hidden in a cart of straw. It was taken to Allentown where it stayed until June, 1778, when it returned to Philadelphia.
The British could cross the Schuylkill at Fatlands Ford to go to Philadelphia. Or, they could cross at Gordon's Ford and go to Reading. He built a bridge at Gordon's Ford to convince Washington that the British were going to Reading. The trick worked and Washington moved west to defend the supply depots at Reading. This left Howe a clear path into Philadelphia. At midnight, all the British troops crossed at Fatlands Ford and headed to Philadelphia.
Battle of Germantown, October 4, 1777
[edit | edit source]
Howe captured Philadelphia on September 26. 1777. He posted 9000 troops at Germantown, a village 5 miles north of Philadelphia. He thought Germantown was a safe place to monitor Washington’s movements. He sent 3000 troops to occupy Philadelphia. He kept 6000 near Germantown.
When Washington learned Howe had split his army, he prepared a surprise attack. If the Americans could capture Germantown, they could retake Philadelphia. Eleven-thousand American troops would advance under cover of night. They would attack from multiple directions at dawn.
Unfortunately, they lost the element of surprise because darkness and dense fog delayed their advance. The heavy morning fog caused confusion. Sullivan’s right-center column was able to drive off the British light infantry. However, 120 British soldiers took refuge in a nearby house. Washington ordered his men to take the house. They tried several times, but of their attacks failed. A short distance away, Sullivan’s men ran low on ammunition. They pulled back when they heard cannon fire. Greene’s wing was just arriving. They ran into Wayne’s division. Both were confused by the fog and accidentally fired on each other.
Meanwhile, Greene’s left-center column pushed back the British right flank. Sullivan’s column was out of the fight. The British left wing joined the fight against Greene and defeated him. The Americans withdrew under cover of darkness. The British had won the Battle of the Brandywine.
American casualties were 152 killed, 521 wounded, and 438 captured. British casualties were 71 killed, 448 wounded, and none captured.
After the Battle, there was disappointment on both sides. Howe had let the Americans escape to fight another day. He had been unable to gain support from the civilian population. Washington had received unreliable information about the fords. He had let Howe flank his army and drive them from the field.
Results
Despite the British victory, many Europeans, especially the French, were impressed by the unflagging determination of the Americans. In the final months of 1777, both armies went into winter quarters. The Americans went to Valley Forge in Pennsylvania. The young Continental Army would mature that winter under the direction of General Friedrich von Steuben. They would be trained to use bayonets in battle. Von Steuben would turn them into a disciplined, professional fighting force.
The Battle of the Brandywine was crucial to American freedom because it gave Washington’s army confidence in battle. They had stood up to the British army—one of the most professional in the world. The Americans would ultimately go on to win the Revolutionary War. The American Revolution officially ended on September 3, 1783, with the signing of the Treaty of Paris.
References
American muskets of the Revolution. (July 4, 2020). https://www.americanrifleman.org/content/american-muskets-of-the-revolution/
American Revolution timeline. https://www.nps.gov/subjects/americanrevolution/timeline.htm
Battle of Cooch’s Bridge. https://www.revolutionarywar.us
Burdick, K. (Dec 14, 2021). Cooch’s Bridge, Delaware’s only Revolutionary War battle. Journal of the American Revolution. http://allthingsliberty.com
Harris, M. C. (2014). Brandywine: A military history of the battle that lost Philadelphia but saved America, September 11, 1777. Savas Beatie.
Hoffecker, C. (1974). Brandywine Village, the story of a milling community. Old Brandywine Village, Inc.
Iron making. https://www.nps.gov/hofu/learn/historyculture/iron-making.htm
Kent, D. (1994). Delaware. Childrens press.
Miller, N. (1965). The story of the Liberty Bell. Childrens Press.
Philadelphia Campaign: 1777. Independence Hall Association. https://www.ushistory.org
Revolutionary war battles Germantown. https://www.battlefields.org/learn/revolutionary-war/battles/germantown
Soodalter, R. (Feb 6, 2017). Military History Quarterly. Arming the Revolution: Where did the Continental Army get its cannons? https://www.historynet.com/arming-revolution-continental-army-get-cannons/
Virtual marching tour of the American Revolutionary War, the Philadelphia Campaign: 1777. The Philadelphia Campaign of 1777: Background (ushistory.org)
American Revolution 10/04/1777 - Battles - Battle of Germantown in Pennsylvania (Philadelphia Campaign) - RevWarTalk
Authors
If you wish to join as something more than that an occasional contributor, please add your name to this list, and what you will be doing to the right of your name.
Red4tribe-Original Author, leader of the project.
People of the Revolution
Kingdom of Great Britain
[edit | edit source]-
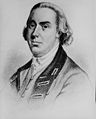 Thomas Gage, Commander of the British forces in Boston.

United States of America
[edit | edit source]Kingdom of France
[edit | edit source]
Battles
For those of you who enjoy the gory details of battles, I have made this section for you. I have listed here, the date, location, casualties and result of each significant battle during the war. Below each year, there is a gallery of paintings or engravings from the battles listed above.
1775
[edit | edit source]Battle of Lexington and Concord
- Date:April 19, 1775
- Location:Lexington, Concord, the surrounding area, Massachusetts
- American Casualties-50 killed, 39 wounded, 5 missing
- British Casualties-73 killed, 174 wounded, 26 missing
- Result:American Victory
Siege of Boston
- Date:April 20, 1775 – March 17, 1776
- Location:Boston and the Surrounding area, Massachusetts
- American Casualties-469 killed or wounded, 30 captured
- British Casualties-1,160 killed or wounded, 35 captured
- Result:American Victory
Battle of Chelsea Creek (part of the Siege of Boston)
- Date:May 27-May 28, 1775
- Location:Hog Island, Noodle Island, Massachusetts
- American Casualties-3 wounded
- British Casualties-2 killed, 1 schooner destroyed
- Result:American Victory
Battle of Bunker Hill (part of the Siege of Boston)
- Date:June 17, 1775
- Location:Charlestown, Massachusetts
- American Casualties-140 killed, 271 wounded, 30 captured
- British Casualties-245 killed, 828 wounded
- Result:British Pyrrhic victory
-
 The Battle of Lexington.
 -
 The Battle of Bunker Hill.
 -
 The Battle of Bunker Hill.


1776
[edit | edit source]Battle of Long Island
- Date:August 27, 1776
- Location:Long Island(Brooklyn), New York
- American Casualties-312 killed, 1,407 wounded or missing, 1,186 captured
- British Casualties-63 killed, 283 wounded, 21 captured
- Result:Decisive British Victory
Battle of Kip's Bay
- Date:September 15, 1776
- Location:Kip's Bay, Manhattan, New York
- American Casualties-50 killed, 320 captured
- British Casualties-12 killed or wounded
- Result:Decisive British Victory
Battle of Harlem Heights
- Date:September 16, 1776
- Location:Harlem, Manhattan, New York
- American Casualties-30 killed, 100 wounded
- British Casualties-90 killed, 300 wounded
- Result:American Victory
Battle of Pell's Point
- Date:October 18, 1776
- Location:Bronx, New York
- American Casualties-8 killed, 13 wounded
- British Casualties-25 killed or wounded
- Result:American Victory
Battle of White Plains
- Date:October 28, 1776
- Location:White Plains, New York
- American Casualties-28 killed, 126 wounded, 16 captured
- British Casualties-42 killed, 182 wounded, 3 captured
- Result:British Victory
Battle of Fort Washington
- Date:November 16, 1776
- Location:Manhattan, New York
- American Casualties-59 killed, 100 wounded 2,837 captured
- British Casualties-86 killed, 350 wounded
- Result:Decisive British Victory
Battle of Trenton
- Date:December 26, 1776
- Location:Trenton, New Jersey
- American Casualties-4 wounded
- British Casualties-23 killed, 83 wounded, 896 captured
- Result:Decisive American Victory
-
 Washington crossing the Delaware River, on the night of December 25–26, 1776.
 -
 The Battle of Trenton.
 -
 The Capture of the Hessians at Trenton.
1777
[edit | edit source]Battle of the Assunpink Creek
- Date:January 2, 1777
- Location:Trenton, New Jersey
- American Casualties-100 killed or wounded
- British Casualties-365 killed, 135 wounded
- Result:American Victory
Battle of Princeton
- Date:January 3, 1777
- Location:Princeton, New Jersey
- American Casualties-31 killed, 40 wounded, 1 captured
- British Casualties-100 killed, 70 wounded, 200 captured
- Result:American Victory
-
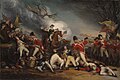 The Death of General Mercer at the Battle of Princeton

1778
[edit | edit source]1779
[edit | edit source]1780
[edit | edit source]1781
[edit | edit source]1782-1783
[edit | edit source]