It's a good idea to begin this honor with the definitions so your Pathfinders have a working vocabulary of the various terms involved. Telling them to "make a bight" or "take the standing part" makes little sense until these terms are understood.
A bight
a. Bight
The term bight refers to any curved section, slack part, or loop between the two ends of a rope.
b. Running end
Also called the working end, it is the free end of the rope. This is the end of the rope in which a knot is being tied.
c. Standing part
The part of the rope between the Running end and the Standing end (the end that doesn't move, think of it as if someone is holding it)
d. Underhand loop
A loop formed by passing the running end of a line under the standing part.
e. Overhand loop
A loop formed by passing the running end of a line over the standing part.
f. Turn
A: Turn B: Round turn C: Two round turns A turn is a component of a knot. Turns can be made around objects, through rings, or around the standing part of the rope itself. Turns come in various forms, distinguished by the number of passes that the rope makes. A turn or single turn requires one pass. The line makes a U-shape through or around the object, or half a revolution. A round turn requires two passes and makes one and a half revolutions. Two round turns adds another pass and revolution.
g. Bend
A bend is used to tie two ropes together, as in the Sheetbend. Technically, even the Reef knot is a bend
h. Hitch
A hitch is used to tie a rope to a spar, ring or post, such as the Clove hitch. Hitches can also be used to tie one rope ONTO another rope, as in the Rolling hitch.
i. Splice
A knot formed by interweaving strands of rope rather than whole lines. More time consuming but usually stronger than simple knots.
j. Whipping
A binding knot used to prevent another line from fray.
d. Return rope to its proper place after using it.
3. Describe the difference between laid rope and braided rope and list three uses of each.[edit | edit source]
In laid rope, three bundles of fiber or twine are twisted in the same direction, placed close to each other, and allowed to twist together. In braided rope, the fibers are woven together, often around some core material.
Manila is a type of fiber obtained from the leaves of the abacá (Musa textilis), a relative of the banana. It is mostly used to make ropes and it is one of the most durable of the natural fibers, besides true hemp. Manila is a coarse, brown fiber, about the same color and feel as a coconut shell.
b. Sisal
Sisal is valued for cordage use because of its strength, durability, ability to stretch, affinity for certain dyestuffs, and resistance to deterioration in saltwater. Sisal ropes and twines are widely employed for marine, agricultural (bailing twine), and general industrial use. Sisal fibers are smooth, straight and yellow and can be long or short.
c. Nylon
Nylon rope is often white, but any color is possible. It has a smooth, silky feeling to it, and it coils easily. Nylon rope does not float in water. It is a synthetic-fiber rope.
d. Polypropylene
Polypropylene rope is most often yellow, though any color is possible. It is often used in marine applications because it floats in water. The rope is sometimes difficult to tie as it is somewhat stiff and brittle. It is a synthetic-fiber rope.
The easiest way to make an initial identification of a rope is to visit a hardware store where rope is sold. The packaging will tell you what the rope is made of. If you want to be sure, buy some of each type (with the labeling) or examine it closely in the store.
5. What are some advantages and disadvantages of synthetic rope?[edit | edit source]
A splice is used to join the ends of two ropes and results in the spliced part being about twice as thick as the non spliced part. The short splice retains more of the rope strength than any knots that join rope ends. It is tied using the same techniques as the eye splice (see below).
Use: The eye splice is the best method of creating a permanent loop in the end of multi stranded rope by means of rope splicing. The ends of the rope are tucked (plaited) back into the standing end to form the loop. Originally this splice was described with each end being tucked only about three times. When the splice was made in tarred hemp or cotton this was reasonably safe. With modern synthetic ropes, five complete tucks is a minimum and additional tucks are recommended for critical loads.
How to tie:
The ends of the rope are first wrapped in tape or heated with a flame to prevent each end from fraying completely. The rope is unlayed for a distance equal to three times the diameter for each "tuck", e.g., for five tucks in half inch rope, undo about 7.5 inches. Wrap the rope at that point to prevent it unwinding further. Form the loop and plait the three ends back against the twist of the rope. Practice is required to keep each end retaining its twist and lie neatly.
A back splice (also called an end splice) is a splice where the strands of the end of the rope are spliced directly back into the end without forming a loop. It is used to finish off the end of the rope to keep it from fraying. The end of the rope with the splice is about twice the thickness of the rest of the rope. Begin by unraveling the strands, and tie a crown knot. Then begin splicing the rope onto itself as with the short splice.
d. Finish the end of a rope with a double crown, whipping, or a Matthew Walker's knot.[edit | edit source]
Double crown knot
Use: A double crown knot is a decorative knot tied on the end of a laid rope to prevent it from unraveling.
How to tie:
Tie a crown knot in the end of the rope.
Pull the three strands upwards, away from the standing part, and tie another crown knot.
Common whipping
Use: The common whipping is the simplest type of whipping knot, a series of knots intended to stop a rope from unraveling. As it can slip off of the rope easily, the common whipping should not be used for rope ends that will be handled. This whipping knot is also called 'wolf' whipping in some parts of the world.
The benefit of a common whipping is that no tools are necessary and the rope does not need to be unlayed. The problem is that it will slide off the end of the rope with little provocation. Other whippings avoid this by interleaving the whipping with the strands of the rope and creating friction with the strands to avoid slipping.
Normally a natural fiber rope is whipped with twine. The size of the rope dictates the size of the twine. Any twine can be used, but tarred two strand hemp (marline) is preferred. Artificial-fiber ropes should have their ends fused by heat rather than whipped to prevent unraveling.
How to tie:
The rope should be whipped a short distance (One and a half times the diameter) from its end.
Lay the head of the twine along the rope, make a bight back along the rope
Begin wrapping the twine around the rope and bight of twine securely. Wrap until the whipping is one and a half times wider than the rope is thick.
Slip the working end of the twine through the bight. Carefully pull on the standing end of the twine until the bight and working end are pulled under the whipping (Note: It is normally necessary to maintain tension on the working end to prevent the bight from being dragged completely through and so destroying the whipping)
Cut the twine flush with the edges of the whipping and the rope end not less than half its width from the whipping to give the rope end a finished look
Matthew Walker knot
Use: A Matthew Walker knot is a decorative knot that is used to keep the end of a rope from fraying. It is tied by unraveling the strands of a twisted rope, knotting the strands together, then laying up the strands together again. It may also be tied using several separate cords, in which case it keeps the cords together in a bundle.
How to tie:
A Matthew Walker knot is tied in a circular bundle of any number of strands. To tie the knot, the tier takes each strand and forms a loop around the rest of the bundle, then passes the end through the newly-formed loop to form an overhand knot. He then moves to the next strand over, moving around the bundle in the direction he passes the loops. Tying the first strand around the bundle is straightforward, but each subsequent end must be passed through the previously-formed loops in order to contain all of the other strands in its loop. When tightening, it may help to roll the knot along the bundle, especially when using only two strands. The final effect is a spiral knot vaguely resembling a section of a barber's pole.
7. Make a six-foot piece of three-strand twisted rope from native materials or twine.[edit | edit source]
Rope-making apparatus
Making rope requires some simple apparatus which you can make yourself easily enough. The first apparatus (we'll call it the twister) is used for twisting three strands of twine (or smaller rope). When making the twister, clamp the two boards that form the handles together tightly and drill three holes through both at the same time. This will ensure that they line up. The hook/crank portion of the twister can be made from coat hanger wire. First make the two 90° bends in the center, then pass them through the holes in the handles. Finally, form the hooks on one end and the other 90° bend on the other. (This final bend prevents the crank from slipping out of the holes in the handle).
As the strands are twisted, they will tend to grab one another and twist together. To make rope, this tendency has to be controlled. This is done with a second apparatus (we'll call it the separator). It consists of a board with three holes drilled in it, forming the points of an equilateral triangle. These points should be at least six inches away from one another, and should be large enough to pass the strands of twine through.
To make rope, cut three pieces of twine about 33% longer than the desired rope. Pass each strand through a hole in the separator, then tie a non-slip loop in the end of each (a figure-eight on a bight works well for this). We will call this end of the strands the free end. Slip these loops over a hook of some sort, and pull the strands straight. Bunch the ends opposite the loops together, and tie them off, again in a loop (and again, a figure-eight on a bight works well for this). We will call this end the bound end. Make sure that the three strands are the same length from one loop to the other. Hand the bound end to a helper, then attach the loops on the free end to the hooks on the twister. Pull the twister away from the bound end (still affixed firmly to another hook) until the strands are straight and tight. Then slide the separator towards the common end. Start cranking the twister so that the hooks rotate. As you crank, your helper will allow the three strands on his side of the separator to twist together. As they do this, the helper will slide the separator towards you, going only as fast as the strands bind to one another. Be careful to keep the strands tight as you do this so that they do not bind to one another on your end of the separator. Continue twisting until the separator reaches the twister. Then tie a knot in the free end of the rope, unhook it from the twister, and slide the separator off. Tie a stopper knot, or bind the end with tape. Then cut off the few inches of untwisted strand that remain (or make a back splice). Finish the opposite end in the same manner. Voila! You now have a rope!
8. From memory tie at least 20 of the following knots and know their common uses and limitations. Demonstrate how they are used.[edit | edit source]
Use: The Anchor Bend is a knot used for attaching a rope to a ring or similar termination. The round turn and tight application help keep the rope from chafing.
How to tie:
Make two turns around a hitch.
Pass the running end around the standing end and beneath the two turns.
Use: This knot doesn't jam or slip when tied properly. It can be tied around a person's waist and used to lift him, because the loop will not tighten under load. In sailing, the bowline is used to tie a halyard to a sail head.
How to tie:
Make the overhand loop with the end held toward you, then pass end through loop.
Now pass end up behind the standing part, then down through the loop again.
Use: This makes a secure loop in the middle of a rope which does not slip.
How to tie:
A bight is the middle part of the rope (not the ends)
In the middle of a rope, form a small loop.
Thread the bight through the loop.
Spread out the bight a little.
Pass this down and around the whole knot.
Continue until it come back to the neck where it started.
Tighten the bight to complete the knot. Tighten carefully so that you don't get a kind of slip knot.
Butterfly loop knot or Alpine butterfly knot[edit | edit source]
Alpine butterfly
Use: The Butterfly Loop has a high breaking strength and is regarded by mountaineers as one of the strongest knots to attach climbers to the middle of a rope, such that they have room to move around even when the main rope goes tight, and they can be supported in either direction from the main rope. The loop is typically attached to a climbing harness by carabiner.
It can also be used to isolate a worn section of rope, where the knot is tied such that the worn section is used for the center of the loop.
A fully interwoven diagonally opposed Carrick bend
Use: The Carrick bend is used for joining two lines. It is particularly appropriate for very heavy rope or cable that is too large and stiff to easily be formed into other common bends. It will not jam even after carrying a significant load or being soaked with water. The Carrick bend's aesthetically pleasing interwoven and symmetrical shape has also made it popular for decorative purposes.
In the interest of making the Carrick bend easier to untie, especially when tied in extremely large rope, the ends may be seized to prevent the knot from collapsing when load is applied. This practice also keeps the knot's profile flatter and can ease its passage over capstans or winches.
The ends are traditionally seized to their standing part using a Round seizing. For expediency, a series of double constrictor knots, drawn very tight, may also be used. When seizing the Carrick bend, both ends must be secured to their standing parts or the bend will slip.
WARNING: The Carrick bend is generally tied in a flat interwoven form shown above. Without additional measures it will capsize (collapse) under load into a secure and stable, although bulky, form. If the knot is allowed to capsize naturally under tension, considerable slippage of line through the knot can occur before tightening. The knot should be upset carefully into the capsized form and worked up tight before actual use.
Use: The Cat's paw is used for connecting a rope to an object.
Attaching a rope to a hook (or to a post or rail where the load is perpendicular to the post) with more security than a simple girth hitch.
Joining an eye to a ring.
Strongly joining eyes in the ends of two lines, where there is access to the end of at least one line.
How to tie:
Method 1
Form a bight in the middle of the line, and pull it back over itself like a girth hitch. This forms two loops, turned in opposite directions. Give each loop one more full turn in the direction that will tend to tighten it (the wrong direction will undo the loop completely). Pass both loops over the hook, rail or post and pull tight, taking care to push the bight up snugly against the turns.
Method 2
If working end of the line has an eye in it, and the standing end is accessible, the knot can be tied to a closed ring, another eye, or a rail with inaccessible ends, as follows. Pass the eye around the ring or rail, then pass the standing end through its own eye (this effectively forms a girth hitch). Then pass the standing end through the eye again, and pull up tight, taking care to push the bight up snugly against the turns.
When using the cat's paw to join two eyes, this process may be repeated several times to give several turns - as many as five in a fine fishing monofilament. Then when tightened, instead of pulling the bight up against the turns, both eyes are pulled equally, to make neat coils of turns in both eyes, meeting halfway between them.
Use: The Constrictor knot is one of the most effective binding knots. Simple and secure, it is a harsh knot which can be difficult or impossible to untie once tightened. It is made similarly to a clove hitch but with one end passed under the other, forming an overhand knot under a riding turn. It is a very effective knot for constructing a pilot's ladder, as it will not slip when tied around wooden rungs.
How to tie:
Make a turn around the object and bring the working end back over the standing part.
Continue around behind the object.
Pass the working end over the standing part and then under the riding turn and standing part, forming an overhand knot under a riding turn.
Be sure the ends emerge between the two turns as shown. Pull firmly on the ends to tighten.
WARNING: The Constrictor knot's severe bite, which makes it so effective, can damage or disfigure items it is tied around.
Use: Used a component in a back splice and in the double crown knot. Can be used to temporarily prevent the ends of a laid rope from unraveling.
How to tie:
Make a constriction around the rope about 7.5 cm from the end. You can constrict it by tying a constrictor knot around the rope with a bit of twine, or you can tape it.
Unravel the end of the rope all the way to the constriction.
Bind the ends of the strands with tape to keep them from unraveling.
Double one strand (strand A) over itself and lay it between the other two (strands B and C), leaving a loop in its center.
Pull strand B over the end of strand A and lay it between strands A and C.
Use: The double sheet bend or double becket bend is a strong knot used to tie two ropes (usually of different thicknesses or rigidity) together. It is a doubled version of the sheet bend.
How to tie:
To tie the double sheet bend, start by making a bight in the larger line. Pass the working end of the smaller line up through the bight, around behind the bight, and beneath the loop in the smaller line (that's a sheet bend). Then once again, pass the working end along the same path, around behind the bight and beneath the loop in the smaller line.
WARNING: As with the standard sheet bend, the two free ends should end up on the same side of the knot. If they do not, a left-handed double sheet bend results, which is much weaker.
Use: This knot is ideal for keeping the end of a rope from running out of tackle or pulley.
How to tie:
Make underhand loop, bringing end around and over the standing part.
Pass end under, then up through the loop.
Draw up tight.
The fisherman's knot is a bend (a knot for joining two lines) with a symmetrical structure consisting of two overhand knots, each tied around the standing part of the other. Other names for the fisherman's knot include: angler's knot, English knot, halibut knot, waterman's knot.
Use: The Fisherman's knot is a specialized bend. It consists of two overhand knots wrapped around each other. It works well for joining thin, stiff, or slippery lines.
It requires little dexterity to tie, so is often used in stubborn materials. When tightened, it becomes fairly compact, and the free ends can be cropped very close to the knot. These qualities make it very useful for fishing line--it is less likely to jam a fishing rod than many other bends, and is easier to tie with cold, wet hands.
How to tie:
To tie the fisherman's knot, lay the two ends to be tied alongside each other and facing opposite ways. Tie an overhand knot on the first rope and pass the second rope through the loop formed. Tighten the overhand knot, to prevent the line inside it from flopping around. Then tie another overhand knot on the second rope with the first rope passing through it.
Use: The fisherman's loop makes a non-slip loop at the end of a rope.
How to tie:
This knot is the same as a fisherman's bend, except that instead of joining two ropes together, a single rope is doubled over and then joined to itself forming a loop.
Another way to tie it is to make a slip knot and then use the running end to tie an overhand knot around the standing end.
Use: The halter hitch, sometimes called a hitching tie is used to tie the lead rope, which is attached to a horse's halter (or to a boat), to a post or hitching rail. The benefit of the halter hitch is that it can be released by pulling on one end of the rope. Even if there is tension on the horse-side of the rope it can still be release with ease.
How to tie:
Pass the working end of the rope over the standing part.
Pass the working end behind the loop.
Create a bight in the working end of the rope. The bight is then passed in front of the main loop and into the second loop.
Tighten the hitch by pulling on the standing end and the bight. The hitch can be finished by passing the working end through the bight.
Use: The Hunter's bend (aka Rigger's bend) is used to join two lines. It consists of interlocking overhand knots, and can jam under moderate strain.
Hunter's bend is one of the most recent knots to be discovered. It appeared on the front page of The Times in 1978 and was credited to Dr. Edward Hunter. Dr. Hunter used it for years to tie broken shoelaces before discovering its originality through a friend in the 1970s. When it appeared on the front page, it led to much publicity for the knot and also to the foundation of the International Guild of Knot Tyers. However, the knot was presented in Knots for Mountaineering by Phil Smith ca. 1956.
Use: A lariat knot is the loop knot commonly used in a lasso. Its round shape, especially when tied in stiff rope, helps it slide freely along the rope it is tied around.
How to tie:
Place an overhand knot in the end of the rope.
Tie a second overhand knot, pass the rope end through it, and tighten.
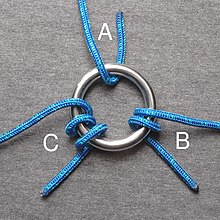
Use: The lark's head is a knot (specifically, a hitch). Also called a cow hitch, it comprises two half-hitches tied in opposing directions. The cow hitch is often used to connect loop-ended lanyards to handheld electronic equipment, since it can be tied without access to the ends of the fastening loop.
How to tie:
When both the standing parts of the rope are available, the cow hitch can be tied in the following manner:
Form a bight and pass it through the ring from the underneath.
Pull the head of the bight downwards, and reach through it, grabbing both standing parts of the rope.
Pull both standing parts of the rope through the bight.
Use: The Man harness is a knot with a loop on the bight for non-critical purposes. This knot is used when multiple people are to pull a load. Typically one end of the rope is tied to a load, and one man harness knot per puller will be tied along its length. Each loop is then pulled by a different person.
How to tie:
Lay the rope flat
Make a loop in the rope with the running end going beneath the standing part.
Pull the running end down so that it crosses over the loop.
Pull the bottom of the loop through the gap between the top of the loop and the running end.
WARNING: The Man harness knot must have the loop loaded or it will slip and contract easily.
Use: A Miller's knot (also Sack knot or Bag knot) is a binding knot used to secure the opening of a sack or bag. Historically, large sacks often contained grains; thus the association of these knots with the miller's trade. Several knots are known interchangeably by these three names. Several variations are shown here.
This is another depiction of the knot shown above.
This knot is also a useful hitch and is known by the name Ground-line hitch when used for that purpose.
This variation is noted as having better binding characteristics than the others.
Use: The Packer's Knot is a binding knot usually used in smaller line.
This knot is sometimes used in baling and in parcel tying.
How to tie:
Make a figure eight not near the standing end of the rope. Wrap the running end around the "parcel" and pass it through the top loop of the "eight" following the same path as standing end.
Make a loop in the running end and pass the standing end through it.
Use: A Prusik (aka Prussik or Prussic) is a friction hitch used in climbing, canyoneering, caving, rope rescue and by arborists to grab a rope (sometimes referred to as a rope-grab). The term Prusik is used both for the knot, for the loops of cord, and for the action (to prusik).
A Prusik rope is a circular loop with a circumference of 20 to 100 cm depending on its intended use. Two Prusik ropes are tied to another rope which is anchored above. When the Prusik knot is under tension, it grabs the rope to which it is tied. When not under tension, it is easily moved. The climber places one foot into each loop, and shifts all of his or her weight to one of them, releasing the tension on the other. The rope without tension is then slid upwards on the vertical rope. The climber the shifts his or her weight to the other loop and slides the first one up. This is repeated until the rope has been ascended.
Prusiks will work around two ropes, even two ropes of different diameters. Prusiks provide a high-strength and relatively fail-safe (i.e., they will slip before damaging the rope or breaking) attachment, and are used in some rope-rescue techniques. Prusiks are good to use in hauling systems where multiple rope-grabs may be needed, and where mechanical rope-grabs are not available.
Although the Prusik Climb technique may be called old-school by some, the US Army still includes it in its annual Best Ranger competition. Rangers in the competition routinely make it up a 90 foot rope in under a minute.
How to tie:
The Prusik is tied by wrapping the prusik loop around the rope a number of times (depending on the materials, but usually 3-5 times), and then back through itself, forming a barrel around the rope, with a tail hanging out the middle. When the tail is weighted the turns tighten around the main rope and grab. When weight is removed the loop can be slid along the rope by placing a hand directly on the barrel and pushing. The trick is, if it grabs well, then it is hard to slide along the rope. Breaking the Prusik free from the rope after it has been weighted can be difficult, and is easiest done by pushing the bow, being the loop of cord which runs from the top wrap, over the knot to the bottom wrap, along the tail a little. This loosens the grip of the hitch and makes movement easier.
Use: The sheet bend knot is excellent for joining two ropes together, especially if the two ropes are not the same size. When tied properly, it will not come undone, and it is easy to untie. It is very similar to the bowline.
How to tie:
Make a bight at the end of the larger rope (if they are not the same size).
Run the end of the smaller rope through the bight, entering from the bottom.
Wrap the end of small rope around the back of the large rope, crossing the short end of the large rope first.
Tuck the end of the short rope under itself, on top of the bight.
Use: A slip knot is one that will tighten under load, and which can be easily untied by pulling on the running end. This knot is typically a component of more complicated knots, and is generally not used by itself.
How to tie:
A slip knot can be tied by starting an overhand knot, but instead of passing the running end through the loop, pass a bight through instead.
WARNING: If tied as shown in the illustration, the running end (on the right) will pull through the loop if even the slightest load is applied to the standing end (on the left). If one reverses the standing end and running ends in the illustration, the knot is far more stable. As shown, the knot will hold a load on the running end, but not on the standing end.
Use: A slipped half-hitch is a knot used to attach a line to a rod or bar. It does not provide great strength compared to some other knots, but it can be tied relatively quickly and released very easily. These characteristics mean that it is used on square-rigged ships for securing the gaskets that bind stowed sails to the yards.
How to tie:
Begin as for a clove hitch, but instead of passing the end of the line through the loop in the final step, pass a bight instead, leaving the end on the original side. Pulling on this end will release the hitch - if tied in a gasket, this will quickly release the sail.
WARNING: Never use this knot in a critical situation. It comes untied at the slightest provocation.
Use: The slipped sheet bend is used in non-critical situations for temporarily joining two ropes.
How to tie:
Start the same as in tying a regular sheet bend, only pass a bight (light blue in the illustration) under the last rope (dark blue) instead of passing the running end under.
WARNING: The slightest tug on the running end will untie this knot instantly - even if the knot is under load.
It is used for the Basic Rescue. ( See basic rescue honor)
Square Knot
Use: Also known as a Reef knot, the Square Knot is easily learned and useful for many situations. It is most commonly used to tie two lines together at the ends. This knot is used at sea in reefing and furling sails. It is used in first aid to tie off a bandage or a sling because the knot lies flat.
How to tie:
Pass left end over and under right end.
Curve what is now the left end toward the right and cross what is now the right end over and under the left.
Draw up tight by pulling one end and line away from the other end and line.
WARNING: Do not rely on this knot to hold weight in a life or death situation. It has been known to fail.
Finished stevedore knotStevedore knot before tightening
Use: The Stevedore knot is a stopper knot, often tied near the end of a rope. It is more bulky and less prone to jamming than the closely related figure-eight knot. This knot is excellent for anchoring a tarp. Pass the end of the rope through a tarp's grommet, tie a stevedore, and anchor the other end with a taut-line hitch. Its added bulk prevents it from pulling through the grommet.
How to tie:
The knot is formed by following the steps to make a figure-eight knot, but the working end makes an additional round turn around the standing part before the end passes back through the initial loop.
Use: The Strangle knot is a simple binding knot. Similar to the constrictor knot, it also features an overhand knot under a riding turn. The difference is that the ends emerge at the outside edges, rather than between the turns as for a constrictor. This knot is actually a rearranged double overhand knot and makes up each half of the double fisherman's knot.
When tightened, it is very slip-resistant. It is ideal for constructing a pilot ladder (like a rope ladder, but with wooden rungs).
Use: The Taut-Line Hitch is an adjustable loop knot for use on lines under tension. It is useful when the length of a line will need to be periodically adjusted in order to maintain tension. It is made by tying a Rolling hitch around the standing part after passing around an anchor object. Tension is maintained by sliding the hitch to adjust size of the loop, thus changing the effective length of the standing part without retying the knot. When under tension, however, the knot will grip the cord and will be difficult to cause to slip.
It is typically used for securing tent lines in outdoor activities involving camping, by arborists when climbing trees, for creating adjustable moorings in tidal areas, and to secure loads on vehicles. A versatile knot, the Taut-line hitch was even used by astronauts during STS-82, the second Space Shuttle mission to repair the Hubble Space Telescope.
How to tie:
Pass the working end around the anchor object. Bring it back along side of the standing part and make a half-hitch around the standing part.
Continue with another wrap inside the loop, effectively making a round turn around the standing part.
Complete with a half-hitch outside the loop, made in the same direction as the first two wraps, as for a clove hitch.
Dress by snugging the hitch firmly around the standing part. Load slowly and adjust as necessary.


.jpg)


