Blender 3D: Noob to Pro/Simple Vehicle: Some Assembly Required
|
|
Applicable Blender version: 2.75. |
Techniques[edit | edit source]
You should know how to:
- Do everything discussed in previous tutorials
This section will recap and introduce:
- Append a file
- Duplicate an object
Overview[edit | edit source]
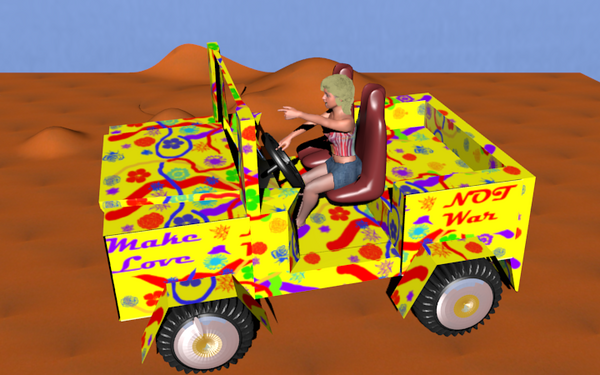
The objects for the simple vehicle have been made if you have followed all the previous Simple Vehicle tutorials. Putting it all together will come very easy now.
Appending the File[edit | edit source]

If you have the jeep body file open, keep it open. Otherwise, open the file for the jeep body.
In Object Mode, go up to File > Append (Append or Link in later versions), about 3/4 of the way down the menu. The Find file window will appear. Go to the location where the jeep seat was saved. When the .blend file is clicked, you'll go into it as if it is a directory.
Here we have the categories of Camera, Lamp, Material, Mesh, Object, Scene, Text, and World. We are interested in the seat object, so click on Object. Now there are three items: Camera, Lamp, and Seat. That is, it will say Seat if you named your object Seat. This is why it is useful to rename your objects, materials, etc. If you forgot to rename the object, it will be called Cube (default for our starting mesh).
Noob note: You must be sure you're appending, and not linking! If you try to duplicate it, and you get an error, then it's probably linked, there will also be "li" to the right of the ME: object name button. Ways to be certain you're appending are: when selecting the file, look at the bottom for the append/link options and make sure "Append" is selected; In the file menu, don't choose "Append or Link (Image Browser)", you need to use the option above it.

What should happen after selecting Seat and the button 'Load Library' is the seat will pop into our file where the 3D cursor was.

It will definitely need to be scaled, rotated, and/or moved to the right position. One way to do this is to rotate the seat about the Z axis -90 degrees by pressing R Z 9 0 NUM− .

After placing the seat in the jeep body, let's make another so we have a seat for the driver and passenger. Still in Object Mode with the seat selected, duplicate it ( SHIFT + D ) and slide it over. After duplicating it, it will automatically go into grab mode. If you RMB or ESC , it will still be duplicated - just sitting on top of the original.
Noob note: Duplicate appended objects in object mode, not edit mode, as they are separate objects and do not share the same edit mode space (each appended object has its own edit world, unless you join them together)
Rinse and Repeat[edit | edit source]
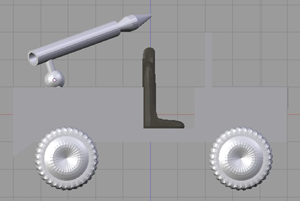
Append the file again to place the wheel object and rocket launcher in the file. Scale, rotate, move, and duplicate each object accordingly. Depending on the position of your camera, you may or may not have to make all four tires. Remember that the only important parts to draw are those that will be seen!
Set the ball over the tripod. The fun part is rotating the rocket launcher since the center of it has been moved to the ball joint.
Parenting[edit | edit source]
Be sure to parent each item to the jeep chassis, by selecting the item, lets say the tire, then also selecting the chasis ( RMB then SHIFT + RMB ) and then CTRL + P , and select "make parent" from the popup menu.
Final things[edit | edit source]

The last thing is to apply materials to your objects!
You can apply material in either object, or edit mode. As you might have noticed when you select something in object mode the entire object is selected, in edit mode on the other hand individual faces can be selected, and painted.
Make the windshield look like glass[edit | edit source]
You have to create a new material and assign it to the appropriate faces.
In edit mode, select the faces you want (make sure you select both sides of the windshield including: front face, back face, and top face).
On the Editing section F9, under Links and Materials, click the 'New' button under Materials then click the 'Assign' button. This assigns the new material to the selected faces.
You can then go into the Shading section F5 and adjust the material to be glass, by setting the alpha to .20, and hitting the ray transparency button. Three more ways of making a material that looks more like glass are shown in Material Glass.
Make sure you are editing the correct material (if you have just the one texture on the jeep, the default name for the new material should be something like "2 Mat 2").
Noob note: Glass is only transparent when you render it. in order to render it you will need to position a few lamps around the jeep, and move the camera around so that it can see the jeep (view->camera).
Extra[edit | edit source]

Other possible ideas
Additional Tutorials[edit | edit source]
Append and Link Video Tutorial: http://www.youtube.com/watch?v=69ZBlDrOlIY


