Visual Studio/Embedded development
Jump to navigation
Jump to search

Constraints[edit | edit source]
Visual Studio[edit | edit source]
Not all versions of Visual Studio can work for a particular Windows CE version. In particular, VS 2008 is the upper limit for Windows CE 6 and 7, and only Visual Studio 2012-2015 can be used for Windows Embedded Compact 2013.
Windows[edit | edit source]
The major difficulty that you're likely to face is the restriction of Windows versions that you can use to develop and virtually test it.
- For Windows CE 7 and below, Virtual PC 2007 is needed. That version works properly only up to Windows 7. Windows 8 and 10 (32-bit) can install Virtual PC 2007, but you will most likely face issues with booting up Windows CE. The 64-bit versions cannot run Virtual PC 2007, and you cannot substitute with VMWare or VirtualBox (described below). Your only option in this case is to use VirtualBox/VMWare inside your host using a Windows 7 license or earlier, and install Virtual PC 2007 inside the virtual machine.
- For the 2013 version, Hyper V is used, which is only available on Windows Server or Windows 8 + (64-bit). You'll also need a processor which support SLAT.
Procedure[edit | edit source]
We assume that you've resolved the issues mentioned above from now on, unless otherwise specified.
- Install the desired version of Visual Studio. Note that if you're only going to use Platform Builder, you can safely deselect the optional components. Install VS2005/VS2008 SP1 as needed.
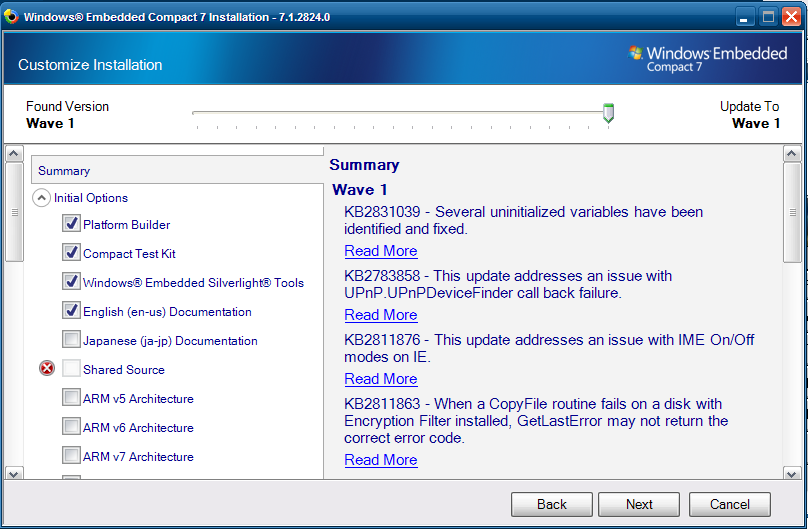
- Install the Windows Embedded Compact 7 toolkit. While you should select the core components (Platform Builder, Compact Tool Kit and the Silverlight tools), you need not (and should not) download/install all the architecture packs unless you also plan to deploy onto a real device. For Virtual PC, the x86 pack is enough.
- Install Virtual PC 2007.
- Open Visual Studio and create a new Platform Builder project.
- In the next screen, select the Virtual PC BSP.
- Here, you are given the change to customise the OS design or go with one of the suggested templates. No matter which option you choose, you can change it later. For now, we'll select the Enterprise Device>Handheld option.

- You can now complete the wizard. Select the option to build the release config at the last wizard screen. If you have not done that, then go to Build>Advanced Build Commands>Sysgen.


In some cases, you will get a cryptic error which is traced to the lack of findstr.exe, and can happen if the host is on a non-standard Windows version (eg, Windows Embedded 2009 POSReady). In this case, grab a copy of findstr.exe from a Windows XP/Server 2003 CD (use EXTRACT in the same directory to expand FINDSTR.EX_) and copy it to system32. You may also have to add the System32 directory as a PATH variable if that does not work. |
Now would be a good time to check that you have what you need. Go to View>Other Tools> Catalog Items Window. Here you can add and remove components as necessary. Make sure that you have a shell (usually the Standard shell), otherwise you won't see anything! |
- Open Visual Studio, and select the option to import a vmc file. Locate the vmc default file (typically located at
C:\WINCE700\platform\VirtualPC\VMif you've used the default options). After importing, make sure that the network settings are set correctly, this is needed. - Start the virtual machine, which will soon start giving
BOOTMEmessages.

If you did this using VMWare or VirtualBox, the VM will halt instead saying that the network adaptor is not supported. You may also receive this error if the network adaptor is disabled.
You will have one minute to complete the next step before the VM will halt. |
- Go to Target>Attach Device. Platform Builder should soon recognise the VM and start uploading to it.
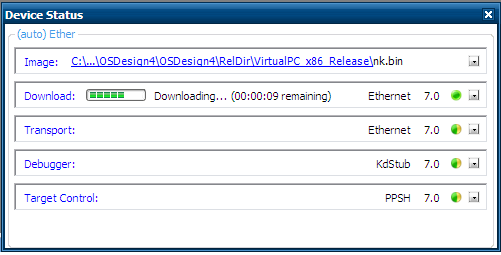
- You should now see CE7 on Virtual PC 2007.


