Blender 3D: Noob to Pro/Bones
|
|
Applicable Blender version: 2.70. |
Bones are a modeling tool that are especially important for animating characters. Bones allow you to move characters' limbs in a way that is much simpler than trying to re-arrange the vertices every time.
It works by associating a bone with particular vertices, causing them to move along with the bone when the position is changed in pose mode. Using bones is fairly simple once you get the hang of it, but, like many things in Blender, can be a little daunting at first sight.
Bones don't do much on their own; in fact, they turn invisible at render time. For this following module we'll use the character that we had made by the end of the module Putting Hat on Person. You will have to have completed all the modules in Section 2B. Note that while we will be using bones on a simple person, the process can be used with any creature or body type you imagine!
Laying down bones[edit | edit source]

Note: This just shows the basics of adding bones to an object. Go to the advanced animation page for a more comprehensive guide on this.
First of all, we'll need a model to put some bones on! For this tutorial, we're going to use a humanoid model. Open the model that you had created by the end of the Putting Hat on Person tutorial, or download a pre-made model from here.
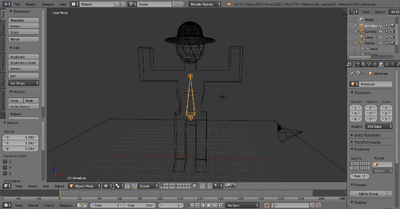
Here's our setup, with Block Dude standing on a plane. You can add a plane by pressing Shift + A → Mesh → Plane. Scale the plane to an appropriate size and move it so that it is approximately underneath the person.
Noob note: You will be placing armatures ("bones") inside your humanoid, so you must work in "wireframe mode", not "solid mode". Otherwise, you will not be able to see the armatures when you place them. To toggle between "solid" and "wireframe", press Z . You may find it helpful to make the wireframe less complex by hiding the subsurface mesh. You can do this by going to the Modifier context panel ![]() of the Properties window
of the Properties window ![]() and deselecting the eye button.
and deselecting the eye button.
Note: An alternative to working in "wireframe mode" is to turn "X-Ray" on for the armature. To do this, select the armature. In the properties panel under object there is a display menu. Click "X-Ray" in the second field of buttons. This will allow the armature to show through other objects.
Add a bone[edit | edit source]

Now, let's put some bones on Block Dude! In Object Mode press Shift + A → Armature → Single Bone.
What we are looking at is an armature. This is a single bone. Now, we need to put the bone in Block Dude! Move and rotate the bone so that it's in the middle of Block Dude's chest. If your bone does not have the correct length, then change the size of the bone by moving one of the ends of the bone: switch to Edit Mode, select one of the ends of the bone, then move it using G . Alternatively, you can scale it using S
Extrude a second Bone[edit | edit source]

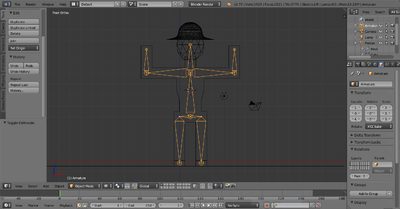
To create a second bone starting from one of the ends of the first bone, switch to Edit Mode with the bone selected, select the end of the bone, then extrude E the end. A second bone appears, with its start point on the selected end of the first bone. Move the mouse to position the end point, then press LMB , Enter , or Space . Scale the bone as needed to fit it in his body, and continue adding bones by extruding the end points. These operate much the same way as vertices: you can extrude, rotate, move, and even subdivide. Your finished result should look something like this:
Name the bones[edit | edit source]

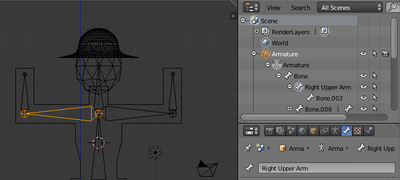
Now, just to make things easier, we're going to name the bones. For example, my bones are named "Right Forearm", "Left Forearm", "Right Upper Arm", etc. While in Edit mode, select the bone you want to rename. In the Outliner ![]() , the bone you have selected will be visible with a circle around it
, the bone you have selected will be visible with a circle around it ![]() . You may need to expand the Armature Object
. You may need to expand the Armature Object ![]() , Armature Data Object
, Armature Data Object ![]() and any parent bones before being able to view the selected bone. In the Bone context panel
and any parent bones before being able to view the selected bone. In the Bone context panel of the Properties window click the name field to edit the name.
Noob Note: When you are naming the bones remember that if you are looking at the person from the front, your left is the person's right. To make the naming easier switch to viewing the person from behind using Ctrl + Num1 .)
Parent the bones[edit | edit source]
Now, we need to parent the bones to the mesh. Go back into Object Mode and select Block Dude (and the Hat, assuming you made one). Now, select the Armature as well, so that it is the last object selected, and press Ctrl + P . The Parenting Menu will pop up. Select Armature Deform → With Automatic Weights. The person (and hat) are now children of the armature.
Noob Note: The selection order is important in defining which object is the parent, so you cannot select both objects at the same time. You must select the armature last to make it the parent. Also please note if you have problems with deformation you need to rest the rest position of the bones this is easily achieved by going to pose edit mode select all bones and CTRL -A then apply pose as rest position .
Moving the Bones[edit | edit source]

To move individual bones, you have to go into Pose Mode. Select the Armature in Object Mode and switch to Pose Mode by pressing Ctrl + Tab or selecting the mode in the mode selection menu of the 3D Viewer. Try moving a bone around by pressing RMB (sic) to select it, and then hitting G or R to move it.
If you've done everything correctly, your mesh should move when you move the bones! If this doesn't happen, scale the bones up so that they fit better in the mesh, and scale up the bones until they do what you want (read comment in the parenting section above on adjusting the bones envelopes if you do not get an effect while moving/rotating the bones). With the bones now, you can put Block Dude into a lot of different positions without moving individual vertices.
To the right is an example of how you can move Block Dude with the bones.
Also while in pose mode if after a RMB (Right Mouse Button) click you can't move bones with G or R , check the "Move Object Centers Only" button (just to the right of the Rotation/Scaling Pivot button).
In-Depth Info on Selected Bone Topics[edit | edit source]
Add/remove mesh from bone control[edit | edit source]

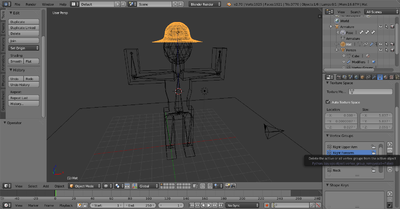
Noob Note: If you've been adding bones to your simple person from the previous lessons, you will have likely noticed that the hat seems to stretch when you move the arms in pose mode. To fix this, you will need to remove the hat from the forearm vertex groups created in the Parenting step.
To manually change the mesh areas that the bones control, go to Object Mode and select the object you want to add/remove (if the mesh is inside the same object, then select only the areas of the mesh you want to work with in Edit Mode).
In this case, select the Hat.
Switch to the Object Data context panel in the Properties window and scroll to the "Vertex Groups" submenu.
Now pick the bone group from the dropdown above the Assign/Remove buttons, and then hit Assign (or Remove) as necessary. Usually vertices will be assigned to one group, but can be assigned to multiple groups. In this case, we want to remove the Hat from the Forearm vertex groups. Select the Forearm vertex groups and press the remove button, as pictured. With both of the Forearm vertex groups removed from the hat, it should be able to move properly with the rest of the armature.
Mesh deforms like it's far away from the bones[edit | edit source]
If the mesh is properly assigned to the bones they will move regardless of whether the bones are inside the volume of the mesh or not (HOW they deform WILL be affected however). The most common mistake in this step is creating and (more importantly) parenting the mesh to the armature while the armature is outside the mesh, which causes Blender not to assign vertices to any bone groups at all.
You can check this by editing the object (i.e. select the mesh and switch to Edit Mode, then un-select all vertices by pressing A until nothing is selected). Pick the Object data context then select a vertex group in the Object data tab', press Select. This will select the vertices associated with the bone group. If the wrong vertices appear selected, you need to assign them manually as explained above.
If there is no effect, in Edit mode select that bone (or bones) and choose Envelope display mode (Properties window ![]() , Armature context panel → Display → Envelope), then press Ctrl + Alt + S and increase its area of influence to cover all faces that should be influenced by the bone.
, Armature context panel → Display → Envelope), then press Ctrl + Alt + S and increase its area of influence to cover all faces that should be influenced by the bone.